


How to Set up OpenVPN on Linux
What is OpenVPN?
The OpenVPN software bundle is a set of open-source, virtual private network (VPN) applications used to create a direct, secure site-to-site connection that provides remote access between two locations.
The OpenVPN Server consists of three main parts:
- The OpenVPN-AS Server
- The Admin Web Interface/Admin GUI
- The Connection Client
The OpenVPN Server:
The VPN server is the primary component of the OpenVPN-AS Server, which handles the main functionality on the backend. Settings in the admin interface include routing, tunneling, encryption, user management, authentication, and other features. The OpenVPN server includes a Web GUI, which helps to manage many of the underlying elements of the software.
The Main WebGUI Administrative Interface:
The Main Web Interface allows for easy management of the OpenVPN server components. In the WebGUI, the admin can control routing options, permissions, network settings, user authentication, and other settings. By default, an administrator can access the GUIWeb Interface by browsing to https://serverip:943/admin
The OpenVPN Connect Clients:
The VPN Client Software is a part of the OpenVPN server, which allows users to connect to the VPN server directly in one of three ways. The VPN Client also provides the option to download a configuration file which can then be used with other OpenVPN clients. The three options are:
- BrowserConnect Client - This is the browser-based connection tool for OpenVPN. The web address for users is https://serverip:943
- OpenVPN Connect Client (Mac) - Simplistic single connection client
- OpenVPN Connect Client (Linux/Windows) - This is the OpenVPN client (which is different from the main openvpn-as program). This software requires a configuration file to work correctly. To install on a Linux variant use one of the following commands:
Cent/RedHat/Fedora
yum install openvpnDebian/Ubuntu
apt-get install openvpnHow to Setup The OpenVPN-AS Package
CentOS
[root@host ~]# yum -y install https://as-repository.openvpn.net/as-repo-centos7.rpm
[root@host ~]# yum -y install openvpn-as
After running this command, the VPN server should be installed and ready to accept further configurations.
Ubuntu
root@host:~# apt update && apt -y install ca-certificates wget net-tools
root@host:~# wget -qO - https://as-repository.openvpn.net/as-repo-public.gpg | apt-key add -
root@host:~# echo "deb http://as-repository.openvpn.net/as/debian bionic main">/etc/apt/sources.list.d/openvpn-as-repo.list
root@host:~# apt update && apt -y install openvpn-as
After running this command, the VPN server should be installed and ready to accept further configurations.
Source Install
Other source install options are available from Alternative OpenVPN and the FAQ OpenVPN documentation can be found on their website.
Ubuntu or Debian Source Install
dpkg -i openvpnasdebpack.debCentOS, RHEL, or Fedora Source Install
rpm -i openvpnasrpmpack.rpmSetup OpenVPN Admin User
After installing the OpenVPN-AS server, the Admin account needs to be set up via a terminal by running the following commands. Change the password:
[root@host ~]# passwd openvpn
Changing password for user openvpn.
New password:
Retype new password:
passwd: all authentication tokens updated successfully.
[root@host ~]#
After setting up the admin password, log in to the WebGUI with the
Username: openvpn
Password: (yourpassword)
https://serverip:943/admin 
Configuring the Admin Web Interface
Once the initial settings have been created, you will be able to access the WebGUI interface via a web browser using this address:
Admin: https://serverip:943/admin
After you log in, you will see a license screen.
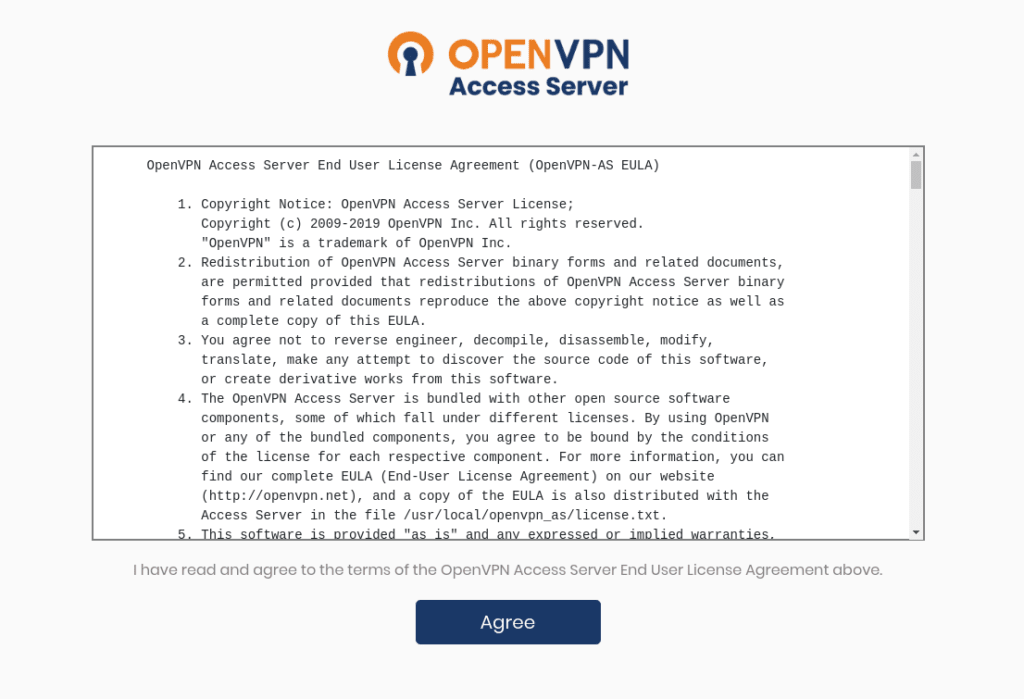
Click Agree to accept the license and move into the main configuration interface.

Add/Configure Users
To add users, we can use bash or the Admin GUI.
root@host:~#
adduser tester
passwd tester
Changing password for user tester.
 New UNIX password:
 Retype new UNIX password:
 passwd: all authentication tokens updated successfully.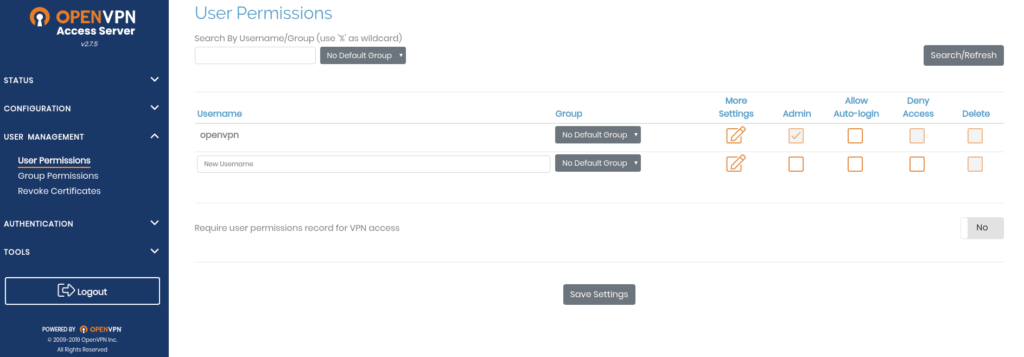
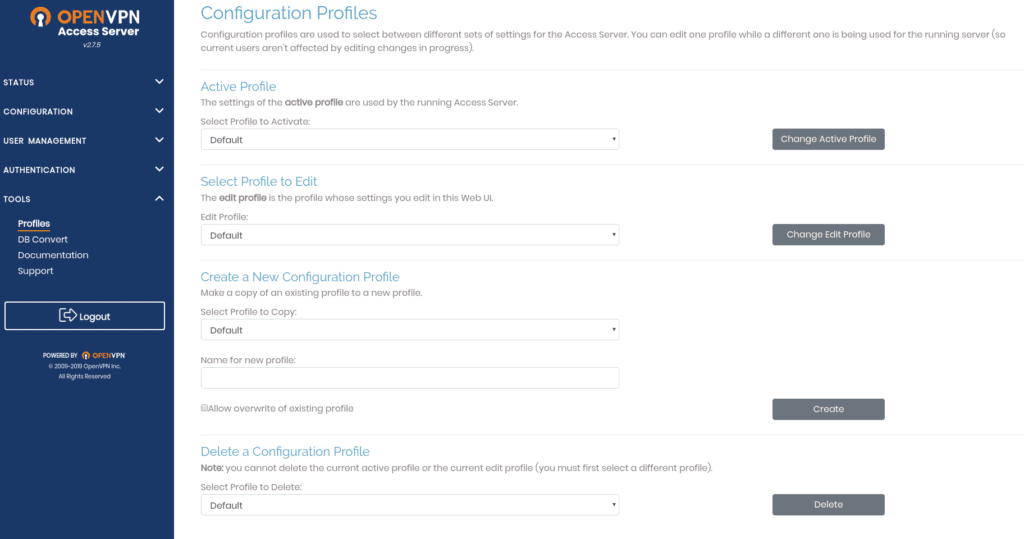
Configuration Profiles
Here is where you can view, create, delete, or modify a configuration file.
Import A Profile Into the OpenVPN Client
If you have a .ovpn profile, copy the profile and any files it references to the SD card folder on your device (copy all files to the same folder). Then go to Menu / Import / Import Profile from SD card.
https://openvpn.net/vpn-server-resources/#faq-762-how-to-get-started
If you have an account on an OpenVPN Access Server, you can import the profile directly from the Access Server by going to Menu / Import / Import Access Server Profile.
If you have an account on the Private Tunnel service, go to Menu / Import / Import Private Tunnel Profile.
User Authentication
OpenVPN also provides for the ability to use multiple forms of user authentication including:
- Local
- PAM
- RADIUS
- LDAP
We suggest using Google's 2FA (2-Factor Authentication) at a minimum.

Log Locations
- /var/log/openvpn/openvpn-status.log
- /var/log/openvpn/openvpn.log
OpenVPN FAQ's
Licensing
OpenVPN only allows for two "concurrent" users without having to purchase a license upgrade.
A $15.00 License Fee, Per Connected Device, Per Year with a minimum purchase of 10 connected devices is required if you need more than two concurrent connections.
Act Quickly To Reserve Your Server Now!
Have you been looking for a secure method to connect to the network or the internet and not seeing any quality candidates that fit the bill? Why not create a VPN of your own using one of our secure Dedicated Servers!
Related Articles:


About the Author: David Singer
I am a g33k, Linux blogger, developer, student, and former Tech Writer for Liquidweb.com. My passion for all things tech drives my hunt for all the coolz. I often need a vacation after I get back from vacation....


Our Sales and Support teams are available 24 hours by phone or e-mail to assist.
Latest Articles
How to use kill commands in Linux
Read ArticleChange cPanel password from WebHost Manager (WHM)
Read ArticleChange cPanel password from WebHost Manager (WHM)
Read ArticleChange cPanel password from WebHost Manager (WHM)
Read ArticleChange the root password in WebHost Manager (WHM)
Read Article