
 J. Mays
 - These instructions are intended specifically for setting up e-mail on Microsoft Outlook.
- I’ll be working from Microsoft Outlook 2010 (specifically version 14.0.7116.5000 [64-bit]).
- If these instructions don’t quite work for you, check out our tutorial on setting up other e-mail clients, or How To Set up Email in Outlook 2016.
Click Add Account.

Select the radio button for Manually configure server settings or additional server types.

Select the radio button for Internet E-mail.

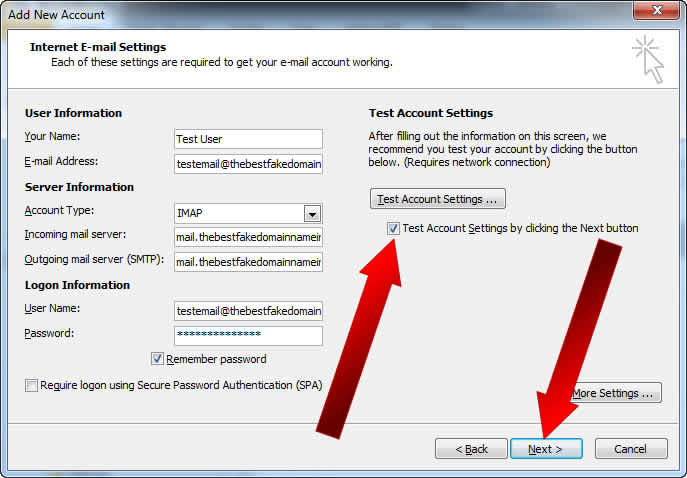
Your Name should be your name as you want it to appear in e-mails that you send.
E-mail Address should simply be your e-mail address.

If you’ve configured your e-mail in cPanel then you can either select POP3 or IMAP for your Account Type.

For SMTP, the outgoing mail server (SMTP) should be set to the correct hostname. Generally speaking, this will be mail.yourdomain.com or similar.
The username should be your username, generally with the domain included. For example, [email protected] instead of just test email.
Password should simply be the password for your e-mail account.

Click More Settings …


Password should simply be the password for your e-mail account.
Click OK
Check the box for Test Account Settings by clicking the Next button, and then click Next :

That’s it, Microsoft Outlook 2010 should now be set up and ready to receive e-mail!
Click Finish
