How to Manage Windows Server Update Settings via Group Policy Editor
Are you looking for a guide on how to manage your Windows Server update settings with the Group Policy Editor? Read on to learn more about the Group Policy Editor and how you can use it to configure your Windows Update group policy settings.
Prerequisites
- A Windows server running Windows Server 2019 or later.
- Administrative access to the Windows server.
How to Open the Group Policy Editor
There are multiple ways to open the Windows Group Policy Editor. Choose the option that is right for you based on your workflow.
Open the Group Policy Editor Using the Control Panel App
1. Click the Start button (Windows logo) or the search bar or icon from the taskbar.
2. Type control panel to search for the app. Click the app when it appears.
3. Click on System and Security.
4. Use the search bar on the upper right to search the word policy.
5. Click the blue link for Edit Group Policy.
Open the Group Policy Editor Using the Windows Search Function
1. Click the Start button (Windows logo) or the search bar or icon from the taskbar.
2. Type gpedit or gpedit.msc to search for the Edit Group Policy app.
3. Click the Edit Group Policy app
Open the Group Policy Editor Using the Command Prompt App
1. Type the Win+X shortcut and click Windows PowerShell (Admin).
2. At the prompt, type gpedit.msc and press Enter.
Open the Group Policy Editor Using the Windows Run App
1. Type the Win+R shortcut to open the Windows Run app.
2. Type gpedit.msc in the text bar next to Open and click the OK button.
Manage Windows Server Update Settings via Group Policy Editor
Once you have opened the Group Policy Editor, you can use it to manage your Windows Server’s update group policy. Use the following ten steps outlined in this guide.
Step 1:
Open the Group Policy Editor. This step is accomplishable using one of the four methods previously discussed.

Step 2:
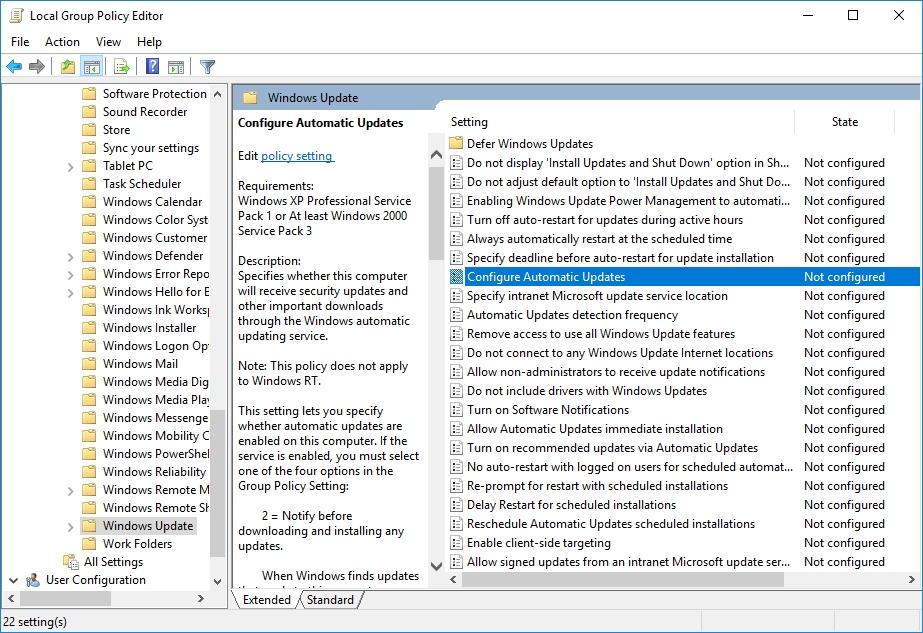
Use the left menu to navigate to and click on Computer Configuration > Administrative Templates > Windows Components > Windows Update.


Step 3:
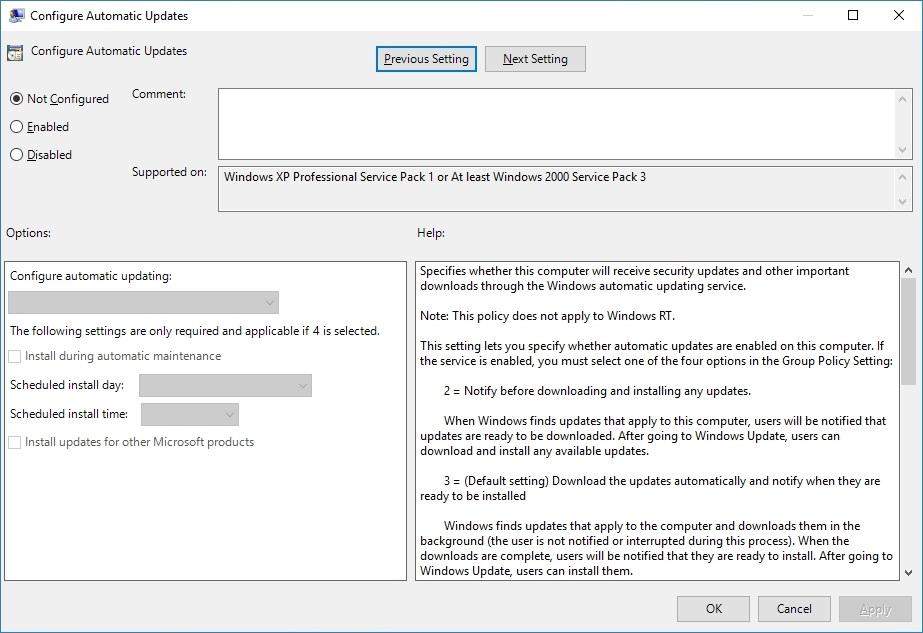
Double-click Configure Automatic Updates on the right to open the configuration window.
Step 4:
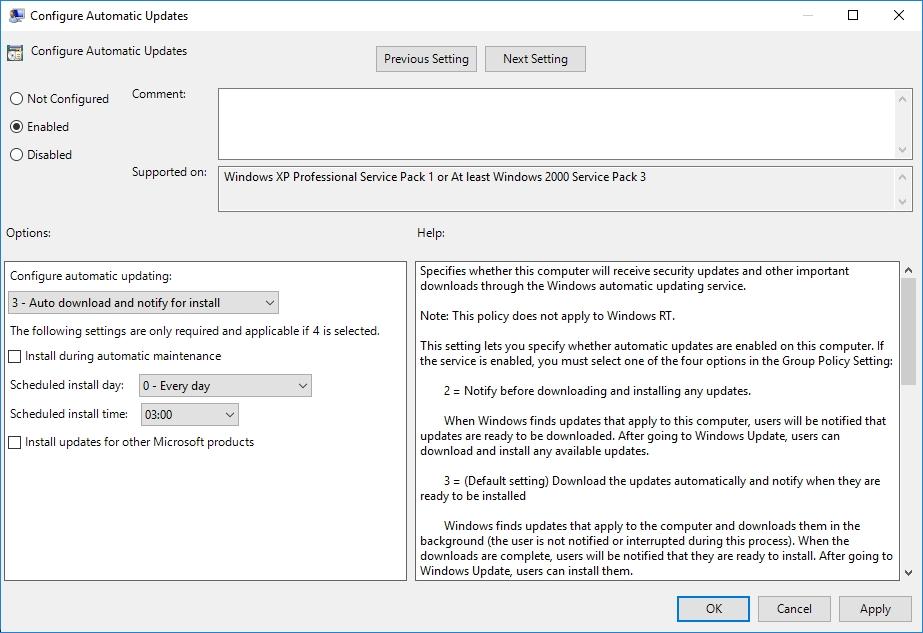
Click the Enabled radio button.
Step 5:
Under the Options section, click the Configure automatic updating drop-down menu to select the desired update method.
Four options or update methods exist when you open the drop-down. They are:
- Notify for download and notify for install - Windows will notify you that updates are ready for download as soon as it finds them. You can then go to Windows Update to download and install the updates manually at your convenience.
- Auto download and notify for install - This is the default update setting. Windows will download the updates automatically and notify you when they are ready for installation. Since the updates are downloaded in the background, you won’t be interrupted during this stage.
- Auto download and schedule the install - This option allows you to schedule when the update installation takes place. Remember that if the installation requires a restart, Windows will perform it automatically. If you are logged in at that time, you receive a warning and an option to delay it.
Allow the local admin to choose the setting - This option allows local administrators to use the Windows Update feature to configure it according to their own needs. However, there’s one option they won’t be able to set, and that’s disabling Automatic Updates.

Step 6:
Click the Install during automatic maintenance checkbox to install the updates during maintenance when the device is not in use.

To further configure automatic maintenance, you can use the Maintenance Scheduler by navigating to Computer Configuration > Administrative Templates > Windows Components.
Step 7:
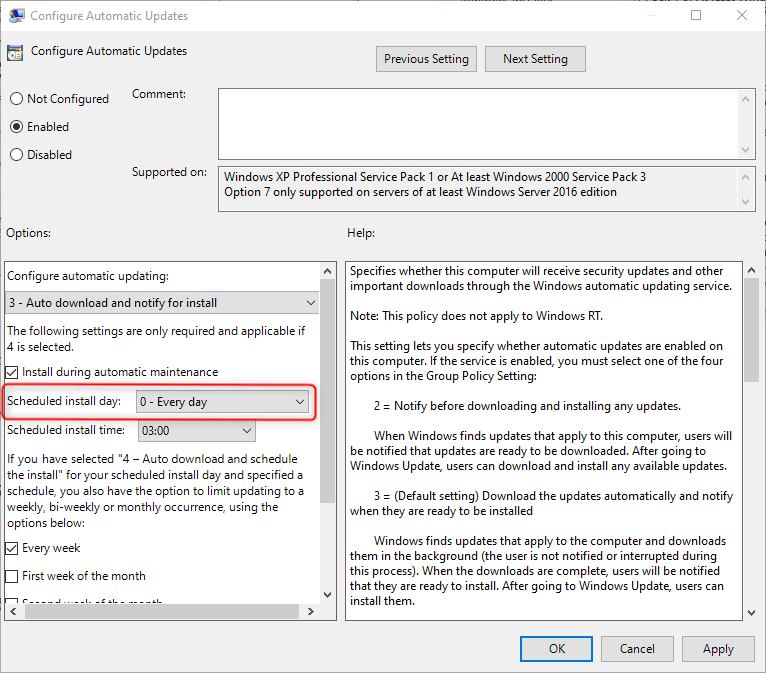
Use the Scheduled install day drop-down menu to select the desired update installation day.
Step 8:
Use the Scheduled install time Drop-Down to select the desired update installation time.
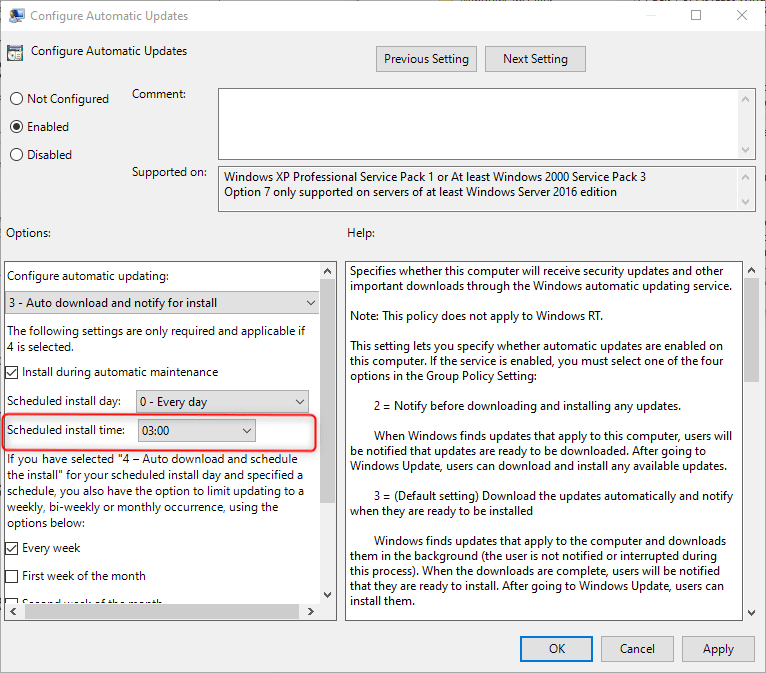
Step 9:
Click the Install updates for other Microsoft products checkbox to include other Microsoft products in your updates.
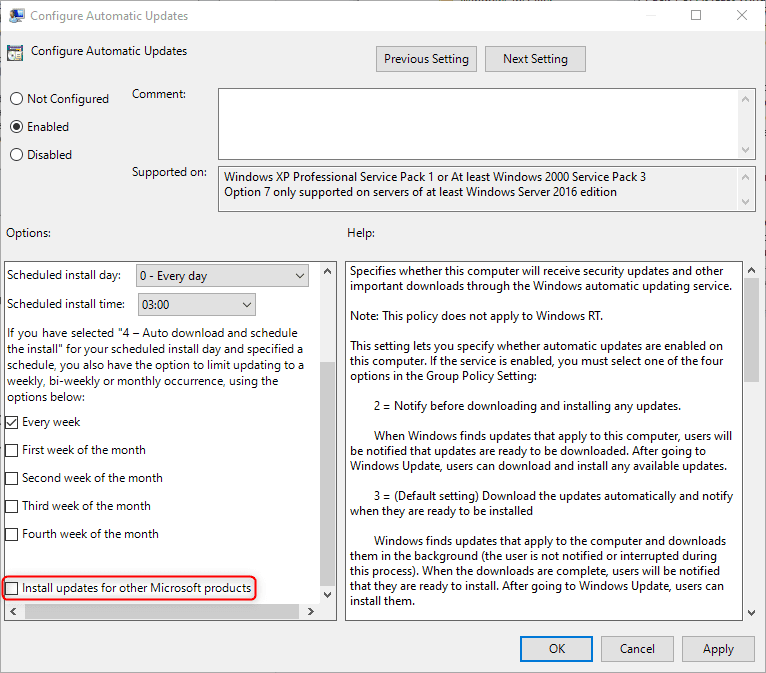
Step 10:
Restart the server or use the Command Prompt app to run the gpupdate /force command to apply the Group Policy updates. Using the Command Prompt app, you receive successfully completed feedback in the session.
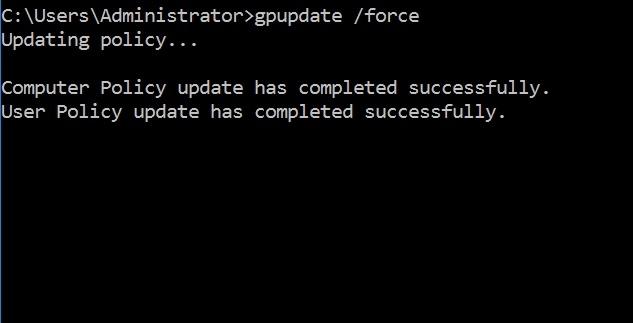
Final Thoughts
This article demonstrates how you could use the Group Policy Editor to manage your Windows Server group policy update settings. Take complete control of your Windows server with this feature, and enjoy a customized, hassle-free Windows Update experience.
Are you a Windows hosting user interested in fully managed Windows servers? Liquid Web’s Windows plans provide an unmatched managed experience for your projects. Contact our sales team to set up your server today.
Related Articles:

About the Author: Joseph Molloy
Liquid Web Security Operations tech Joseph spends his days cleaning up malware and doing his part to keep the Internet safe. He is interested in all things Linux and always looking for something new to learn. In addition, he enjoys cooking and playing guitar, is an avid horror and sci-fi reader, and is a fan of black metal music.
Our Sales and Support teams are available 24 hours by phone or e-mail to assist.
Latest Articles
How to use kill commands in Linux
Read ArticleChange cPanel password from WebHost Manager (WHM)
Read ArticleChange cPanel password from WebHost Manager (WHM)
Read ArticleChange cPanel password from WebHost Manager (WHM)
Read ArticleChange the root password in WebHost Manager (WHM)
Read Article


