As a widely adopted package manager, Yarn is favored by development teams and DevOps professionals across all industries seeking to streamline project workflows. In this guide, we’ll introduce four methods to get Yarn 1 (Classic) up and running on your Windows Server: MSI Installer, Chocolatey, Scoop, and NPM. We’ll dive into some of the ins and outs of each method as well as address some commonly asked questions.
What Is Yarn?
A 2016 collaboration from Exponent, Google, Tilde, and Meta (Facebook), Yarn was developed as a robust alternative for the default npm package manager client (also called npm). Packages, also known as modules, are used to distribute the code. A package.json file outlines the contents of the package and all associated, distributed code.
Prerequisites for Installing Yarn on Windows Server
- Windows Server: Make sure you’re running a supported version of Windows (Windows 7 or later, Windows Server 2003 or later).
- Administrator Access: Administrator access is required to install software and grant privileges.
- Backup: Always ensure you have a recent, reliable backup of your server before making any system change.
- Internet Connection: You will need a stable internet connection to download Yarn and its dependencies.
- .NET Framework 4+: Required for Chocolatey.
- Node.js: Yarn requires Node.js to function.
- PowerShell: To open a PowerShell session with administrative privileges, press the Windows key + X + A.
Table of Contents:
Method 1—Install Yarn on a Windows Server Using the MSI Installer
Step 1: Download the Yarn Install Package
First, you need to download the Yarn install package. Download the Yarn .msi installer from the official Yarn website.
Step 2: Run the Installer
Locate and double-click on the downloaded package. A message box will appear where you will click Run.

Step 3: Begin the Setup Wizard
A new welcome wizard will pop up for the Yarn install setup. Click Next.

Step 4: Accept the License Agreement
The next screen displays the license agreement details. Click the checkbox near the bottom of the window to accept the license agreement, and click Next.

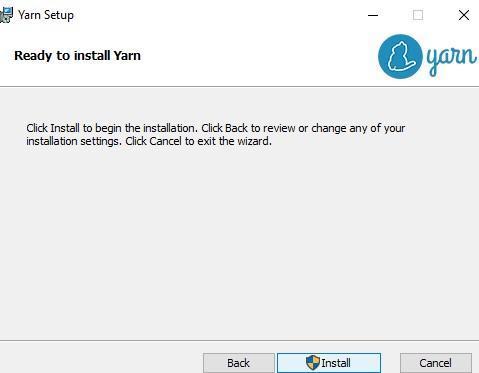
Step 5: Complete the Installation
To complete the Yarn package installation, click Install.
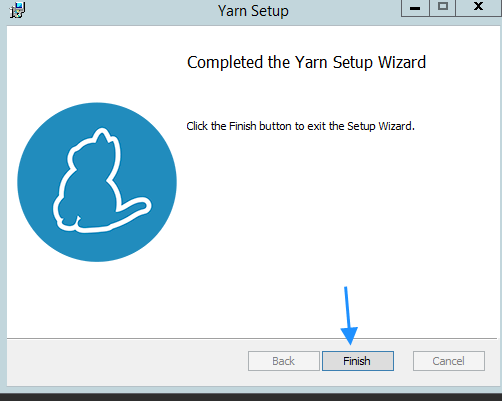
Step 6: Exit the Setup Wizard
Once the Yarn install is completed, a confirmation message box will appear. Click Finish to exit the Setup Wizard.
Step 7: Verify the Installation
Now, run the following Yarn version check command on the Windows PowerShell to verify the completion of the Yarn package install.
yarn --versionThe output will show the version number, signifying that it is installed.
PS C:\Users\Administrator> yarn --version
1.22.18
PS C:\Users\Administrator>
Method 2—Install Yarn Using Chocolatey
Chocolatey is a command-line package manager and software installer for Windows. The Chocolatey package manager automatically installs all dependencies for the Yarn package on the server. It also checks for a Node.js installation, and, if not already present, it will install it immediately.
Step 1: Open PowerShell
To start the installation, open the Windows PowerShell as Administrator by pressing the Windows Key + X + A.
Step 2: Verify the Execution Policy
Run the following command to view the execution policy.
PS C:\WINDOWS\system32> Get-ExecutionPolicy
RemoteSigned
The above example shows the default setting for Windows Servers. This is the desired setting. If your policy is set to Restricted, you will want to set it to Remote Signed.
PS C:\WINDOWS\system32> Set-ExecutionPolicy RemoteSigned

Execution Policy Change
The execution policy helps protect you from scripts that you do not trust. Changing the execution policy might expose you to the security risks described in the about_Execution_Policies help topic at https:/go.microsoft.com/fwlink/?LinkID=135170. Do you want to change the execution policy?

[Y] Yes  [A] Yes to All  [N] No  [L] No to All  [S] Suspend  [?] Help (default is "N"): Y
Press Y or A and then press enter to accept the new policy.
Step 3: Complete the Installation
To complete the installation, run the following command in PowerShell.
Set-ExecutionPolicy Bypass -Scope Process -Force; [System.Net.ServicePointManager]::SecurityProtocol = [System.Net.ServicePointManager]::SecurityProtocol -bor 3072; iex ((New-Object Set-ExecutionPolicy Bypass -Scope Process -Force; [System.Net.ServicePointManager]::SecurityProtocol = [System.Net.ServicePointManager]::SecurityProtocol -bor 3072; iex ((New-Object System.Net.WebClient).DownloadString('https://community.chocolatey.org/install.ps1'))This will download and run the Chocolatey installation script. Chocolatey will then automatically download and install any missing libraries and binaries.
Step 4: Install Yarn
Once the Chocolatey installation is complete, install the Yarn package on the Windows server by running the following command.
choco install yarnHere is the output.
Chocolatey v1.3.1
Installing the following packages:
yarn
By installing, you accept licenses for the packages.
Progress: Downloading yarn 1.22.19... 100%

[...]

 The install of yarn was successful.
  Software installed as 'msi', install location is likely default.

Chocolatey installed 1/1 packages.
 See the log for details (C:\ProgramData\chocolatey\logs\chocolatey.log).
Step 5: Verify Installation
To confirm Yarn is installed correctly, check the version in the Windows Command Prompt (CMD). A quick way to access it is by the Run menu. Press the Windows + R keys and type CMD at the prompt.

Run the following command to check the Yarn version.
yarn -versionThe output should contain a Yarn version.
C:\Users\Administrator> yarn --version
1.22.19
Method 3—Install Yarn Using Scoop
Scoop is another command-line package manager and software installer for Windows.
Step 1: Set the Execution Policy
First, we set the execution policy to allow downloaded scripts that have been previously signed by a trusted publisher.
Set-ExecutionPolicy RemoteSigned -scope CurrentUserStep 2: Install Scoop
Next, we use PowerShell to use a web request to download and run the Scoop install script.
iwr -useb get.scoop.sh | iexStep 3: Install Yarn
Next, install Yarn using Scoop. From the PowerShell, run the following command.
scoop install yarnIf scoop complains that Node.js is not yet installed, install Node.js with this command.
scoop install nodejsStep 4: Verify the Installation
Check to see that Yarn is installed with this command.
C:\Users\Administrator> yarn --version
1.22.19
Method 4—Install Yarn Using NPM
Step 1: Install npm
First, we check to see if npm is already present. From the PowerShell, run the following command.
npm -versionThe output displays the version.
PS C:\Users\Administrator> npm --version
9.5.1
If it is not yet installed, you will see something like this.
npm : The term 'npm' is not recognized as the name of a cmdlet, function, script file, or operable program. Check the spelling of the name, or if a path was included, verify that the path is correct and try again.In that case, download the Node.js installer using the following command.
iwr "https://nodejs.org/dist/v18.16.0/node-v18.16.0-x86.msi" -OutFile "node-v18.16.0-x86.msi"Then run the following to execute the installer.
msiexec /i "node-v18.16.0-x86.msi" /qnRun the version check from the beginning of this step to verify if the installation was successful.
Step 2: Install Yarn
Tell the Node.js package manager to download and install the Yarn package with this command.
npm install --global yarnThe output should be the same as below.
C:\Users\Administrator\AppData\Roaming\npm\yarn -> C:\Users\Administrator\AppData\Roaming\npm\node_modules\yarn\bin\yarn.js
C:\Users\Administrator\AppData\Roaming\npm\yarnpkg -> C:\Users\Administrator\AppData\Roaming\npm\node_modules\yarn\bin\yarn.js
+ [email protected]
added 1 package in 1.527s
Common Yarn Commands
Initialize a New Yarn Project
The below code will initialize a new Yarn project and create a package.json file.
yarn initInstall a Package and Add to Dependencies
Installs a package and adds it to the project’s dependencies.
yarn add [package]Remove and Uninstall a Package
The below command removes a package from the project’s dependencies and uninstalls it.
yarn remove [package]Update a Package to its Latest Version
This command upgrades a specific package to its latest version.
yarn upgrade [package]Choose Which Packages to Upgrade
The below command interactively chooses which packages to upgrade.
yarn upgrade-interactiveInstall a Package Globally
The below command installs a package globally, making it available across all projects.
yarn global add [package]List All Installed Packages
Lists all installed packages and their versions in the current project.
yarn listList Outdated Packages
The below command shows a list of outdated packages in the current project.
yarn outdatedClean Global Yarn Cache
The below command cleans the global Yarn cache to free up disk space.
yarn cache cleanExecute a Script Defined in the Package
Executes a script defined in the package.json file with the below command.
yarn run [script]Wrapping Up
Using this guide helps you with how to install Yarn on your Windows server. Yarn assists you with managing packages and distributing code quickly, securely, and consistently.
If you want to get your Windows server going, Liquid Web offers Windows options for our VPS hosting, cloud dedicated servers, and dedicated servers. Contact our sales team to get set up.