How to Install WordPress in cPanel / WHM with Softaculous
WordPress is a very popular option for running a website or blog and can be used to get your content online quickly.  This guide will walk you through installing the WordPress server software via cPanel / WHM and Softaculous. Liquid Web makes WordPress hosting easy and painless, for every level of customer, especially since all of our managed plans are backed by our 24/7/365 Support team!
Pre-Flight Check
- These instructions are intended for installing WordPress in cPanel / WHM with Softaculous.
- I’ll be working from a Liquid Web cPanel / WHM CentOS 6.6 server, and I’ll be logged into a cPanel account.
Step #1: Open Softaculous

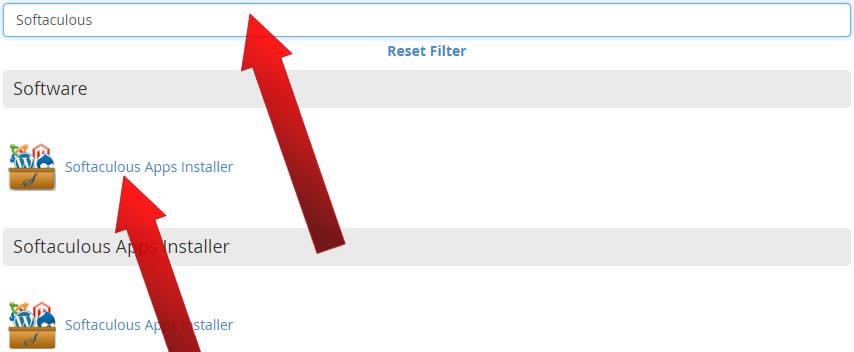
Once you’re logged in to cPanel, navigate to the Softaculous Apps Installer. It can be found under the Software heading or the Softaculous Apps Installer heading. You may also be able to enter Softaculous into the filter bar to find it quicker!
Click on Softaculous Apps Installer.
Step #2: Start the WordPress Install
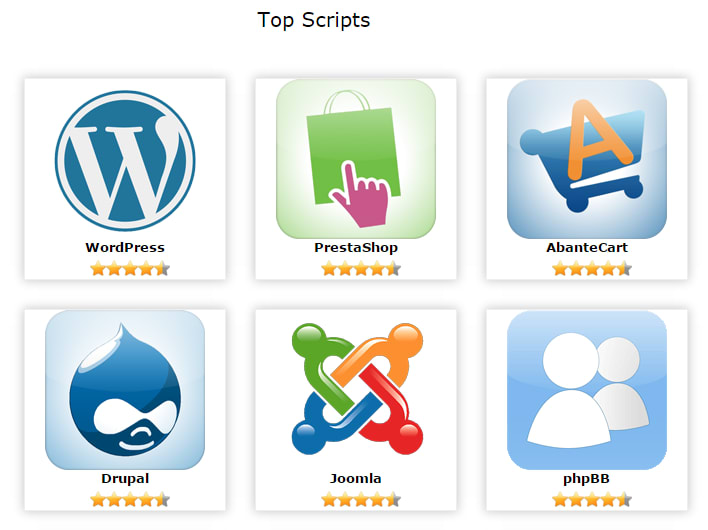
WordPress might be located in the Top Scripts section when you first open Softaculous:
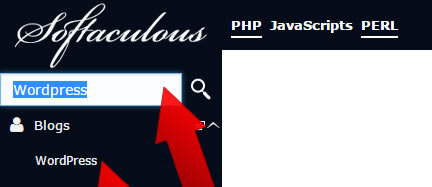
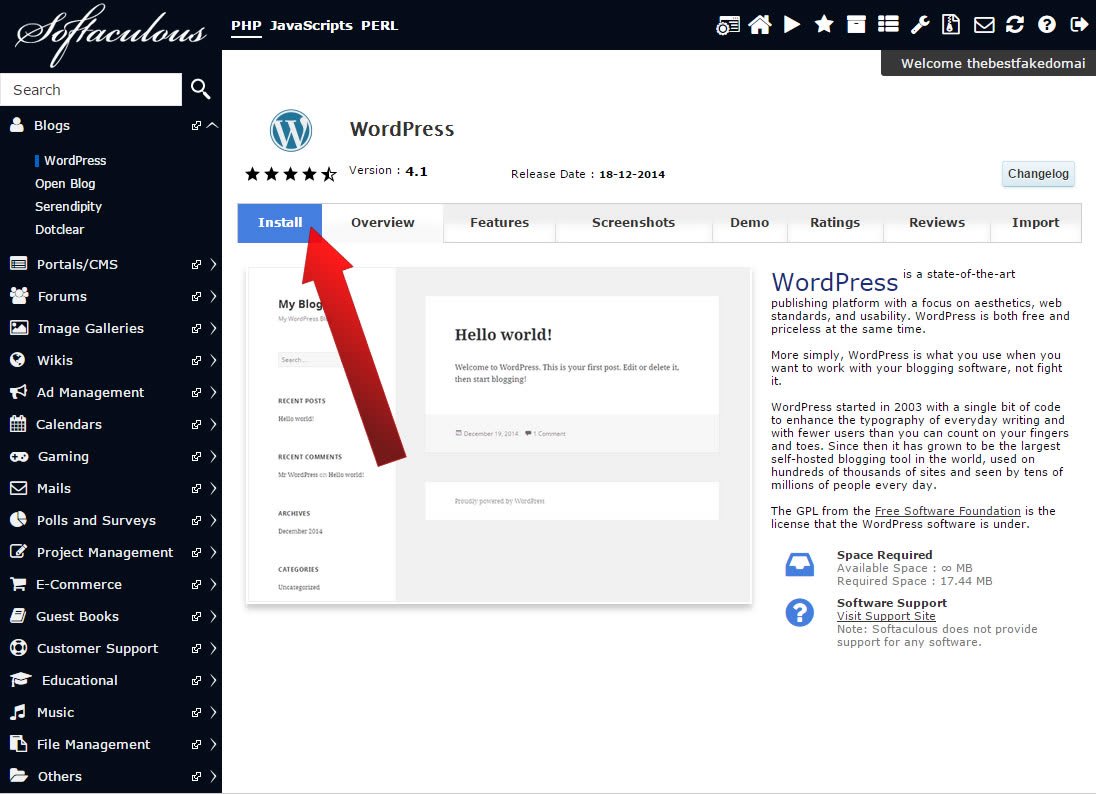
You should be brought to the WordPress Overview screen. Now click Install.
Step #3: Software Setup
Now it’s time to choose a protocol for WordPress. If you’re using SSL, then you would use HTTPS. If you haven’t purchased an SSL certificate, then HTTP will suit you just fine. If you need more information on SSL Certificates than visit our tutorial on What is an SSL Certificate?
Select an option for Choose Protocol. In this case, we’re selecting http://.

And then select your domain under Choose Domain. This is the domain under which WordPress will be installed.
If you want WordPress installed in the root directory for your domain, then under In Directory remove wp. You can also specify another directory.

And finally, enter a database name. The database name cannot be greater than 7 letters. In this case, I’ve entered wpdb.
![]()
Step #4: Database Settings
Under the Database Settings heading, you’ll find Table Prefix. This setting is generally left unchanged and refers to the table prefix for each WordPress table in the WordPress database. The default is wp_.
Step #5: Site Settings
Both the Site Name and the Site Description should be filled in with information relevant to your new blog/site. Only Enable Multi-site (WPMU) if you plan to use this feature. (A multi-site network is typically very similar to a personal version of WordPress.com, where end users can create their sites on demand.)

Step #6: Admin Account
It is strongly recommended that the Admin Username be changed to something other than admin.
For the Admin Password, be sure to follow the Liquid Web guide on safe passwords: Practice Safe Passwords: A Quick Guide to Password Security
And then enter an appropriate email address for the Admin Email. This email will receive notifications from your WordPress installation.

Step #7: Choose Language
Select a language for your WordPress installation.
Step #8: Select Plugins
It is wise to select Limit Login Attempts.
Step #9: Advanced Options
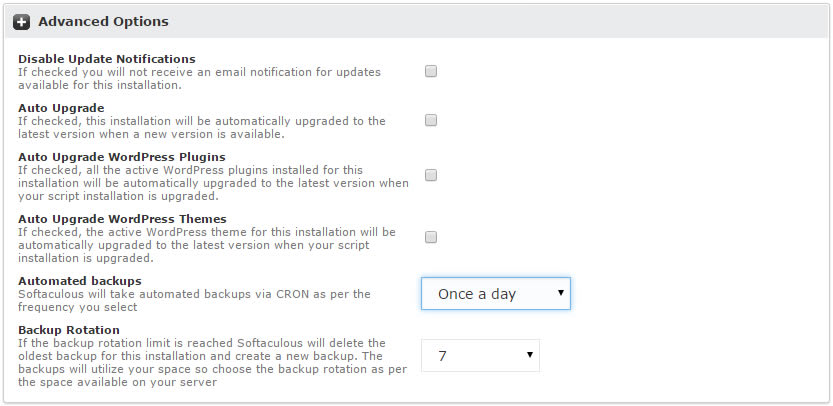
Of all the options under the Advanced Options heading, we suggest at least enabling backups. For example, if you want to store a week’s worth of Automated backups, then select Once a day and then under Backup Rotation select 7.
Step #10: Select Theme
The theme is entirely based on personal preference. A theme can also be added later!
Step #11: Begin the Installation
And finally, click Install!
If you have a question about this topic, we can always assist! Just open a ticket with one of our Support Technician today by emailing support@liquidweb.com, or calling into our support line at 1-800-580-4985 (or using our international line at 1-517-322-0434) or lastly, open a chat with us, and we’ll be happy to get you the info you require to resolve your issue quickly!
Related Articles:

About the Author: J. Mays
As a previous contributor, JMays shares his insight with our Knowledge Base center. In our Knowledge Base, you'll be able to find how-to articles on Ubuntu, CentOS, Fedora and much more!
Our Sales and Support teams are available 24 hours by phone or e-mail to assist.
Latest Articles
How to use kill commands in Linux
Read ArticleChange cPanel password from WebHost Manager (WHM)
Read ArticleChange cPanel password from WebHost Manager (WHM)
Read ArticleChange cPanel password from WebHost Manager (WHM)
Read ArticleChange the root password in WebHost Manager (WHM)
Read Article


