
 Justin Palmer
 What is Gradle?
Gradle is a high-performance open-source build automation tool that makes it possible to build just about any type of software. It is highly configurable and extensible via a well-developed plugin ecosystem. Because build automation is an integral part of the consistent delivery of software projects, Gradle integrates seamlessly with multiple IDE’s, including Android Studio. This tutorial covers the manual installation of Gradle on Linux, MacOS, and Windows.

Preflight Check:
- The instructions covering Linux and macOS installation were performed as the root user on a Liquid Web Self Managed Ubuntu 18.04 LTS VPS server. While macOS and Ubuntu are not identical, the manual installation of Gradle is the same for both.
- The Windows installation was performed on a Liquid Web Self Managed Windows 2019 Dedicated Server as an administrator.
- This tutorial assumes you have a Java Development Kit version 8 or higher available on your system and, in the case of windows, that Java is available in your Path environment variable. We have an article available to assist with installing and configuring Java.
Linux/macOS
Step #1: Download the Latest Gradle
First, make a directory to house Gradle by running the following command:
root@ubuntu:~# mkdir /opt/gradleNext, download the Gradle binary using the following curl command:
root@ubuntu:~# curl -L https://services.gradle.org/distributions/gradle-6.5-bin.zip --output gradle.zipAt the time this article was written, Gradle 6.5 was the most recent software version. Check the Gradle releases page for newer versions.
Next, unzip Gradle into the /opt/gradle directory:
root@ubuntu:~# unzip -d /opt/gradle/ gradle.zipIf the unzip command is unavailable on your system you can install it with the following command:
root@ubuntu:~# apt install unzipStep #2: Configure Environment
To make the gradle command accessible run the following command to add a gradle.sh file to /etc/profile.d to include Gradle in the system PATH variable:
root@ubuntu:~# echo PATH=$PATH:/opt/gradle/gradle-6.5/bin > /etc/profile.d/gradle.shFinally, source the newly created gradle.sh file to update the PATH environment variable:
root@ubuntu:~# source /etc/profile.d/gradle.shStep #3: Verify Gradle Installation
The last thing to do is to verify that Gradle is installed. To accomplish this, run the following command:
root@ubuntu:~# gradle -v
------------------------------------------------------------
Gradle 6.5
------------------------------------------------------------
Build time: 2020-06-02 20:46:21 UTC
Revision: a27f41e4ae5e8a41ab9b19f8dd6d86d7b384dad4
Kotlin: 1.3.72
Groovy: 2.5.11
Ant: Apache Ant(TM) version 1.10.7 compiled on September 1 2019
JVM: 11.0.7 (Ubuntu 11.0.7+10-post-Ubuntu-2ubuntu218.04)
OS: Linux 4.15.0-91-generic amd64
Windows
Step #1: Download the Latest Gradle
Start by opening up a command prompt and creating a directory for Gradle to land:
C:\Users\Administrator>mkdir C:\GradleDownload Gradle into the newly created Gradle directory by running the following curl command:
C:\Users\Administrator>curl -L https://services.gradle.org/distributions/gradle-6.5-bin.zip --output C:\Gradle\gradle.zip

  % Total % Received % Xferd Average Speed Time Time Time Current
                                 Dload Upload Total Spent Left Speed
  0 0 0 0 0 0 0 0 --:--:-- --:--:-- --:--:-- 0
100 97.6M 100 97.6M 0 0 97.6M 0 0:00:01 0:00:01 --:--:-- 115M
Next, open an instance of File Explorer and navigate to the C:\Gradle directory.

Now, extract the gradle.zip file by right-clicking the file and selecting “Extract All…”.
Before hitting the Extract button, adjust the path to extract the files directly to the Gradle directory. The extraction should look like it does in the below image. Once it does, hit the Extract button:

Step #2: Configure Environment
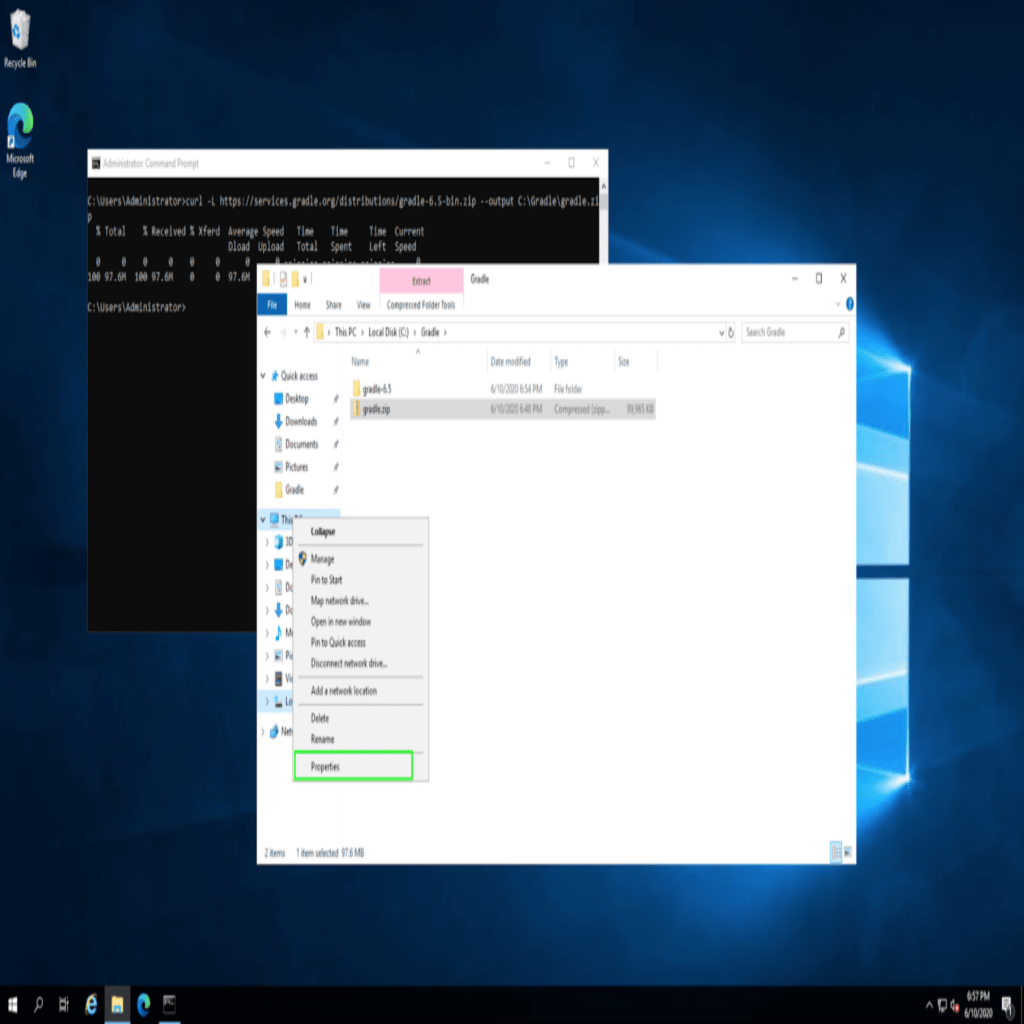
Now that Gradle is installed, it’s time to set up the Environmental Variable for it. Right-click “This PC” in the File Explorer and select “Properties”:
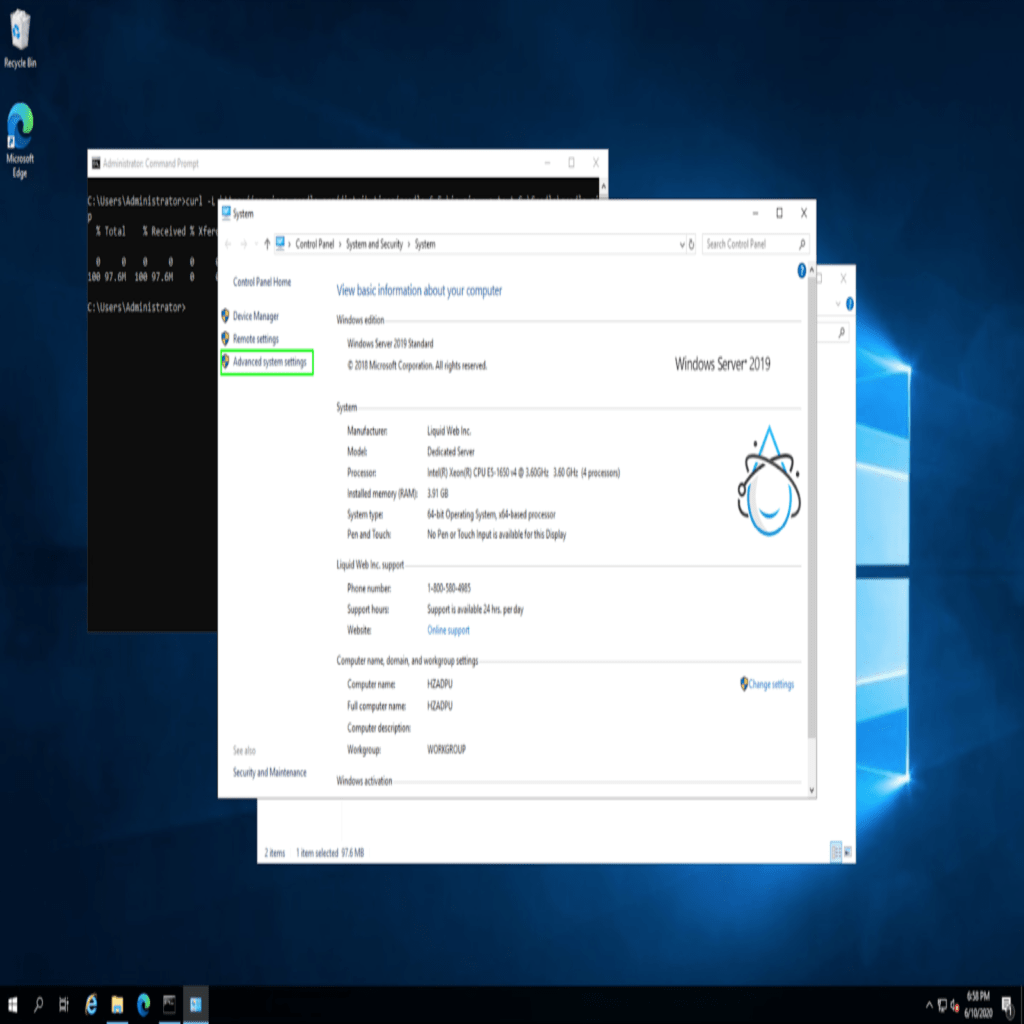
In the System menu, select Advanced system settings:
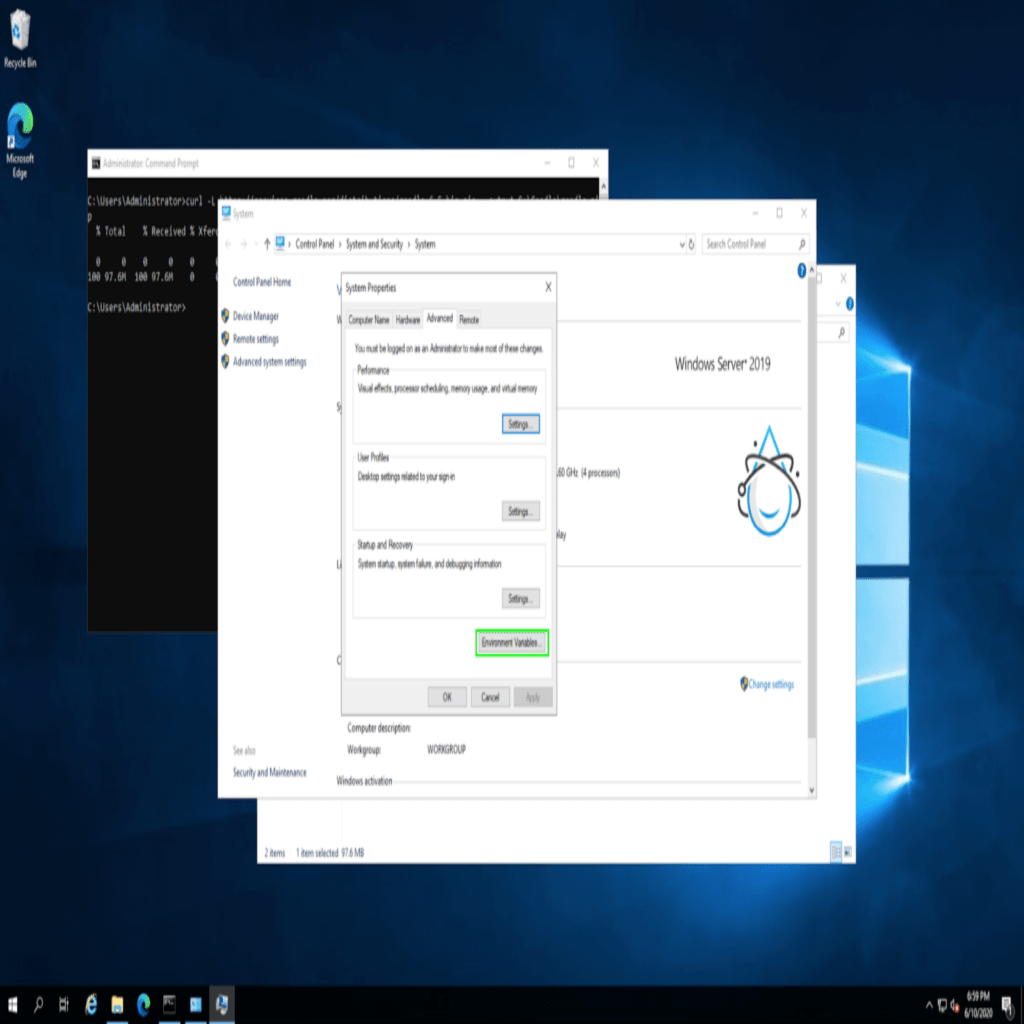
In the System Properties dialog hit the “Environment Variables…” button:
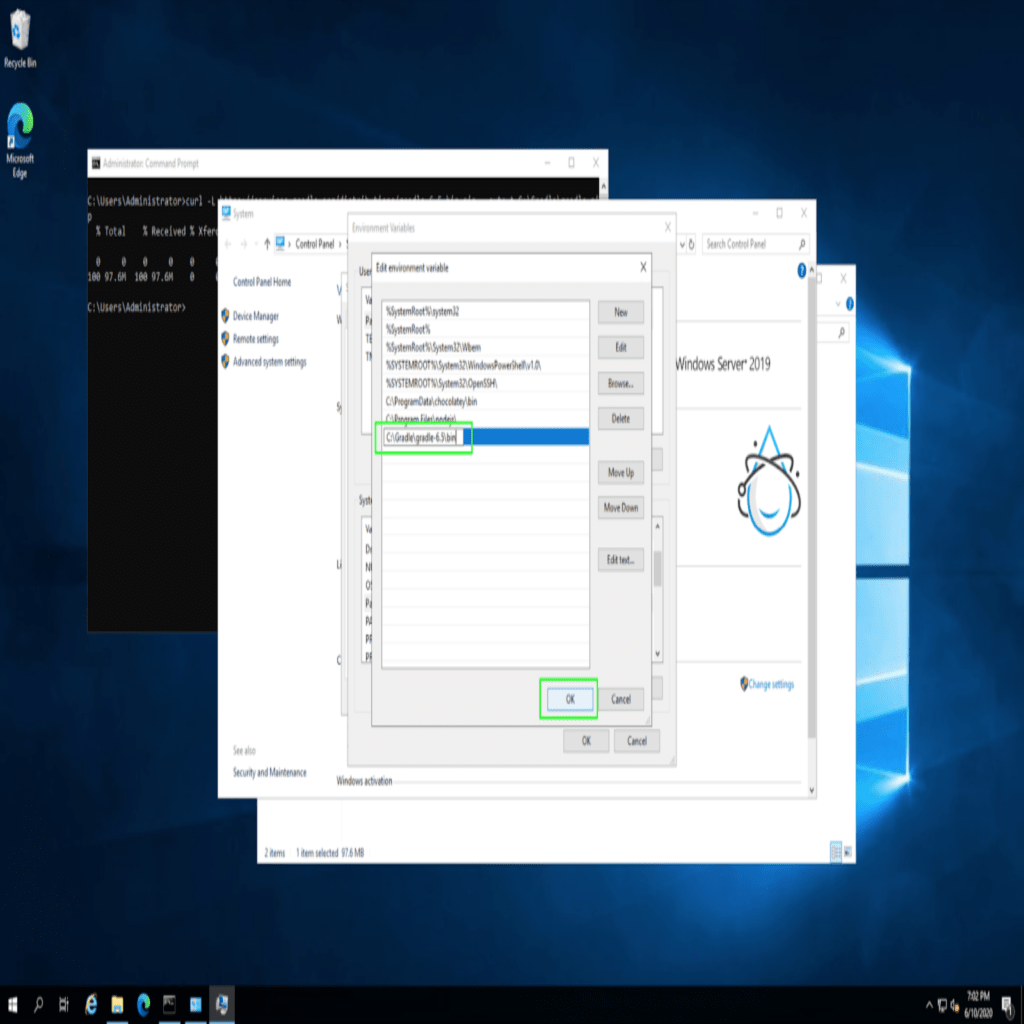
Find “Path” under the “System variables” header and select it and hit the “Edit” button:
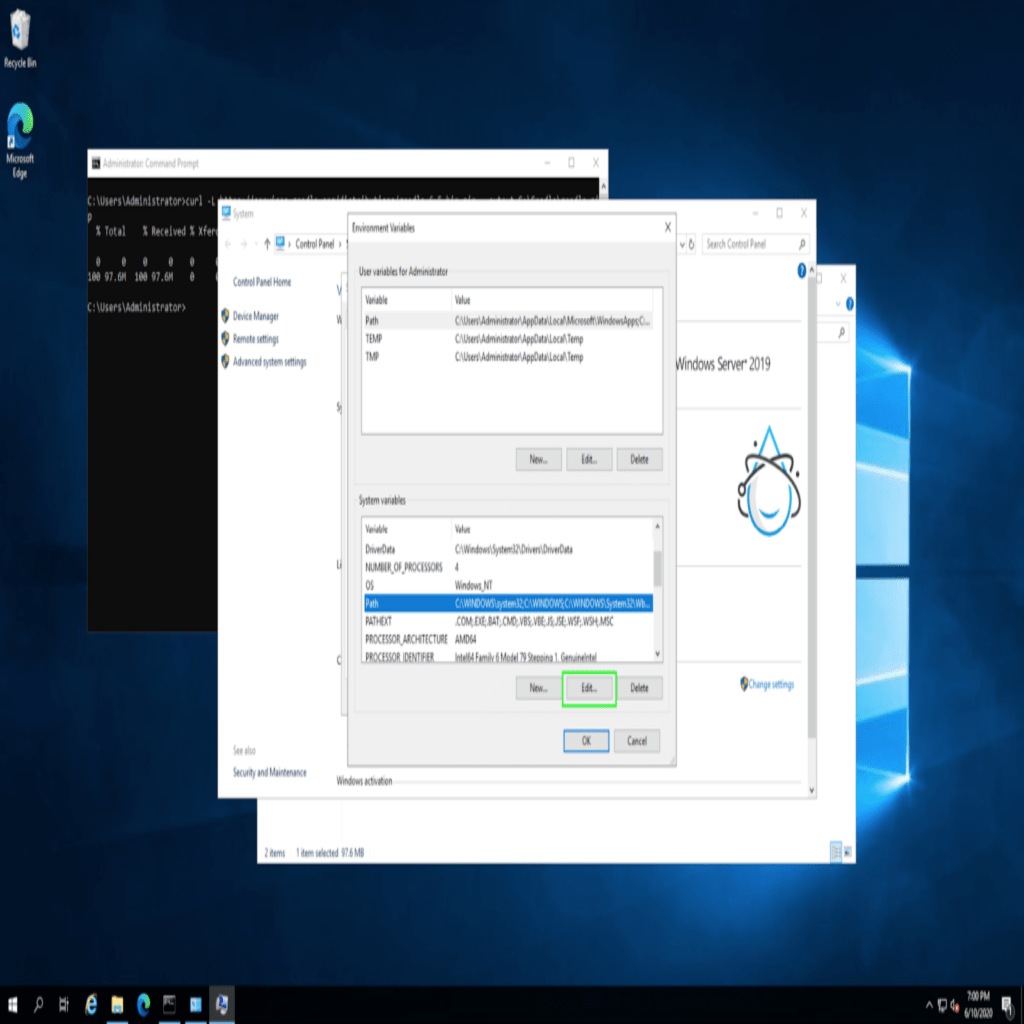
After that, hit the “New” button enter C:\Gradle\gradle-6.5\bin then hit the “OK” button to save the new variable:
Step #3: Verify Gradle Installation
To verify that Gradle has been installed and is available, close the current command prompt, open a new one, and run the following command:
C:\Users\Administrator>gradle -v

Welcome to Gradle 6.5!
Here are the highlights of this release:
 - Experimental file-system watching
 - Improved version ordering
 - New samples
For more details see https://docs.gradle.org/6.5/release-notes.html

------------------------------------------------------------
Gradle 6.5
------------------------------------------------------------

Build time: 2020-06-02 20:46:21 UTC
Revision: a27f41e4ae5e8a41ab9b19f8dd6d86d7b384dad4
Kotlin: 1.3.72
Groovy: 2.5.11
Ant: Apache Ant(TM) version 1.10.7 compiled on September 1 2019
JVM: 14.0.1 (Oracle Corporation 14.0.1+7)
OS: Windows Server 2019 10.0 amd64
Conclusion
That’s it! Gradle is now installed! It’s now possible to use Gradle to start working with and building software projects.
We pride ourselves on being The Most Helpful Humans In Hosting™!
Our Support Teams are replete with talented Linux technicians and System administrators who have an intimate knowledge of multiple web hosting technologies, especially those discussed in this article. Our support staff is always available to assist with any issues related to this article, 24 hours a day, 7 days a week 365 days a year.
If you are on a VPS hosting server, cloud server, VMware private cloud, or a dedicated server and you are uncomfortable with performing any of the steps outlined, we can be reached via phone @800.580.4985, a chat or support ticket to assisting you with this process.