


How to Install an SSL on a Core/Unmanaged Ubuntu Server
Why do I Need to Install or Reinstall My SSL Certificate?
According to Globalsign;
“The Certificate Authority (CA) industry was alerted of compliance implications related to the inclusion of a specific extension (OCSP-signing extended key usage) in CA certificates which has, under certain conditions, unintended compliance and security implications. A number of GlobalSign Issuing CAs have been impacted by this issue. While no key compromise or security incident has taken place, we will be revoking these Issuing CA’s as part of our remediation plan in accordance with the CA/B Forum Baseline Requirements and the GlobalSign CPS. Revoked intermediate certificates can cause errors in the validation of certificates signed by these Intermediate Certificates.”
Globalsign.com
So, What Exactly Does This Mean?
It means that one of the base certs which validates your SSL certificate was found to have had a flaw. Although no security issues have been seen, Globalsign has opted’d to revoke that base certificate as a precautionary measure to ensure no compromises affect its clients.
What is the Next Step?
Basically, Globalsign is asking you to search your server for any affected certificates and either replace or reissue them using the steps outlined below by them.
Reissuing an SSL Certificate
Globalsign has asked clients affected by this issue to take the following steps.
1. Search For Impacted Certificates at GlobalSign
2. Reissue any affected SSL Certificates
3. Install New Certificates (select the server type on this page, e.g., Apache, Nginx, IIS)
What if I Need a New SSL Certificate?
In that case, we have outlined the steps below you need to take to install a new SSL certificate.
Obtaining a New SSL Certificate
In order to create a new SSL certificate, we must follow these steps.
1. Generate a CSR — Create a new Certificate Signing Request
2. Purchase a Certificate — Send the CSR to GlobalSign, pay for the order, they then vet the info and provide a signed certificate.
3. Install the Certificate — Typically, this falls under the Apache configuration.
Below, we provide greater detail to accomplish this task on both Core Managed CentOS and Unmanaged Ubuntu Servers
To obtain a new SSL certificate, you must first generate a CSR or Certificate Signing Request. Next, you must submit your CSR to GlobalSign the get a new SSL. Once you have ordered your certificate and the vetting process is complete, you are now ready to install your certificate. You can obtain a copy of your certificate at any time via your GlobalSign Certificate Center (GCC) account. It will also be emailed to you as well.
Generate a CSR Certificate
First, let’s check whether Apache has the SSL module enabled.
root@host3:~# a2enmod ssl Next, we need to restart apache to initiate the module.
root@host3:~# systemctl restart apache2 We begin by generating a CSR to send to GlobalSign for your SSL using this command. (replace mydomain with your domain name)
openssl req -new -newkey rsa:2048 -nodes -keyout /etc/ssl/private/mydomain.key -out /etc/ssl/private/mydomain.csr
root@host3:~# openssl req -new -newkey rsa:2048 -nodes -keyout /etc/ssl/private/mydomain.key -out /etc/ssl/private/mydomain.csr
Generating a RSA private key
......................+++++
.......................................................+++++
writing new private key to '/etc/ssl/private/mydomain.key'
-----
You are about to be asked to enter information that will be incorporated
into your certificate request.
What you are about to enter is what is called a Distinguished Name or a DN.
There are quite a few fields but you can leave some blank
For some fields there will be a default value,
If you enter '.', the field will be left blank.
-----
Country Name (2 letter code) [AU]:US
State or Province Name (full name) [Some-State]:Michigan
Locality Name (eg, city) []:Detroit
Organization Name (eg, company) [Internet Widgits Pty Ltd]:Liquid Web Inc.
Organizational Unit Name (eg, section) []:Marketing
Common Name (e.g. server FQDN or YOUR name) []:host3.g33k.fun
Email Address []:dsinger@liquidweb.com

Please enter the following 'extra' attributes
to be sent with your certificate request
A challenge password []:1234567890
An optional company name []:
You will be prompted to answer a series of questions, as noted below.
- Country Name – This is the two-letter abbreviation for your country. For example, United States would be US and Great Britain would be GB.
- State or Province Name – This is the full name of the state your organization operates from. For example, this might be “California” or “Michigan.”
- Locality Name – Name of the city your organization operates from. Examples might include “Lansing” or “Phoenix”. Don’t use abbreviations in this field. For example, “St. Helena” should be “Saint Helena."
- Organization Name – The name of your organization. If you are a business, use must use your legal name. If you are applying as an individual, you use your full name instead.
- Organizational Unit Name – If applying as a business, you can enter your “Doing Business As” (DBA) name here. Alternately, you can use a department name here. For example, “IT Department” or “Web Administration.”
- Common Name – The domain name that you are purchasing a SSL certificate for. This must be a fully qualified domain name (FQDN). An example might be mydomain.com.
- Email Address – An email address that can be used as a point of contact for your domain. Be sure the address is valid!
- A challenge password – An optional password to further secure your certificate. Be sure to remember this password if you choose to use it. It must be at least 4 characters long. You can skip this step if you like.
- An optional company name – Another optional step. Fill in your company name if you wish. This is not required for web SSL certificates.
Key and CSR Files
In the /etc/ssl/private/ directory, you should see two new files.
- mydomain.csr
- mydomain.key
root@host3:/etc/ssl/private# ll
total 20
drwx--x--- 2 root ssl-cert 4096 Dec 18 15:40 ./
drwxr-xr-x 4 root root     4096 Apr 24  2020 ../
-rw-r--r-- 1 root root     1119 Dec 18 15:40 mydomain.csr
-rw------- 1 root root     1704 Dec 18 15:39 mydomain.key
root@host3:/etc/ssl/private#
The .key file should be kept private on your server. The .csr file is your new certificate signing request. This file contains the information that will be sent to a Certificate Authority. You can inspect the contents of the CSR by using the “cat” command.
root@host3:/etc/ssl/private# cat mydomain.csr
-----BEGIN CERTIFICATE REQUEST-----
MIIDADCCAegCAQAwgZ8xCzAJBgNVBAYTAlVTMREwDwYDVQQIDAhNaWNoaWdhbjEQ
MA4GA1UEBwwHRGV0cm9pdDEYMBYGA1UECgwPTGlxdWlkIFdlYiBJbmMuMRIwEAYD
VQQLDAlNYXJrZXRpbmcxFzAVBgNVBAMMDmhvc3QzLmczM2suZnVuMSQwIgYJKoZI
hvcNAQkBFhVkc2luZ2VyQGxpcXVpZHdlYi5jb20wggEiMA0GCSqGSIb3DQEBAQUA
A4IBDwAwggEKAoIBAQD8wcsNFU1N/PZUzC/nVXnyH4ar8QWtrDRGHPbV+jCHJPDP
Vs345fWS/3xowK7Uz2hiVtf7d78RVUN2Gzx7M77FNsyGZ4ce9duHgpmFS0D3swXb
lwQHZo3KFhMZ/Vy3WlG37dnmi5ASVRNMmMqC1owP9xtzsfN4k/6aWUQu30qSkXHv
qDZWUNgCDb0qKjZYlzr7DDc/1h/RPguuh3scdw2XFEDVKYmk0AMhsg6CF2bqzOVP
B2nDLhjUNHalYtIwG+OFI/YosJfKuZ6G2DgIHk9SQQeOdRHpocPhrv8WsccXaf2E
9Z2tu46MtegCKifaQwW5UXf6zZGXcLm/xXtYa7xNAgMBAAGgGzAZBgkqhkiG9w0B
CQcxDAwKMTIzNDU2Nzg5MDANBgkqhkiG9w0BAQsFAAOCAQEAZYOefl+8b9OkHyTf
QEUVSAgEUsIIPDJpYobhmByjQsDOFDgDCTs7FK/x1c+BKdvvSRSJiwzLMwvbHD9R
rOsLjbbv5lbqtb+jjsxHT7iu1pnnpDV+wsL0pi8Xy869onTPdPqhA4boPdo7vgso
ItOKL11wefdqqa85NEsv5HQXbpII+TcG8u/wcmJ3vFoh4Z89dhAdhrkqrDSSJkRN
SuK4NW6bVdffpAMRRJvvTCMfFYgm9X7mL2z0pOWLYnMD3IH4DksYvvUmYPF8Ni97
3iyownvCEXLLEKK5d/7Clch+XfpjmSl1CnOjVXAJ8zzgSKpgWek+pF+1d811c70s
5GNq0g==
-----END CERTIFICATE REQUEST-----
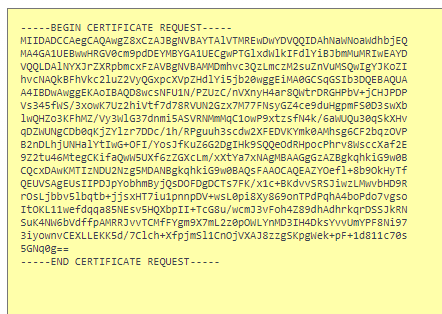
root@host3:/etc/ssl/private# You will need to copy and paste the entire contents of the CSR file to your Certificate Authority when ordering a new SSL certificate. Be sure to include the lines that read
—–BEGIN CERTIFICATE REQUEST—–
and
—–END CERTIFICATE REQUEST—–
Order a New SSL Certificate
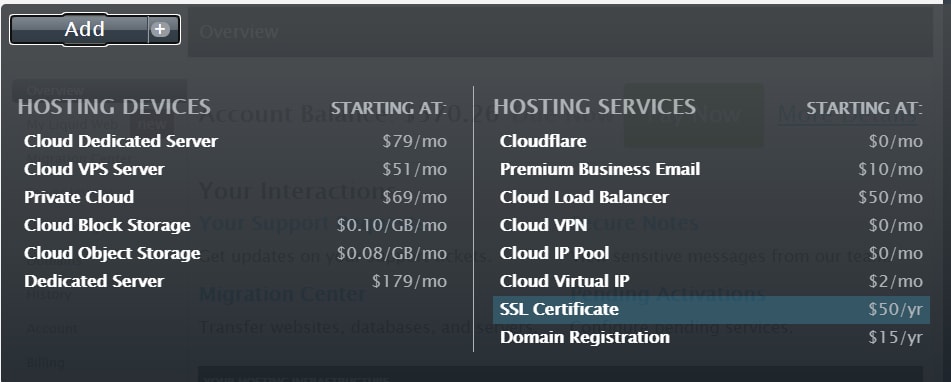
You can now order a new SSL from within your Manage Dashboard. Select Add and then SSL Certificate.
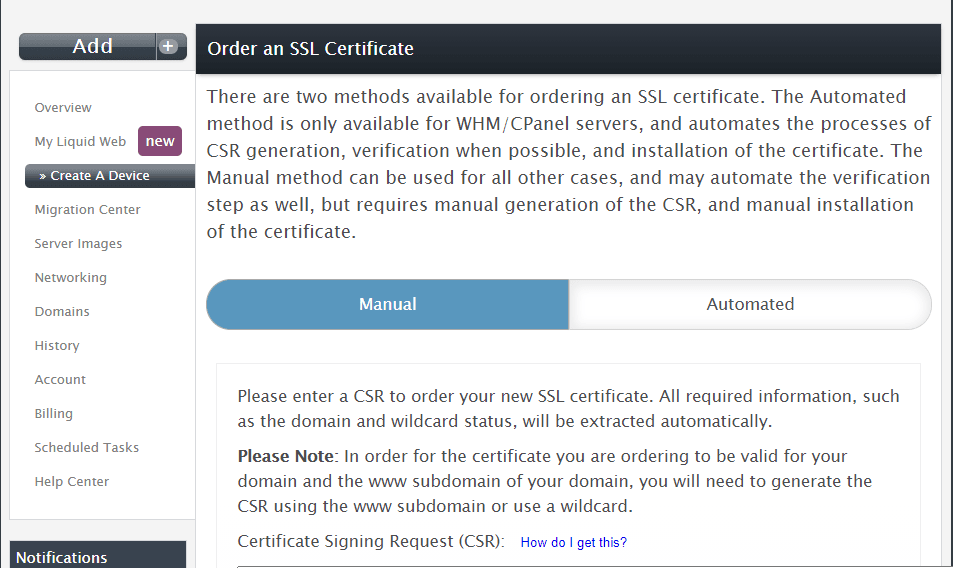
Next, choose the manual option and paste in the csr that was generated above.
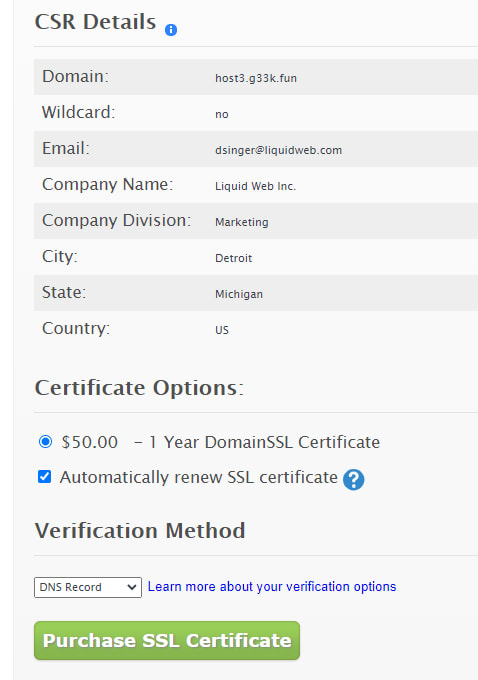
Lastly, click the Purchase SSL Certificate button.
Install The Certificate
To install the certificate when it arrives, copy the certificates into the typical location for these files – /etc/httpd/ssl folder on your server. This includes your server certificate, private key, and an intermediate certificate. Your server certificate can be obtained from the delivery e-mail.
Next, open your Apache configuration file for editing. This will generally be found in the following locations in Ubuntu.
root@host3:~# vim /etc/httpd/httpd.confNow, configure your virtual host to use the certificates. Locate the virtual host for your site in the httpd.conf file. It should look like the example below.
 <VirtualHost xxx.xxx.x.x:443>
     DocumentRoot /var/www/examplesite
     ServerName example.com www.example.com
     SSLEngine on
     SSLCertificateFile /path/to/examplesite.crt
     SSLCertificateKeyFile /path/to/privatekey.key
     SSLCertificateChainFile /path/to/intermediate.crt
 </VirtualHost>
Point the following directives to the corresponding certificate located in the /etc/ folder.
In Ubuntu, you can add new Apache config files into the /etc/apache2/sites-available/ folder, and they will load when Apache is reloaded or restarted the next time.
SSLCertificateFile — This should point to your server certificate.
SSLCertificateKeyFile — This should point to your server's private key.
SSLCertificateChainFile — This should point to the intermediate certificate for your product.
Next, we will test our updated configuration. Depending on your system, run the command:
root@host3:~# apachectl configtest or
root@host3:~# apache2ctl configtestThis will detect any errors in your configuration such as mismatched public and private keys, or an incorrect path.
Finally, restart Apache.
root@host3:~#systemctl restart apache2Create a New Self Signed SSL Certificate
To create a Self-Signed SSL Certificate on Ubuntu, follow these commands.
First let’s check whether Apache has the SSL module enabled.
[root@host3 ~]# apachectl -M | grep ssl
[root@host3 ~]#
If it does not have this module installed, we can install it using this command.
[root@host3 ~]# a2enmod sslNext, we restart apache so the server recognizes the changes.
root@host3:~#systemctl restart apache2To verify the module is in place, we will rerun the command.
root@host3:~# apachectl -M | grep ssl
  ssl_module (shared)
Now, we will create a new folder to store our private key.
[root@host2 ~]# mkdir /etc/httpd/sslSince the files stored within this directory must be kept private, we modify the folder permissions to ensure the root user is the only one who has access.
[root@host2 ~]# chmod 700 /etc/ssl/privateCreate a CSR
Next, we will create the SSL key and certificate files using the openssl command. When creating a new CSR, you will be prompted for a series of questions regarding the information about the domain you are creating. Run the following command to begin.
[root@host2 ~]# openssl req -x509 -nodes -days 365 -newkey rsa:2048 -keyout /etc/ssl/private/apache.key -out /etc/ssl/private/apache.crt

 Generating a RSA private key
 ……………………………………………………………………….+++++
 ……………………………………………………………..+++++
 writing new private key to '/etc/ssl/private/apache.key'
 You are about to be asked to enter information that will be incorporated
 into your certificate request.
 What you are about to enter is what is called a Distinguished Name or a DN.
 There are quite a few fields but you can leave some blank
 For some fields there will be a default value,
 If you enter '.', the field will be left blank.
 Country Name (2 letter code) [AU]:US
 State or Province Name (full name) [Some-State]:Michigan
 Locality Name (eg, city) []:Lansing
 Organization Name (eg, company) [Internet Widgits Pty Ltd]:Liquid Web Inc.
 Organizational Unit Name (eg, section) []:Marketing
 Common Name (e.g. server FQDN or YOUR name) []:host3.g33k.fun
 Email Address []:dsinger@liquidweb.com
 root@host3:/etc/security#
Create Website
Now, let’s quickly create a new folder for a test website in /var/www/ by running the following command.
[root@host3 ~]# mkdir /var/www/g33kNow that we have a directory for our site, we will add a basic HTML file. Next, we will cd into our new created folder and create a file.
[root@host3 ~]# cd /var/www/g33k/
[root@host3 ~]# vim index.html
Paste the following code in the index.html file
<html>
  <head>
    <title>g33k.fun</title>
  </head>
  <body>
     <p>G33k.fun is now secure!</p>
  </body>
</html>
Using this, we can now configure our virtual hosts entry.
Add the Self-Signed SSL Certificate to Apache
Because Apache comes with a default VirtualHost file called 000-default.conf, we will use that as our configuration template file. Next, we copy the template file to a new file called g33k.conf. Then we will edit the file.
[root@host3 ~]# cp 000-default.conf g33k.conf
[root@host3 ~]# vim /etc/apache2/sites-available/g33k.conf
In this file, we should modify the following entries.
ServerAdmin user@g33k.fun
DocumentRoot /var/www/g33k/ServerName host3.g33k.fun
This ensures that visitors will reach the correct website instead of the default page when they type in g33k.fun.
Configure Virtual Hosts
Next, we will activate the virtual hosts config file by running the following command inside the configuration file directory.
[root@host3 ~]# a2ensite g33k.conf
Enabling site g33k.fun
 To activate the new configuration, you need to run:
   systemctl reload apache2
 root@host3:/etc/apache2/sites-available# systemctl reload apache2.service
 root@host3:/etc/apache2/sites-available#
<VirtualHost _default_:443>
ServerName host2.g33k.fun:443 -or-
 <VirtualHost _default_:443>
 ServerName 64.92.237.88:443
Note: The domain should be the same as the “Common Name” specified in the step above.
Now, verify that the following variables are set appropriately within the same file:
SSLEngine on SSLCertificateFile /etc/ssl/private/apache.crt
SSLCertificateKeyFile /etc/ssl/private/apache.key
Finally, ensure you add the file locations where the SSL files can be located. Then exit and save the file with the :wq command.
Next, restart Apache.
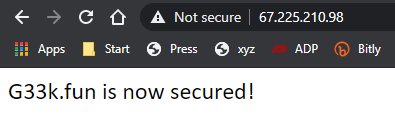
Testing
Your web browser will most likely show the warning triangle in the browsers address bar stating that the website’s security certificate is not trusted. This is normal because our certificate is not signed by a known CA (certificate authority) like Thawte or GlobalSign. This warning simply means it is unable to verify the identity of the server that you are trying to connect to. We created a self-signed certificate instead of a trusted CA-signed certificate, so this makes perfect sense.

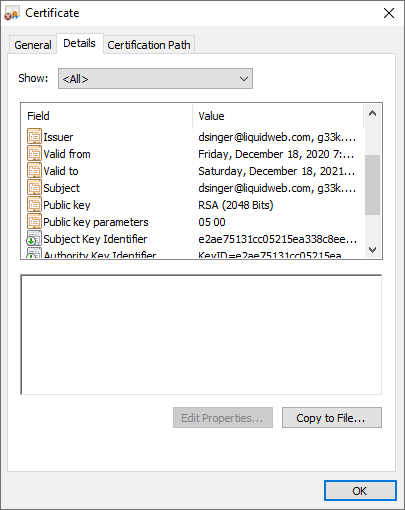
As you can see, the information we added in our certificate is plainly visible. Once you add an exception to the browser’s identity verification, you will be allowed to proceed to your newly secured site.
Conclusion
Replacing an SSL on a core managed or unmanaged server is often time-consuming and adds a layer of complexity to an already complicated system. SSL are a necessity when dealing with todays’ security conscious client. Demonstrating that you take security seriously only aids in providing a higher level of trust.
Should you have any questions regarding this information, we are always available to answer any inquiries with issues related to this article, 24 hours a day, 7 days a week 365 days a year.
Our Support teams are filled with experienced Linux technicians and talented system administrators who have intimate knowledge of multiple web hosting technologies, especially those discussed in this article.
If you are a Fully Managed VPS server, Cloud Dedicated, VMWare Private Cloud, Private Parent server, Managed Cloud Servers, or a Dedicated server owner and you are uncomfortable with performing any of the steps outlined, we can be reached via phone at @800.580.4985, a chat or support ticket to assisting you with this process.
Related Articles:
- Change cPanel password from WebHost Manager (WHM)
- Blocking IP or whitelisting IP addresses with UFW
- Fail2Ban install tutorial for Linux (AlmaLinux)
- How to set up NGINX virtual hosts (server blocks) on AlmaLinux
- Integrating Cloudflare Access with a Bitwarden instance
- How to install Yarn on Linux (AlmaLinux)


About the Author: David Singer
I am a g33k, Linux blogger, developer, student, and former Tech Writer for Liquidweb.com. My passion for all things tech drives my hunt for all the coolz. I often need a vacation after I get back from vacation....


Our Sales and Support teams are available 24 hours by phone or e-mail to assist.
Latest Articles
Change cPanel password from WebHost Manager (WHM)
Read ArticleChange cPanel password from WebHost Manager (WHM)
Read ArticleChange cPanel password from WebHost Manager (WHM)
Read ArticleChange cPanel password from WebHost Manager (WHM)
Read ArticleChange the root password in WebHost Manager (WHM)
Read Article