


How to Generate a CSR and Install an SSL in Plesk
Posted on by dpepper
Reading Time: 4 minutes
Pre-Flight Check
- This article is specifically intended for generating a Certificate Signing Request and installing a standard SSL certificate on a Windows server running Plesk.
- We’ll walk through ordering the SSL via Liquid Web’s Manage interface, but you can use the CSR you generate in Plesk to purchase an SSL from the vendor of your choice.
- If your Windows server is running Plesk 12.5 or higher, you can check out our tutorial on Using Let’s Encrypt SSL Certificates with Plesk 12.5.
Step #1: Generate a Certificate Signing Request in Plesk
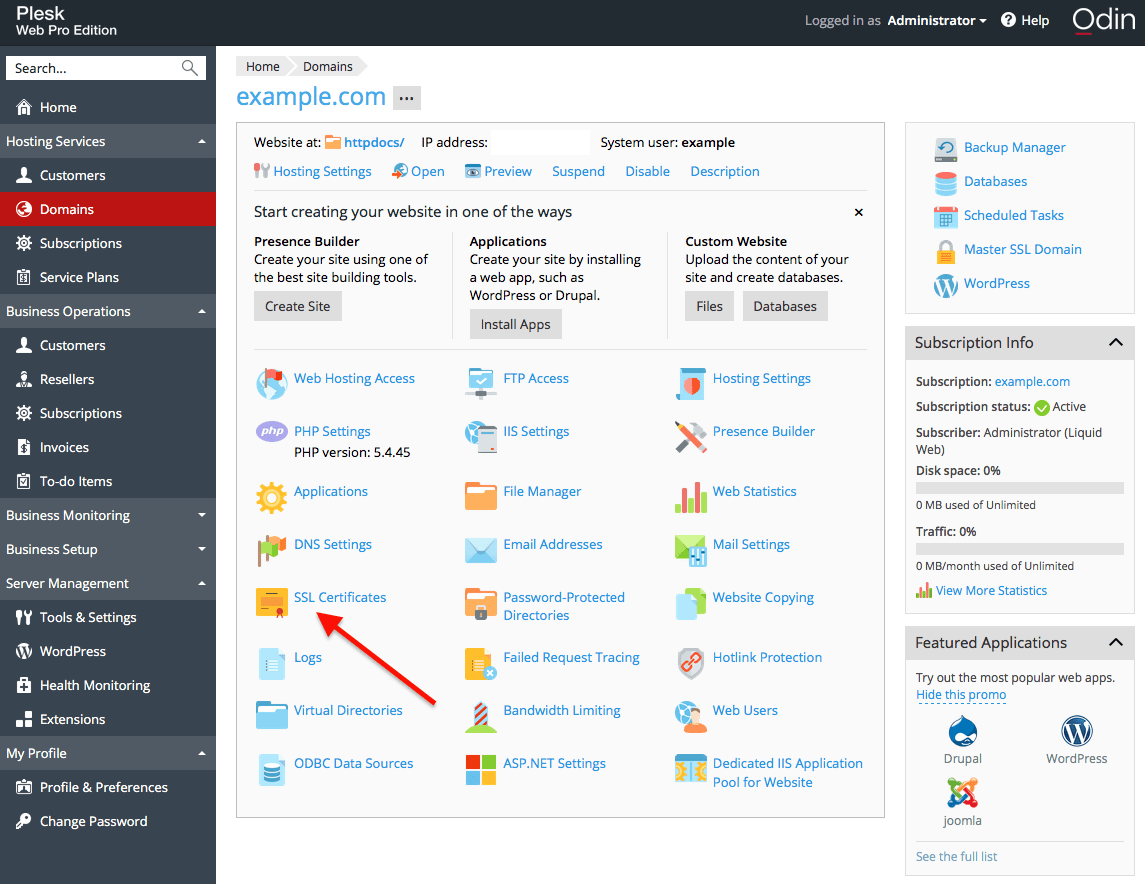
- Log into Plesk.
- Select Domains from the main menu and click on the domain name to access its settings page.
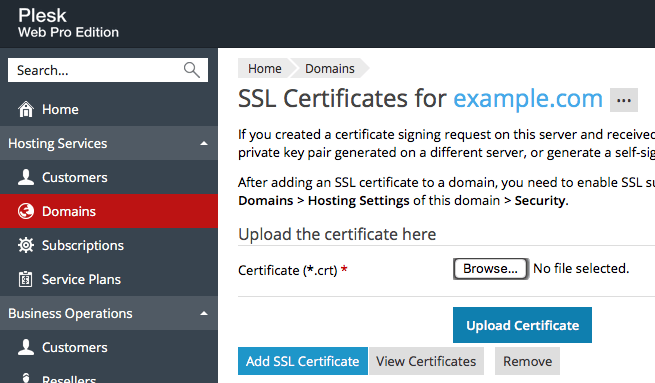
- Click on SSL Certificates to bring up the SSL certificate page:
- Now click the blue Add SSL Certificate button:
- Fill out the request form and then press the Request button:
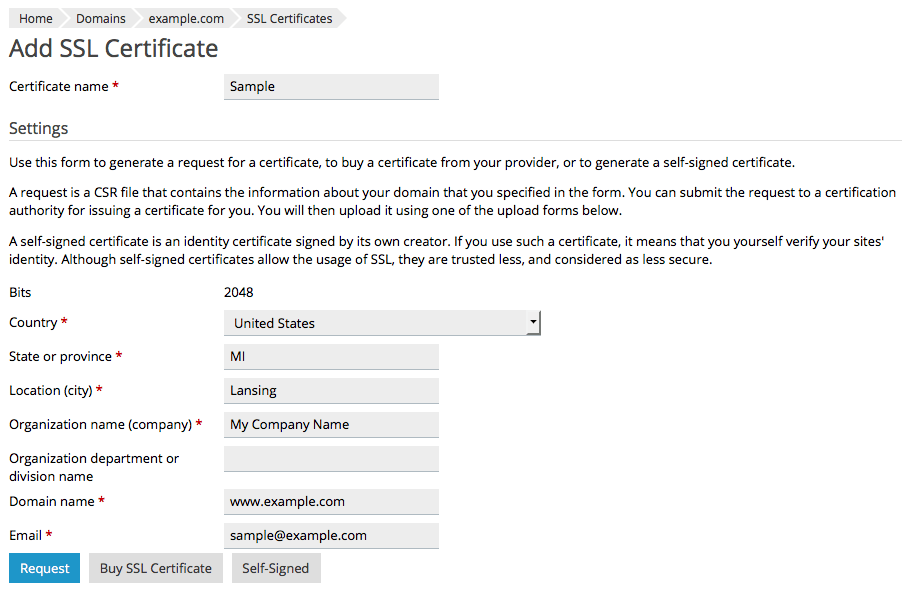
While the fields are self-explanatory, pay special attention to these three required fields:
- Certificate name: This is how the certificate will be displayed in Plesk. To make it easier to identify later, you’ll likely want to use the domain name.
- Domain name: If you want your SSL certificate to cover the domain with and without the “www”, you must enter the “www” version here.
- A certificate for www.yourdomainname.com will cover both yourdomainname.com and www.yourdomainname.com.
- A certificate for yourdomainname.com will only apply to yourdomainname.com.
- Email: Plesk will email the CSR and details to this address, although we will walk through retrieving the CSR directly from Plesk in the next step.
- Upon submitting the form, you’ll be redirected to the domain’s SSL Certificates page. Click on the certificate name (“Sample” in this example) to return to the certificates page, where you’ll be able to copy the CSR:
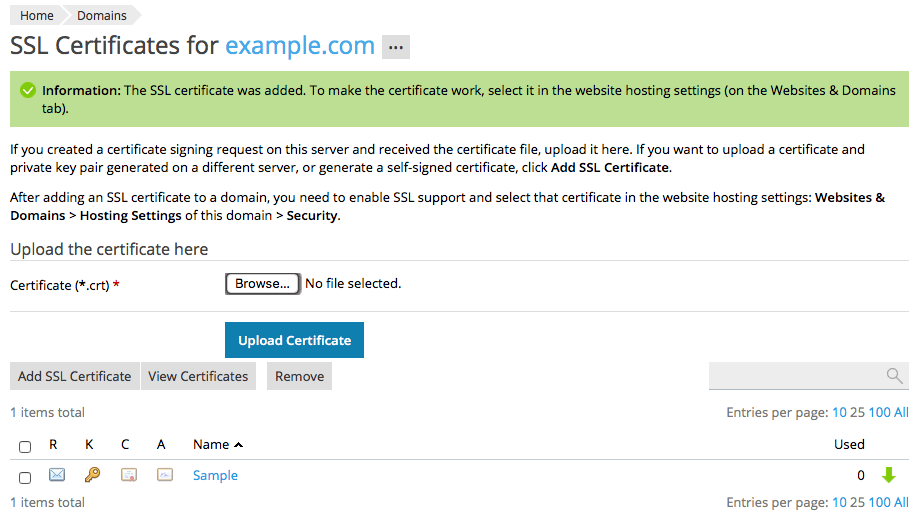
- On the SSL Certificates page for the domain, scroll down to the section labeled CSR, and copy all the text contained in that field:
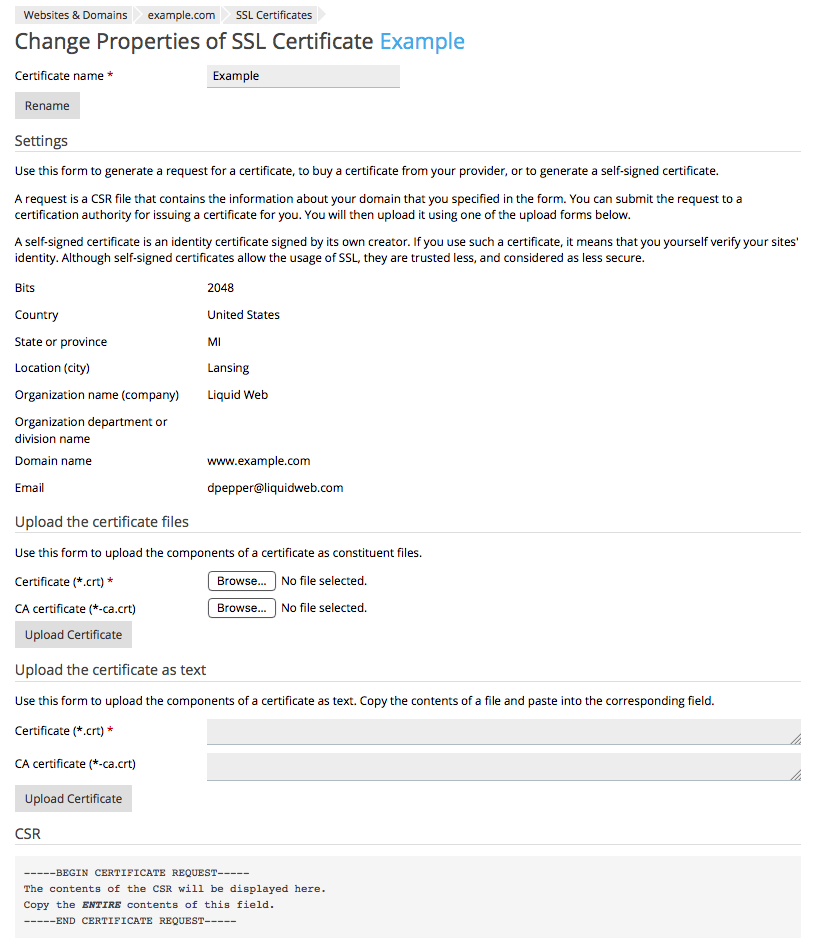 Important: Leave this window up, as you will return to it once you have ordered and obtained the certificate. You will paste the certificate into the Upload the certificate as text field just above the CSR section on this same page.
Step #2: Order the SSL Certificate in Manage
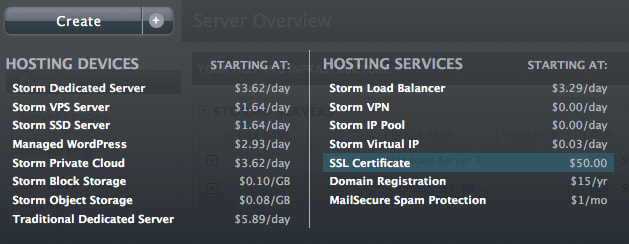
- In a new browser window or tab, log into your Liquid Web Manage dashboard.
- Click on the Create button near the top left of the page and select SSL Certificate:
- On the Order an SSL Certificate page, paste the CSR you copied from Plesk into the Certificate Signing Request (CSR) field.
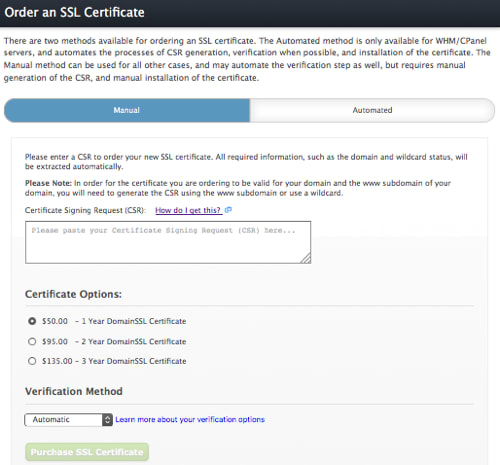
The CSR Details section will populate with the information you entered in Plesk.
- Review the CSR details. If you need to correct any errors, go back to Step One and re-generate the CSR.
- Select the length of time for which you’d like the certificate to be valid.
- Select a Verification Method. Typically you will want to leave this set to “Automatic”.
- Click the Purchase SSL Certificate button to order the certificate and have it charged to your card on file.
Step #3: Verify and Obtain your SSL Certificate
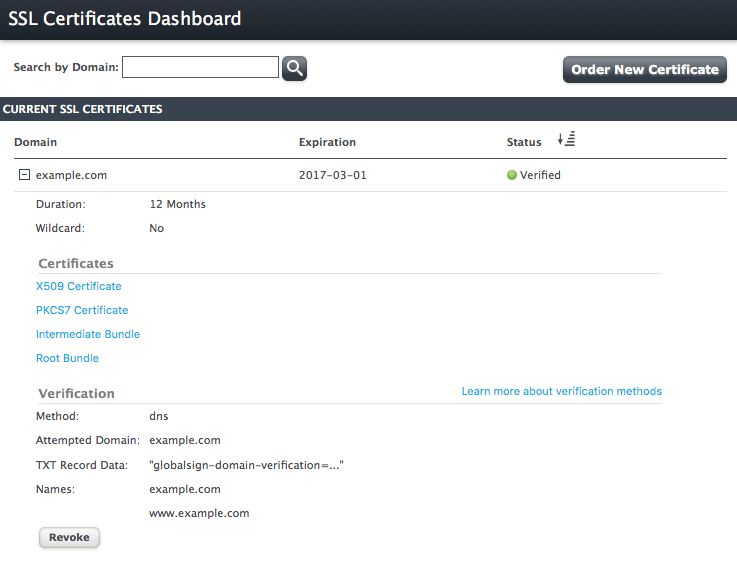
- Your SSL certificate is accessible from your Manage dashboard.
- Click on Overview in the left menu of your Manage dashboard.
- Click on SSL Certificates under the Services section.
- Click the [ + ] button next to the domain name to expand the window.
- Click the Dashboard button to access the SSL dashboard.
- If automatic verification was successful, you will see a green button next to Verified in the Status column. If automatic verification failed, follow the instructions for verifying the SSL via DNS record, HTML meta tag, or email at Installing an SSL Certificate.
- Once the certificate status is displayed as Verified, click the link labeled X509 Certificate to pop up a window containing the certificate. You will need to copy the contents of the certificate in that popup before returning to your Plesk browser window or tab.
Important: Leave this window up, as you may need to return to it to copy and paste the Intermediate Bundle from this screen into the CA Certificate field in Plesk.
Step #4: Install the SSL Certificate in Plesk
- Now return to the Plesk browser window or tab you left open in Step #1, and paste the certificate into the Upload the certificate as text field just above the CSR.If the CA certificate does not fill in automatically, you will need to copy the Intermediate Bundle from the Manage browser window or tab you left open in Step #3 into the CA certificate field.
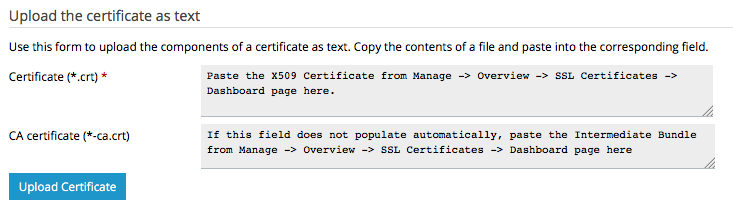
- Now click the Upload Certificate button to add the certificate.
Step #5: Configure the Domain to Use SSL
Now that the SSL certificate is uploaded, all that remains is to enable SSL support for the domain.
- In the Plesk menu, click on Websites & Domains.
- Click on the domain name.
- Click on Hosting Settings.
- Scroll down to the Security section, select the certificate to use and check the box next to SSL support.

Related Articles:


About the Author: dpepper


Categories
Have Some Questions?
Our Sales and Support teams are available 24 hours by phone or e-mail to assist.
1.800.580.4985
1.517.322.0434
Latest Articles
How to use kill commands in Linux
Read ArticleChange cPanel password from WebHost Manager (WHM)
Read ArticleChange cPanel password from WebHost Manager (WHM)
Read ArticleChange cPanel password from WebHost Manager (WHM)
Read ArticleChange the root password in WebHost Manager (WHM)
Read ArticleWant More Great Content Sent to Your Inbox?