


How to Enable Spam Protection in cPanel
II. How to Create an Email Account in cPanel
III. How to Set a Default Address in cPanel
IV. How to Set Up an Autoresponder in cPanel
V. How to Set Up Email Forwarding in cPanel
VI. How to Set Up Email Filters in cPanel
VII. How to Enable Spam Protection in cPanel
VIII. How to Add an MX Entry in cPanel
IX. How to Use Webmail From Within cPanel
X. How to Change Your cPanel Password
XI. How to Update Your Contact Information in cPanel
XII. How to Change Your cPanel Theme
XIII. How to Change the Primary Language in cPanel
XIV. How to Add a Record With the DNS Zone Editor in cPanel
XV. How to Backup Your Website in cPanel
XVI. How to Use the Disk Space Usage Tool in cPanel
XVII. How to Create Additional FTP Accounts in cPanel
XVIII. How to Password Protect a Directory in cPanel
XIX. How to Use the IP Blocker in cPanel
XX. How to Set Up Hotlink Protection in cPanel
XXI. How to Create a Subdomain in cPanel
XXII. How to Create an Addon Domain in cPanel
XXIII. How to Create a Domain Alias in cPanel
XXIV. How to Set Up Domain Redirects in cPanel
XXV. How to Create a MySQL Database in cPanel
XXVI. How to Use the Index Manager in cPanel
XXVII. How to Create Custom Error Pages in cPanel
XXVIII. How to Set Up a Cron Job in cPanel
Spam email is a hard-fought battle in server administration. Knowing how to enable spam protection in cPanel helps you protect your server and systems by securing your email accounts. These features save time and money lost from potential threats and breaches.
Use this guide to enable spam protection in cPanel.
Requirements
- A server with cPanel.
- The login credentials for cPanel.
Enable Spam Protection in cPanel
1. Login to cPanel.
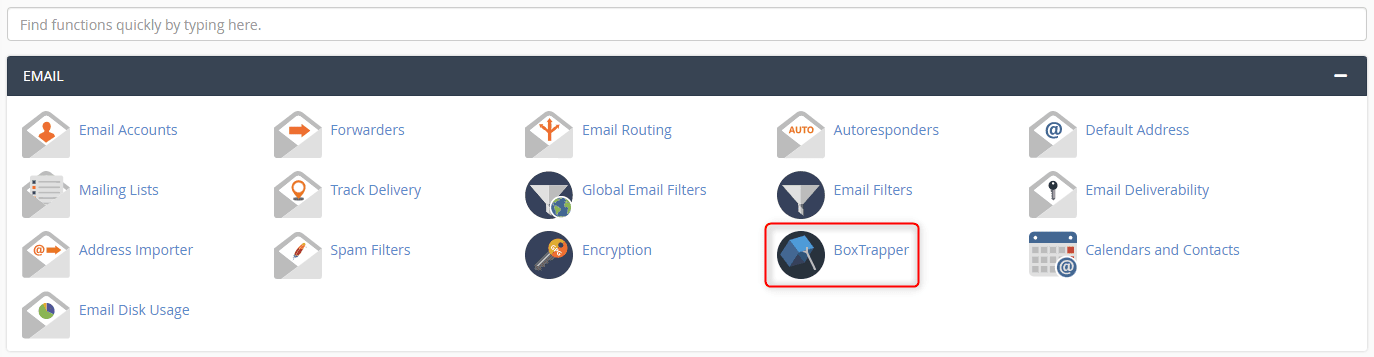
2. Box Trapper protects your inbox from spam by requiring all email senders who aren’t on your whitelist to reply to a verification email before you can receive their mail. To enable and configure it, click BoxTrapper under the email section.
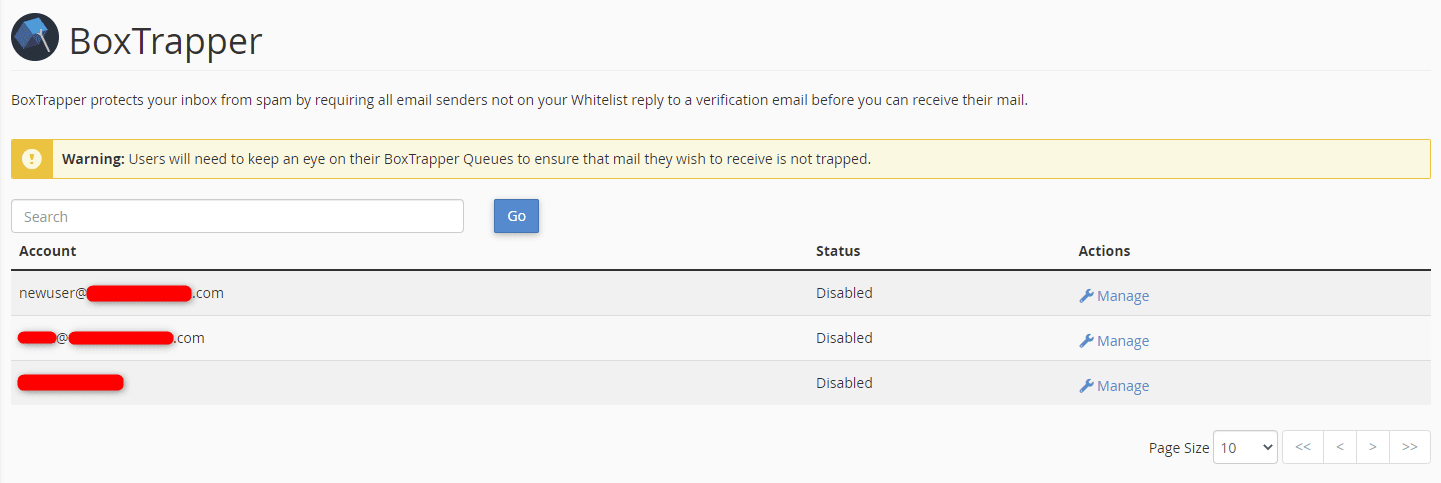
3. Click Manage next to an email address to enable BoxTrapper.
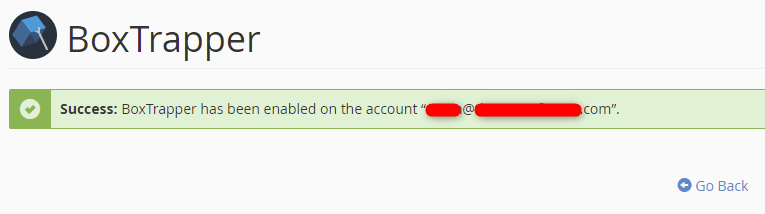
4. Click the Enable button.
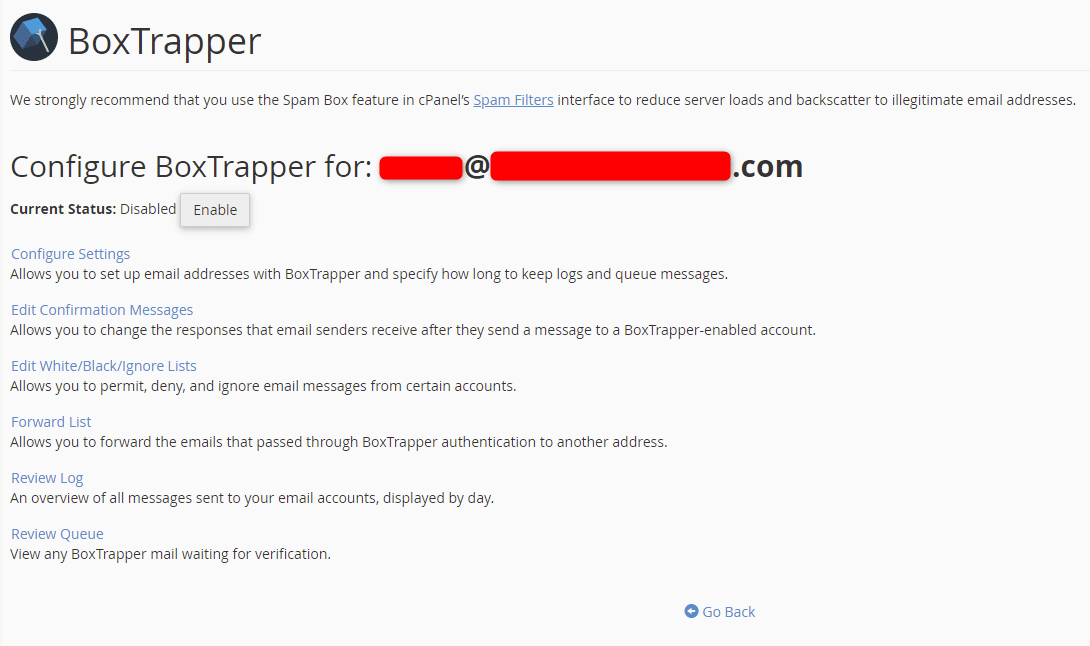
5. You receive a confirmation that BoxTrapper is enabled for this address. Click Go Back.
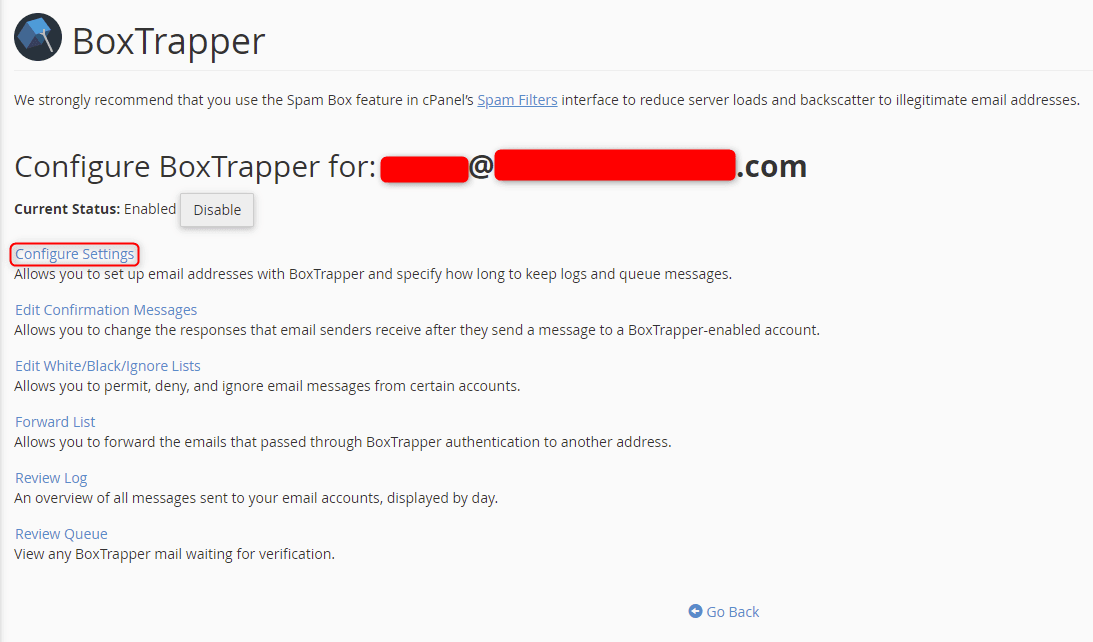
6. After enabling BoxTrapper, you’ll want to configure your settings. Click Configure Settings.
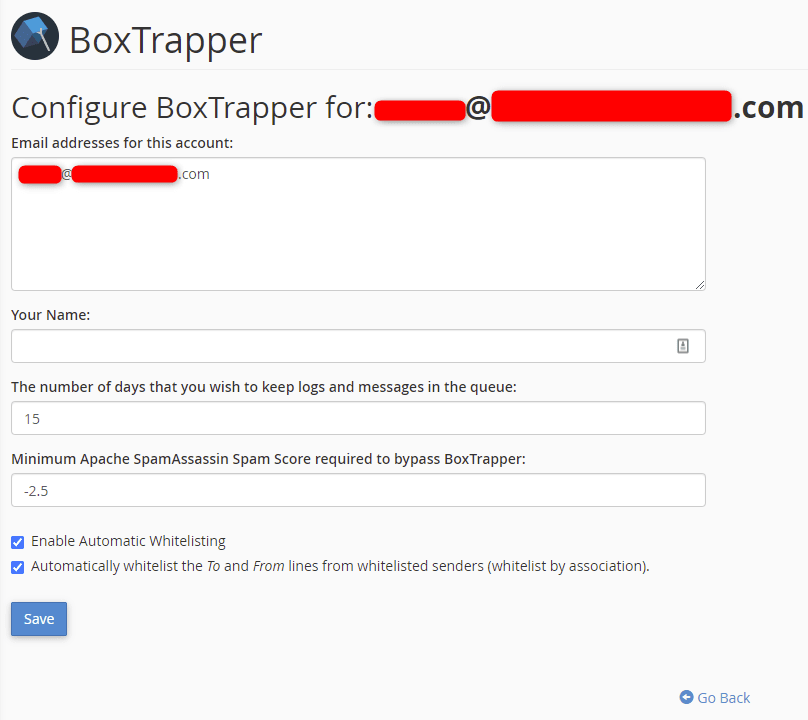
7. You can set various options here, including auto-whitelisting for addresses to which you send an email. Update the settings you wish and click Save.
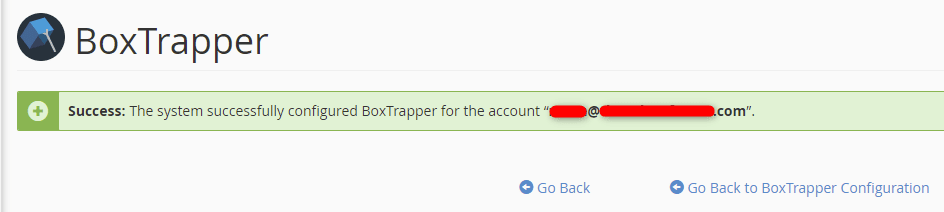
8. A green confirmation message appears. Click Go Back to BoxTrapper Configuration to go back to the main BoxTrapper screen.
9. Next, click Edit Confirmation Messages.
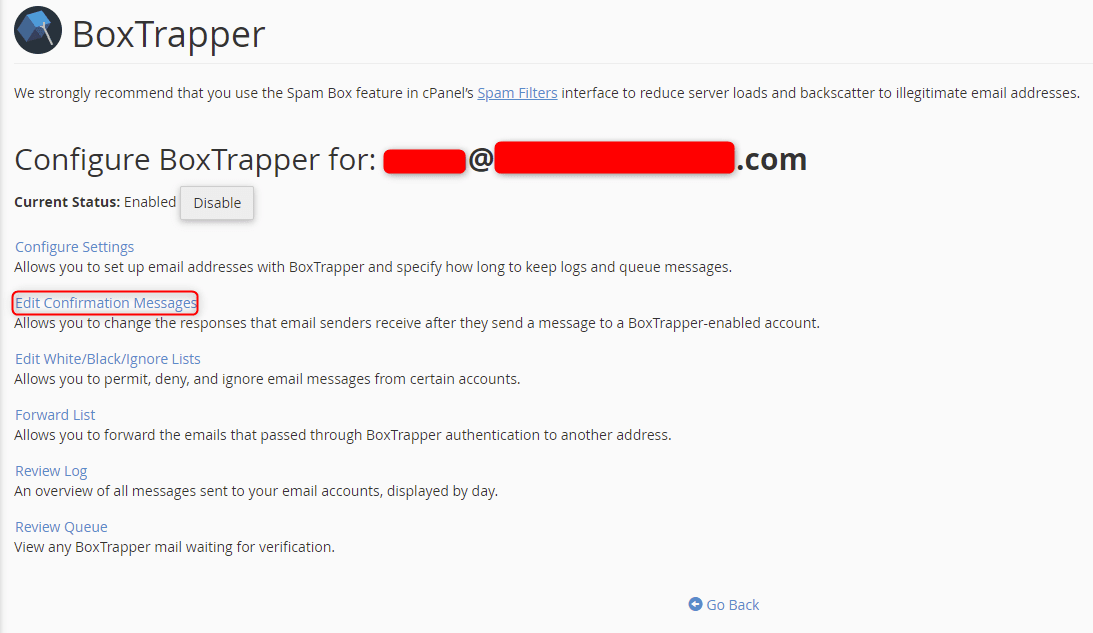
10. Confirmation messages are responses email senders receive after sending a message to a BoxTrapper-enabled account. You can edit the standard confirmation messages already set up for you. Once complete, go back to the main BoxTrapper screen.

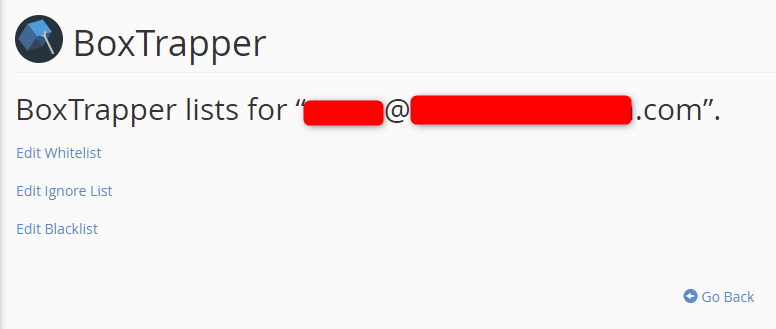
11. Click Edit White/Black/Ignore Lists.
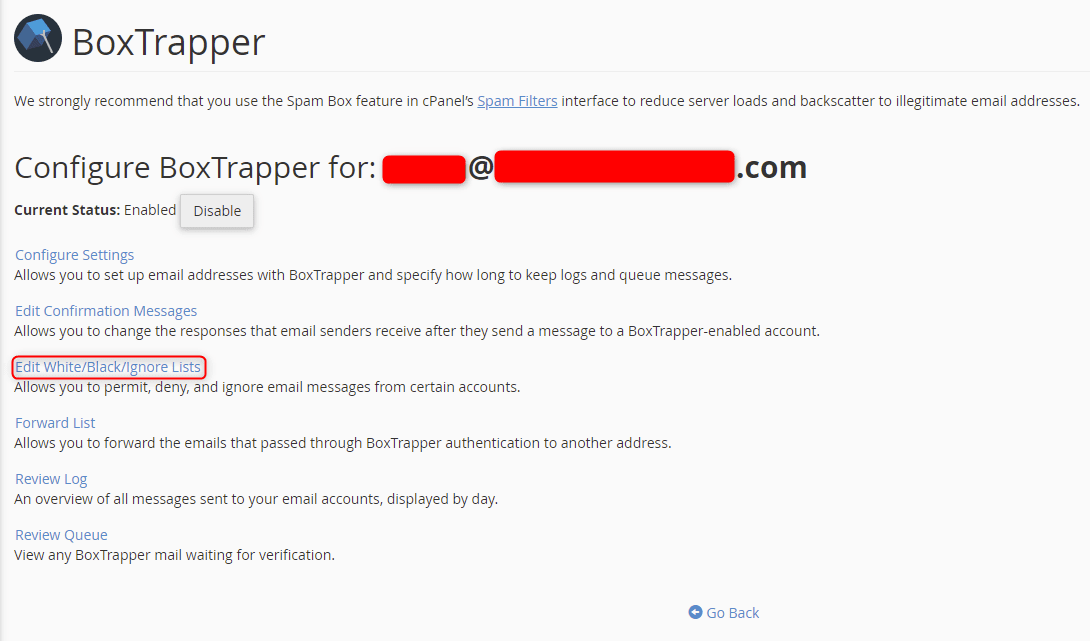
12. You can add addresses to your Whitelist, Blacklist, and Ignore list in order to permit, deny, and ignore messages from specific accounts.
From here, you can go back to the BoxTrapper main screen to alter some of the many other settings. Once you have BoxTrapper configured to your requirements, you’ll notice a reduction in spam.
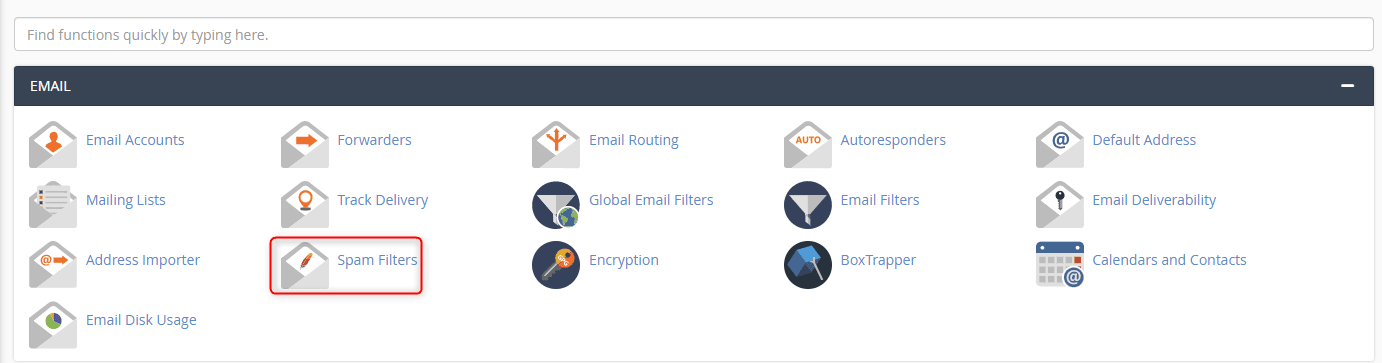
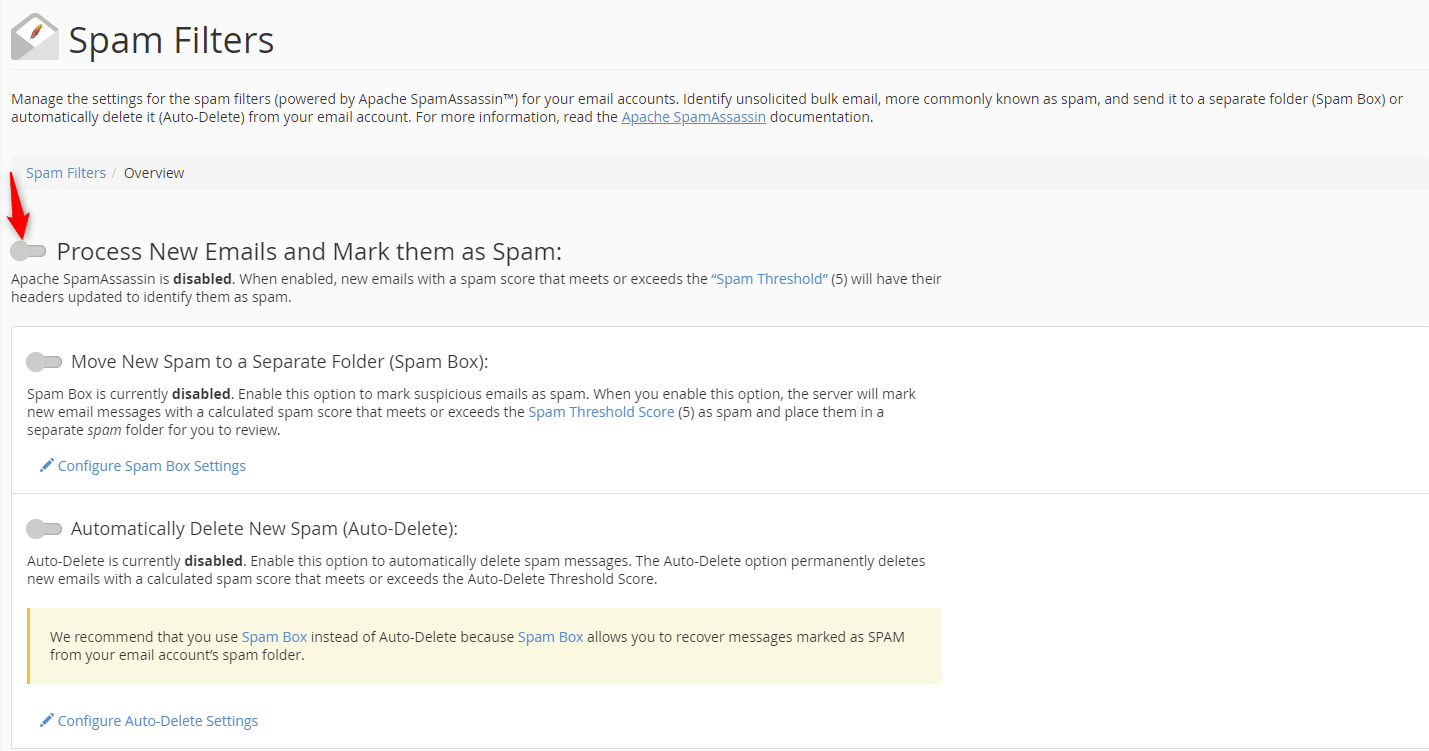
13. Another option for controlling spam is SpamAssassin. You can use SpamAssassin in conjunction with BoxTrapper for maximum spam control, or you can use each tool individually. To enable SpamAssassin, click Spam Filters from the cPanel home screen.
14. Click the toggle to enable SpamAssassin.
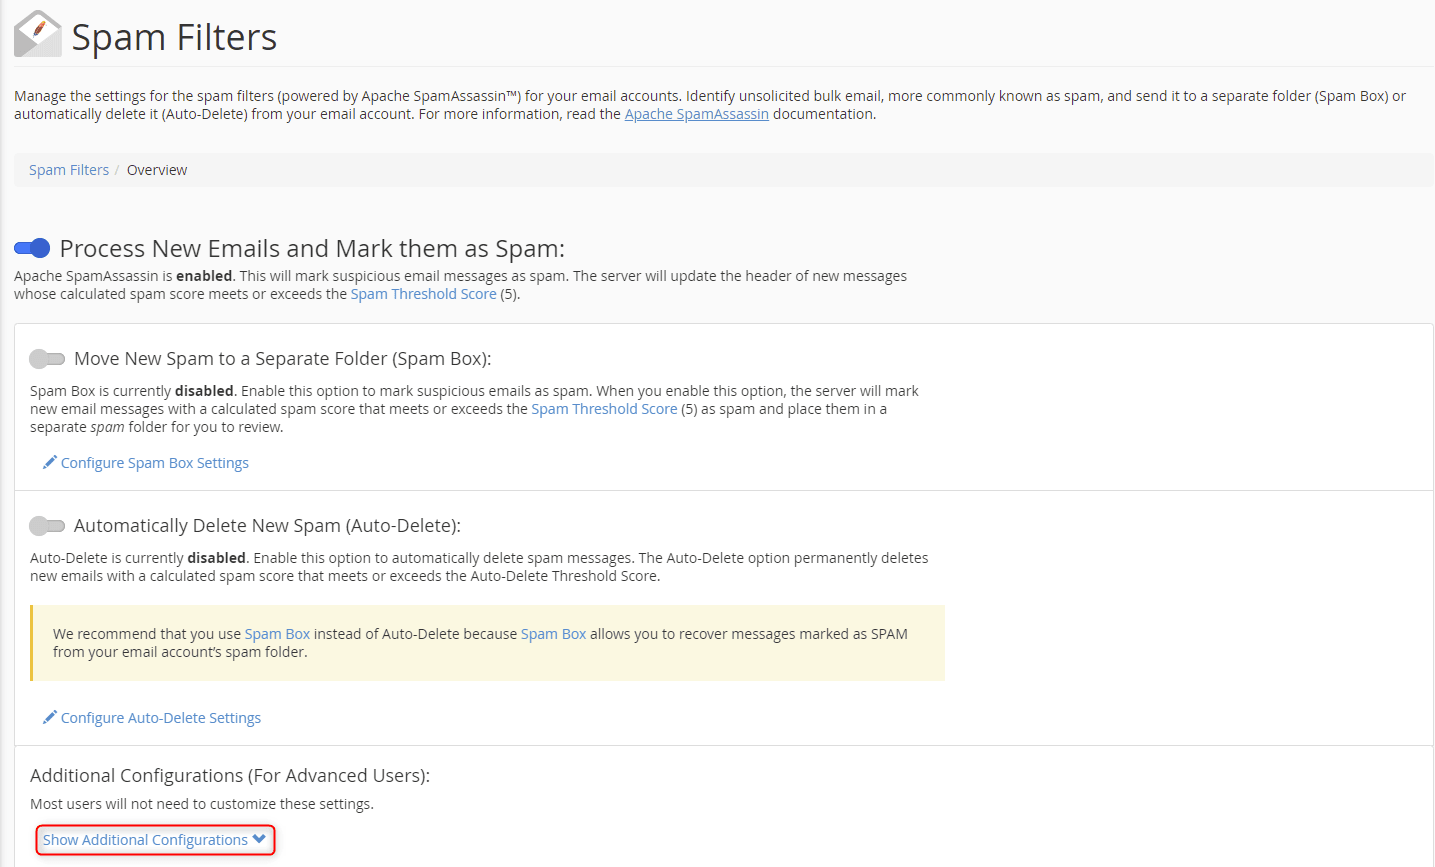
15. A green confirmation appears in the top right-hand corner and the toggle turns on and turns blue.


16. To further configure SpamAssassin, click Show Additional Configurations at the bottom of the Spam Filters page. This option only exists once SpamAssassin is enabled.
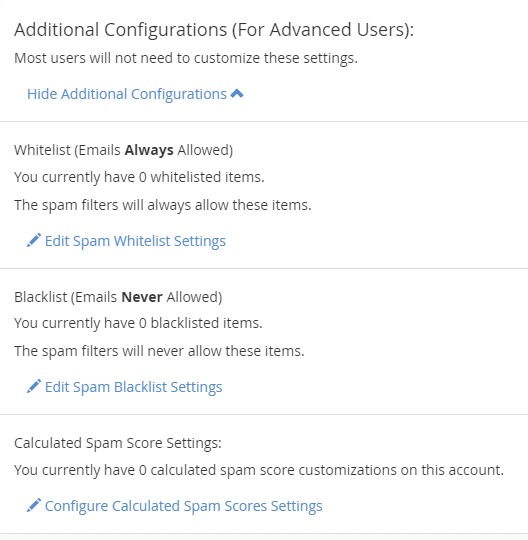
17. Here you can set up or edit your whitelist, blacklist, and calculated spam score settings.
Wrapping Up
This tutorial walks you through enabling spam protection in cPanel. The ability to enable spam protection in cPanel means your email accounts have a layer of security between spam perpetrators and your users.
Liquid Web offers cPanel environments for VPS Hosting, Cloud Dedicated Servers, and Dedicated Servers as well as support for these and other functions within the control panel. Contact our sales team to get started.
Check out the next tutorial in our cPanel series on How to Add an MX Entry in cPanel.
Related Articles:


About the Author: Ronald Caldwell
Ron is a Technical Writer at Liquid Web working with the Marketing team. He has 9+ years of experience in Technology. He obtained an Associate of Science in Computer Science from Prairie State College in 2015. He is happily married to his high school sweetheart and lives in Michigan with her and their children.


Our Sales and Support teams are available 24 hours by phone or e-mail to assist.
Latest Articles
How to use kill commands in Linux
Read ArticleChange cPanel password from WebHost Manager (WHM)
Read ArticleChange cPanel password from WebHost Manager (WHM)
Read ArticleChange cPanel password from WebHost Manager (WHM)
Read ArticleChange the root password in WebHost Manager (WHM)
Read Article