


How to Create a Storm Server
Once you have decided that a Cloud Server is the best fit for your hosting project, it is relatively easy to set up in just a few steps. In fact, it can be done from any computer. The first step is to log into your manage interface. Manage provides you the tools needed to view real-time statistics, resize, and create or destroy a fully managed VPS server.
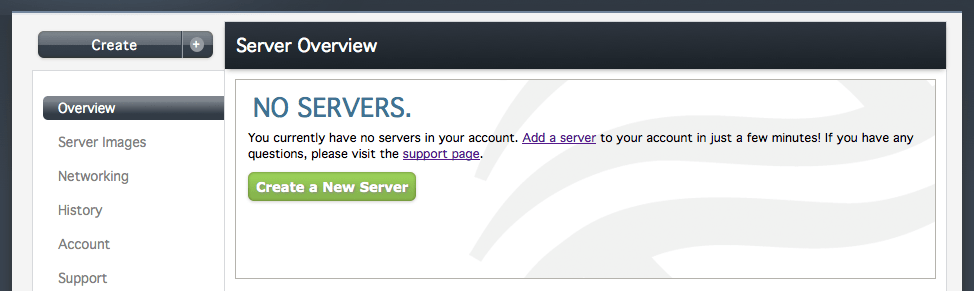
Once you are logged in you will be presented with a screen similar to this. Should you have existing servers with us they would be listed here. Press the green button to continue.
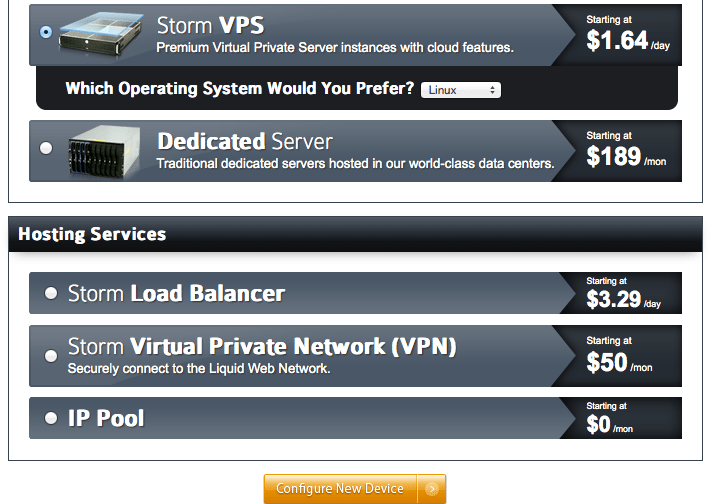
This screen will show you all the available Storm products we offer. For now, we are going to focus on a Linux Storm VPS.

When you click the Storm VPS option you will be shown a drop-down menu to choose an operating system. As mentioned, we will be choosing Linux. Once you choose your option, click on the orange Configure New Device button at the bottom.
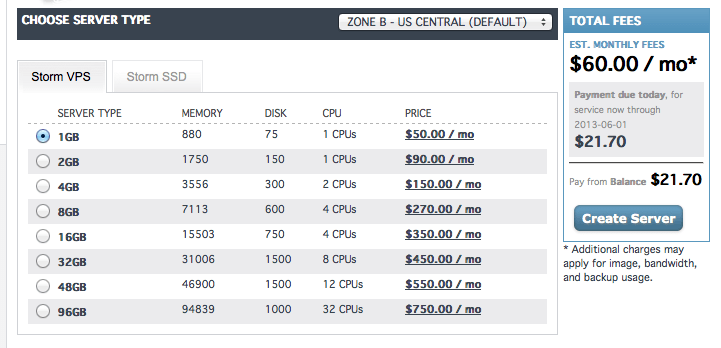
On the “configure your device“ screen you are presented with a somewhat lengthy list of options. We are going to focus on one section at a time. The first one allows you to select the plan you want. These plans are preset and come with the hardware specifications that are listed. At the top of this section, you can change the location of your server. It will default to US Central – Zone B, which is our Lansing, Michigan data center in our newest zone. You can safely ignore this section unless you have specific needs for other zones/regions.
Under that, you can select the server type, either Storm VPS or Storm SSD. We are going to select a 1 GB Storm VPS which shows as $50/Month. You can ignore the pricing on the right for now.
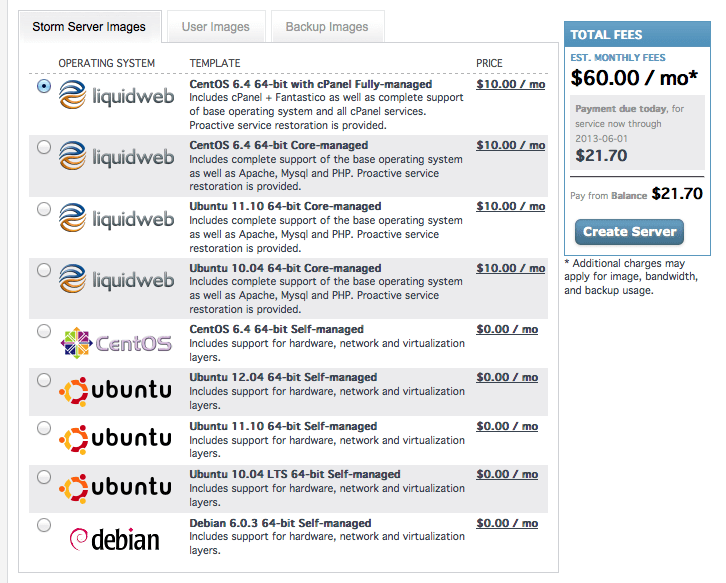
As we progress down the page you will get into the Storm Server Images section. This is where you pick not only the level of management you would like but also the specific operating system options. For a VPS each managed image is $10/Month, which is why it showed $60 on the pricing section before. This will default to our fully manage CentOS image with cPanel/WHM included. Here you also have the option to create a server, based off an image you saved or off a backup from another server.
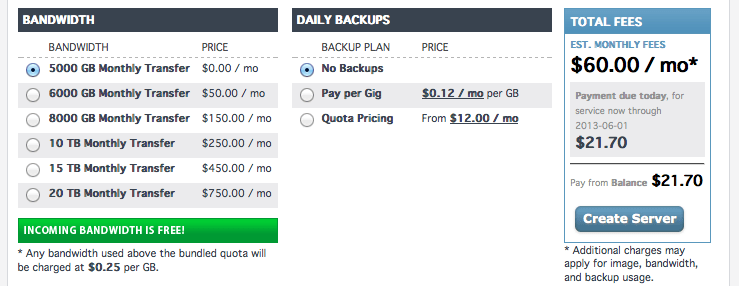
Once you have selected your image and level of management, move on to your bandwidth and backups options. Each VPS comes with 5000 GB outgoing bandwidth and free incoming at no extra cost. Storm servers can have cPanel account backups taken and stored locally via cPanel/WHM, but we also offer off-server backups to be taken daily. You can either select a quota package that will save backups until the quota is met, then start deleting the oldest ones; or you can pay for each GB taken and choose the number of daily backups to keep.
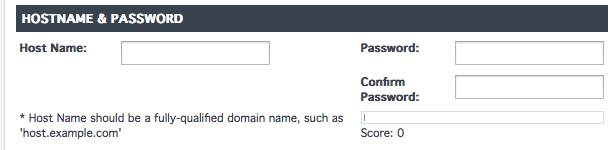
Next, pick your hostname and password. Your hostname is more or less a name for your server. The format is normally host.example.com. It is highly recommended that you use a fully qualified and registered domain name when doing this.
When setting up your server’s password, it must be secure. Your best bet is to use a password that is at least 8 characters long, has a number, special character and, a capital letter.
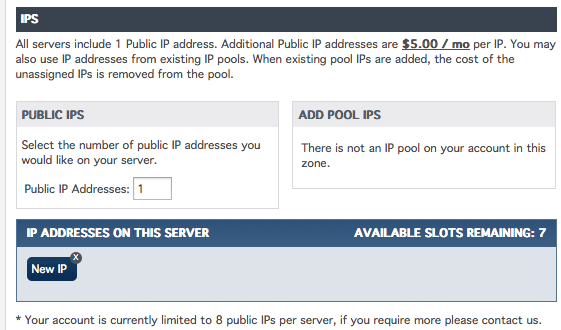
Once you have named your server and set a strong password, choose how many IP addresses you would like on the server. You get a single IP by default, which is enough for most setups. Should you have the need for more, each additional IP costs $5 per month.
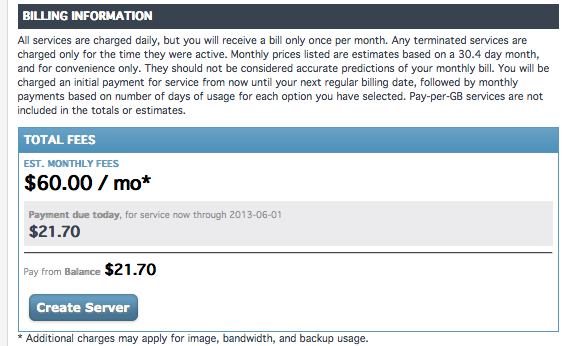
Now that you have customized your server, the bottom of the page will show you the total monthly cost associated with your choices. If you are creating the server in the middle of the month, it will show you the pro-rated amount you will be charged today for creating it. Once you’ve accepted the costs you can click on Create Server to continue.
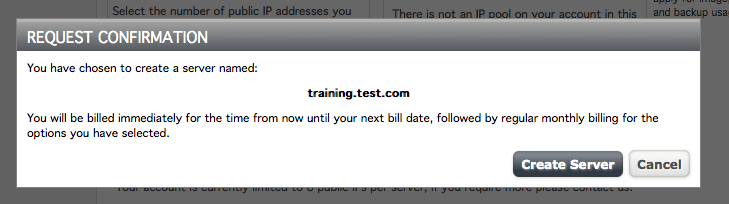
A smaller window will pop up that is just asking for a second confirmation you wish you create your server.
After you click Create Server a second time you will be taken to the main dashboard of your manage interface. This will show the current server(s) you have along with any progress of a server being created, destroyed or resized.

At this point, the only thing left to do is wait for the server to finish being created. You will get an email when the process finishes and you can begin to use your server.
===
Liquid Web’s Heroic Support is always available to assist customers with this or any other issue. If you need any assistance, please feel free to contact us on our Toll Free line 1.800.580.4985 or, use our International number 517.322.0434. You can also open a ticket with us using the support@liquidweb.com email or, open a ticket from your Manage interface. Lastly, there’s always our chat option if you need quick info on smaller issues. Whatever means you choose, do not hesitate to contact us, as we are always standing by to offer our assistance and support! Thanks for hosting with Liquidweb!
Related Articles:


About the Author: J. Mays
As a previous contributor, JMays shares his insight with our Knowledge Base center. In our Knowledge Base, you'll be able to find how-to articles on Ubuntu, CentOS, Fedora and much more!


Our Sales and Support teams are available 24 hours by phone or e-mail to assist.
Latest Articles
How to use kill commands in Linux
Read ArticleChange cPanel password from WebHost Manager (WHM)
Read ArticleChange cPanel password from WebHost Manager (WHM)
Read ArticleChange cPanel password from WebHost Manager (WHM)
Read ArticleChange the root password in WebHost Manager (WHM)
Read Article