Git & Continuous Deployment on Cloud Sites
If you’re used to using services such as GitHub or Bitbucket for continuous integration, chances are you’re wondering how you can setup continuous deployment for your website on Cloud Sites. Since Cloud Sites doesn’t have git or SSH access, you might think it’s impossible. Luckily, with a service like DeployBot and their SFTP deployment tools, it is actually very simple to deploy your code from your repository to Cloud Sites with a simple click. Here’s a quick tour on how to get up and running with DeployBot and Cloud Sites.
Creating a new site on Cloud Sites
If you haven’t done so already, you’ll first want to create your website on Cloud Sites. Once logged into your Cloud Sites dashboard, simply click on Create Website, input your domain name, choose your Framework, and then click on Create New Website.
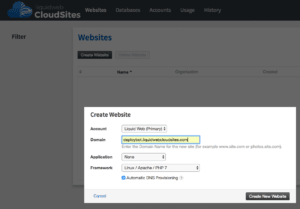
Your website should be ready to go within seconds. Next, you’ll want to create an FTP user so that Deploybot can connect to your site. Click on the website you wish to connect to, then head to the FTP section and click on Create User. Enter your details and select your home directory (in my case, I’ve selected the root directory).
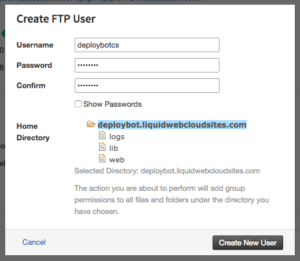
You’re now ready to head over to Deploybot and connect to your git repository and Cloud Sites.
Getting started with Deploybot
If you don’t already have a Deploybot account, go ahead and sign up here. The next step is to connect to a repository. Deploybot supports GitHub and Bitbucket directly, as well as any self-hosted git repository. For this demonstration, I’m going to connect to a GitHub account to deploy the latest version of WordPress (which I’ve simply cloned from WordPress’ repo to my own).
Connect your git repository
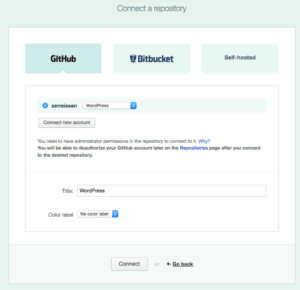
Once you’ve logged into the Deploybot dashboard, click on the Repositories tab in the upper lefthand corner and select Connect a repository. Then select the Github option and Connect new account. Follow the steps to authenticate with your GiHub account, and then select your repository from the dropdown, choose your title and click Connect.
Add an environment
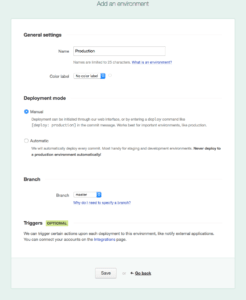
Next, go ahead and Add an environment. For this example, I’m going to create a production environment, keeping the Deployment mode set to Manual. If you’re deploying to a development site (dev.domain.com, for example), you may want to set it to Automatic.
Add a new server
The next thing you’ll want to do is Add a new server. For deployments on Cloud Sites, you’ll want to select the SFTP option. The important bits here are:
- Host: This is the hostname of the FTP server on Cloud Sites, (in my case this is ftp2.ftptoyoursite.com). You can find this in the FTP section in your Cloud Sites dashboard next to the Primary Server field.
- Port: Since we’re using SFTP, you’ll want to use port 22, which should be the default.
- Destination path: The public content directory on Cloud Sites is web/content which is what you’ll want to use here.
- Login/Password: This is the username/password that you chose for your FTP user in your Cloud Sites account.
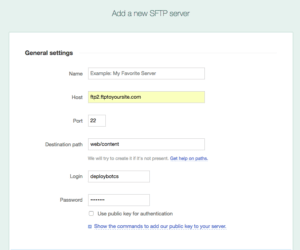
Leave the rest of the options on the page at their defaults and hit Save at the bottom of the page.
If everything was set correctly, you should now see a message under the Servers Configuration section that a connection was established. You can now click Overview at the top of the page and hit Deploy. Review the details and select Start Deployment to begin the deployment process.
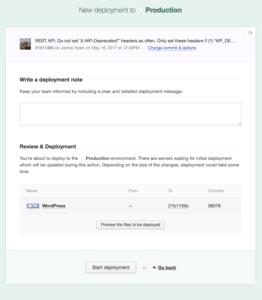
Now, anytime you commit changes, you can utilize Deploybot to upload your files to your website on Cloud Sites!
Related Articles:

About the Author: Chris Farmer
Chris Farmer is the previous Product Manager for Cloud Sites. Chris started with Cloud Sites in 2009 as a Support Technician and worked his way through as a Linux Administrator, Shift Lead, Project Manager and to his current role as the Cloud Sites PM. In his free time, he enjoys woodworking, biking, kayak fishing and spending quality time with his wife, Cecilia, and his toddler son, Jackson.
Our Sales and Support teams are available 24 hours by phone or e-mail to assist.
Latest Articles
How to use kill commands in Linux
Read ArticleChange cPanel password from WebHost Manager (WHM)
Read ArticleChange cPanel password from WebHost Manager (WHM)
Read ArticleChange cPanel password from WebHost Manager (WHM)
Read ArticleChange the root password in WebHost Manager (WHM)
Read Article


