
 Alex Gorzen
 Creating a table and remembering what all details need to go in it can be tricky if you are manually running commands to get it set up. phpMyAdmin can help with setting up the structure for the tables and makes the whole process quick and easy. This guide assumes that you have already logged in to PhpMyAdmin. Now let’s explore how to run SQL queries on a database.

This tutorial assumes you’ve already logged in to phpMyAdmin. Let’s learn how to use phpMyAdmin to create a table within a database.
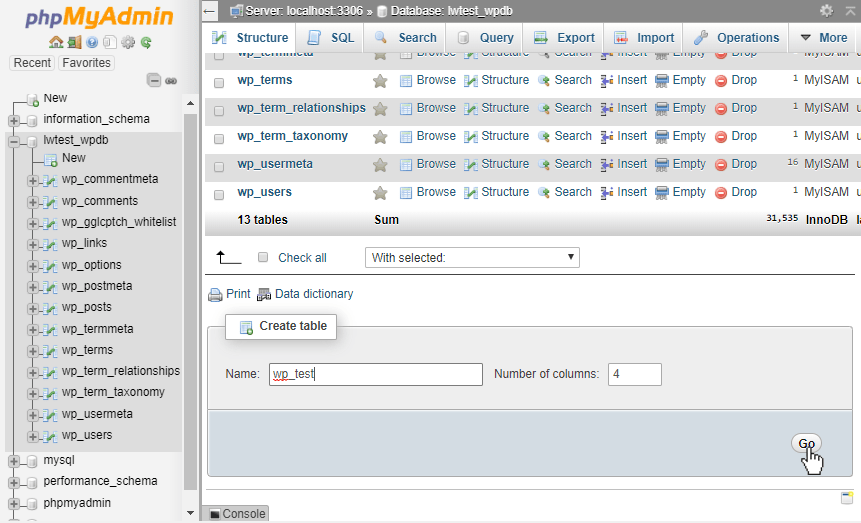
Step 1: To begin, we will select the database from the left-side menu to which we want to add the table. The database name we will be using is called lwtest_wpdb.

Step 2: This takes us to the Structure tab which lists any existing tables in the database. At the bottom of that page it has a “Create table” section. Add the table name and choose how many columns the table will have. After that click on the Go button in the bottom right corner.
Step 3: The table creation page gives boxes that we can fill out, like the Name of the column, the Type of data that will be stored in it, the character Length that the value will be limited to, and the Collation type that will be used to store the data. The collation type would depend on the data that will be stored in the record. If it’s an Integer then the collation would not matter, but for Text and other types that can accept many different characters, the collation might need to be set to something specific.
For instance, if foreign characters will need to be saved into the record, then the collation would need to be one that properly supports those characters and symbols.

There are other columns as well, but they don’t all need to be filled in to create the table. Setting the Primary Key in the Index box is recommended to help with sorting records and to avoid duplicate data.

Step 4: Then below the columns, we can set the Storage Engine type that the table will use. InnoDB and MyISAM are the most common to use, but other types are available if needed. InnoDB is generally preferred due to it only causing rows to be locked (instead of the whole table).

Step 5: Then click on the Save button at the bottom of the page.

Then the table is finally created! It’s ready to store information or it can be further modified if needed.

Conclusion
This guide went over the basics of using phpMyAdmin to create a table. In addition, the phpMyAdmin interface can help with more advanced configurations as well. The dropdown boxes make it easy to choose what settings the database needs without having to memorize all the options and formatting that would need to be done when creating tables through the command line.
We’d Love For You to Join Us!
Whether you’re hosting a VPS server, a dedicated server, a cloud server, or just hosting WordPress, if you are a Liquid Web customer experiencing any problems or issues when using phpMyAdmin, simply open a chat or ticket with us to speak with one of our knowledgeable System Administrators!