


Creating a new Product in WooCommerce
So you’ve just setup your new WooCommerce site, setup your store’s theme – what’s next? Well first, congratulations on setting up your new WooCommerce store!
Now you’re probably excited to take the next step: adding your products. This article will help walk you through adding new products to your WooCommerce!
Add a new product to WooCommerce
First, you’ll log into your site’s wp-admin dashboard. Almost all your store management will happen in the wp-admin area, so you’ll grow familiar with the interface and options pretty quickly.
Along the left side menu you’ll see Products. Hover on Products, then click Add New. This will bring up the add a new product screen.
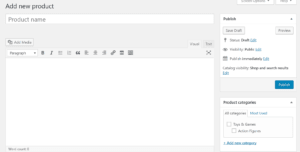
You can now enter the product title, a detailed description of your product, and a shorter description. You will also enter in your product data. This data includes the regular price, sale price, SKU, stock availability, and physical weight and dimensions.
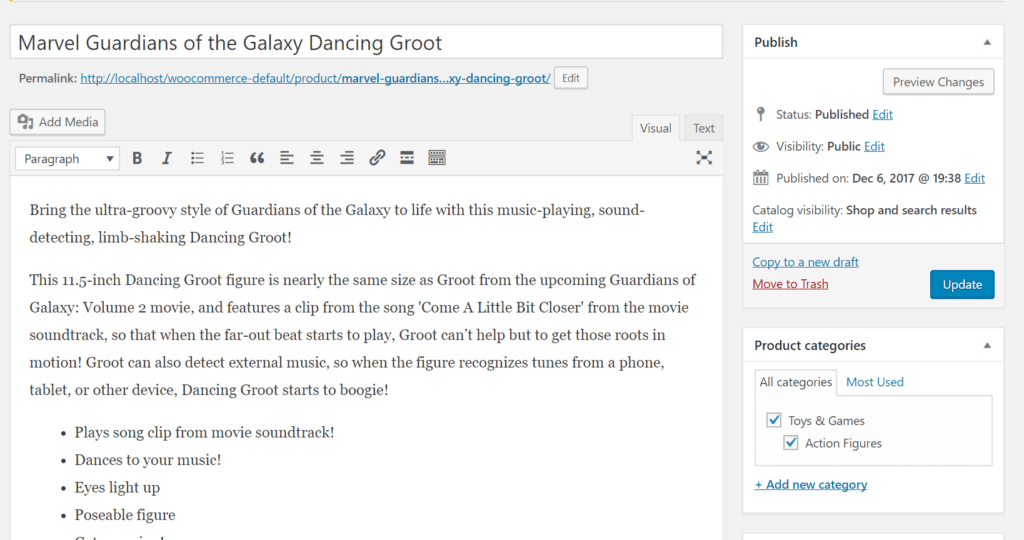
You can then select or add product categories in the sidebar. This will also be where you set product images and add images to the product gallery.
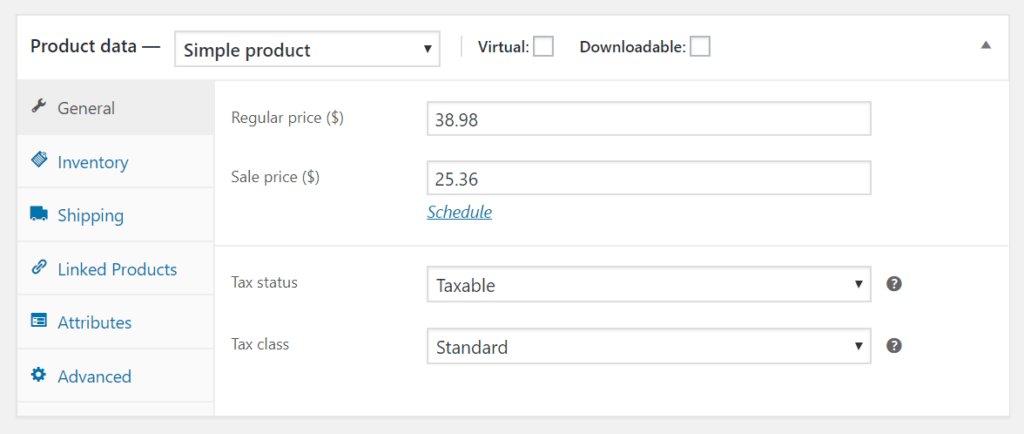
After writing up the main product description you’ll want to scroll down and set up the product parameters. For our example we’re using a ‘Simple Product’, at minimum you’ll want to set the basic product settings shown here.
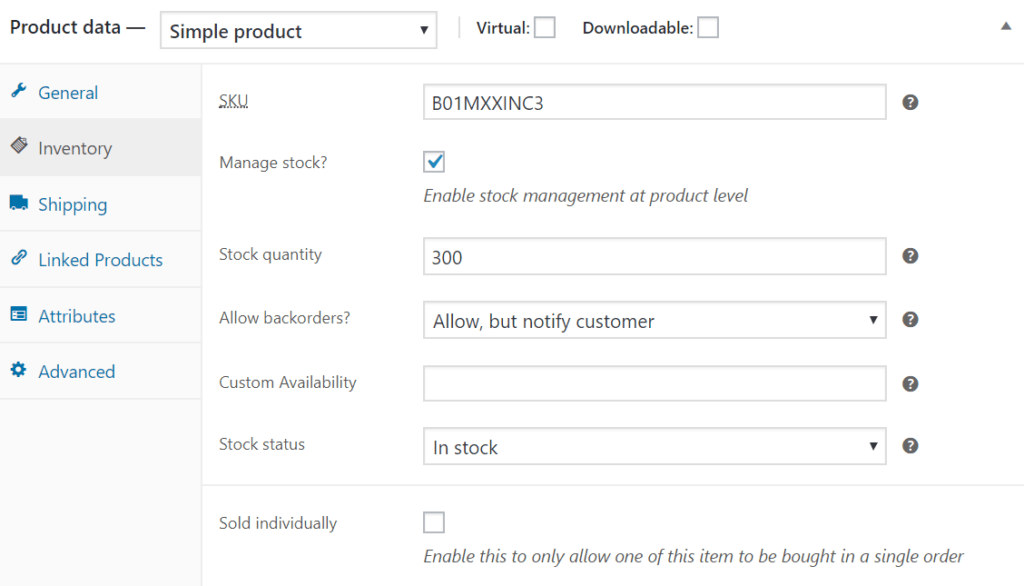
 Keep in mind, for the inventory tab, if the products you sell don’t use SKU’s you don’t need to include them. You also have the option of not tracking the stock of products if needed. In general though, you’ll probably want to have your WooCommerce manage your products stock to make inventory management easier.
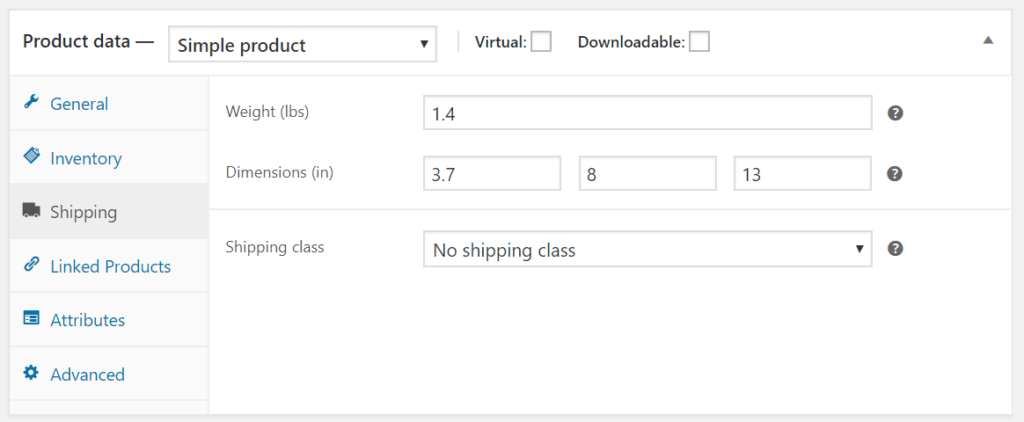
Assuming you’ll be selling physical products, you’ll also want to fill in the Shipping tab on the product data. This can help ensure that shipping estimations and charges are done correctly for the product.
 The Result: Checking your first Product
Now that you’ve got your first product created and all the details filled in you can see it on your front-end. The product page will be generated using the details that you provided in the product setup area. If you haven’t setup images already hop over to our managing product images article to learn that process! Once you’ve gotten product images in place you should see something similar to this product.
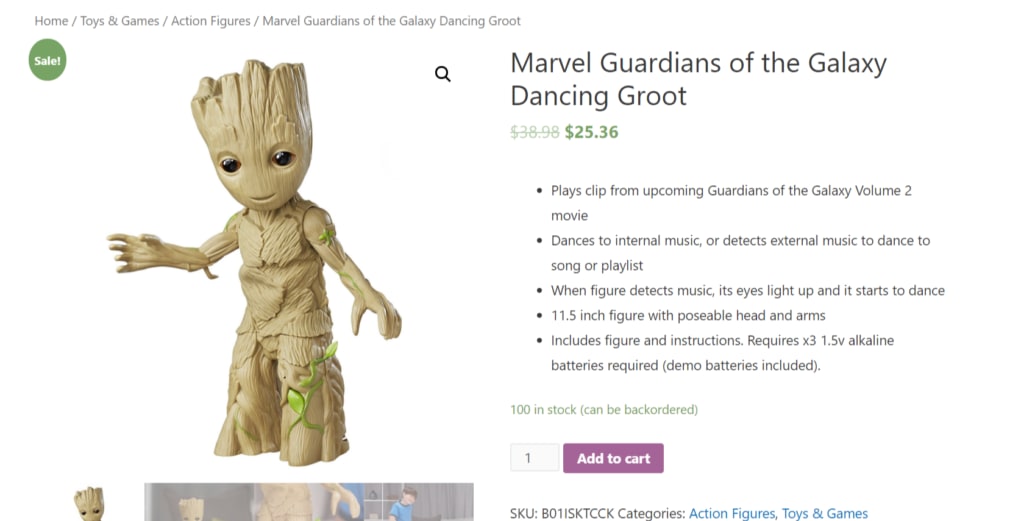
Keep in mind that your theme will determine how product pages look, so your site may not look exactly like this one. Overall a pretty simple process, right? Once you’ve done this once you can get the hang of things and it’ll be a breeze from there.
Related Articles:


About the Author: Dan Pock
Dan Pock does technical support at Liquid Web with a background in System Administration, Public Relations, and Customer Service. His favorite things include his cats, Oscar Boots, and Dash Nougat; experimenting with PHP; and making up recipes (or at least attempting to). You can find his coding hijinks on GitHub, where he shares most of his projects and open source work.


Our Sales and Support teams are available 24 hours by phone or e-mail to assist.
Latest Articles
How to use kill commands in Linux
Read ArticleChange cPanel password from WebHost Manager (WHM)
Read ArticleChange cPanel password from WebHost Manager (WHM)
Read ArticleChange cPanel password from WebHost Manager (WHM)
Read ArticleChange the root password in WebHost Manager (WHM)
Read Article