Creating an Auto Responder in cPanel
The Auto Responder functionality allows for cPanel to send a pre-made response to e-mails that are received by a given e-mail account. This is extremely useful for when someone is away from their e-mail for an extended period of time and they want to convey that to other users.
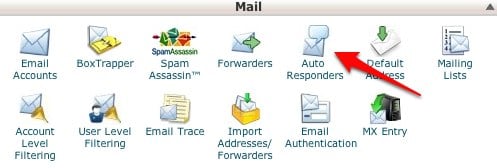
First you will want to login to your cPanel account. Once logged in, please navigate to the Auto Responder icon in the e-mail section of the front page.
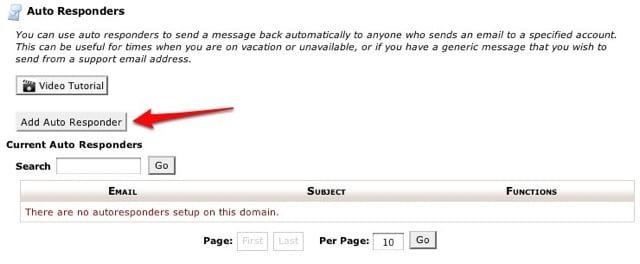
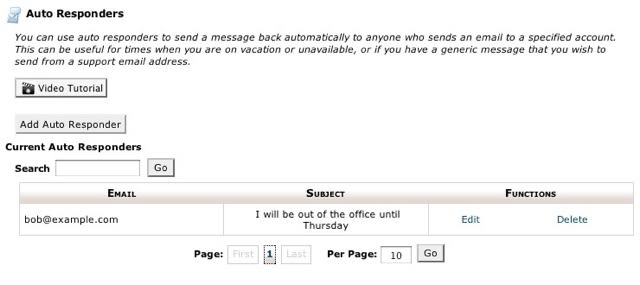
Once on the Auto Responder page, click on the link to add an auto responder.
That page will take you to a creation page, that will look like the following.
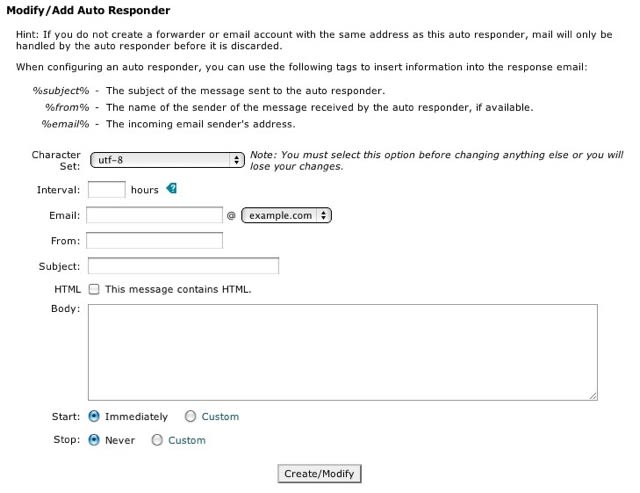
From here you can create the auto responder. There are many options you will need to input in order for the auto responder to work.
- The Character Set allows you to change the character set that the e-mail is sent it. The default is utf-8, which should work for most users.
- The Interval allows you to put a delay on when the auto responder will reply back to the person that e-mailed you. If set to zero, the system will respond as soon as the e-mail is received.
- The Email section allows you to specify which e-mail you want the system catch e-mail for.
- The From section allows you to specify a name of for the from line on the e-mail.
- The Subject Line allows you to specify what the subject of the e-mail will be.
- The HTML checkbox allows you specify whether the body of the e-mail contains HTML or not.
- The Body section allows you to specify what the body of the message is going to be.
- The Start and Stop sections allow you to specify the times you would like the auto responder to be active. By default, the responder will start immediately and have no end date.
In addition to these options, cPanel provides three tags that can be used to personalize the message the auto responder sends.
- The %subject% tag allows you to put the subject of the e-mail sent to auto responder in the message.
- The %from% tag allows you to put the name of the sender in the message, but only if it’s available.
- The %email% tag allows you to put the incoming e-mail into the message.
This is what the auto responder form looks like completed.
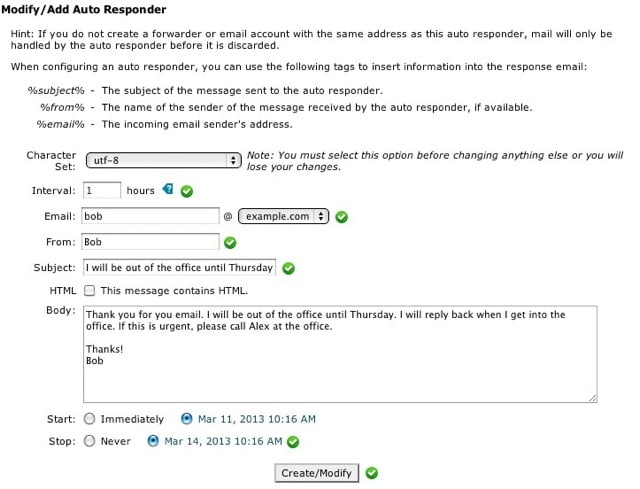
Once you are happy with the auto responder, clicking on the Create/Modify button will create the auto responder itself. cPanel will bring you back to the main page where you will be able to modify or delete the auto responder as needed.
If you ever find yourself having trouble creating an auto responder, please do not hesitate to contact our 24/7/365 support for assistance.
===
Liquid Web’s Heroic Support is always available to assist customers with this or any other issue. If you need our assistance please contact us:
Toll Free 1.800.580.4985
International 517.322.0434
Email Liquid Web Support
Liquid Web Manage Account
Related Articles:

About the Author: Matt Aurand
Our Sales and Support teams are available 24 hours by phone or e-mail to assist.
Latest Articles
Change cPanel password from WebHost Manager (WHM)
Read ArticleChange cPanel password from WebHost Manager (WHM)
Read ArticleChange cPanel password from WebHost Manager (WHM)
Read ArticleChange cPanel password from WebHost Manager (WHM)
Read ArticleChange the root password in WebHost Manager (WHM)
Read Article


