
 Ronald Caldwell
 What is NGINX?
NGINX is an open source Linux web server that accelerates content while using low resources. NGINX provides:
- Performance.
- Stability.
- Load balancing.
- Reverse proxy.
- Mail proxy.
- HTTP cache.
NGINX does not execute PHP scripts by default and must be configured to do so. This tutorial helps with your NGINX and PHP configuration to enable and test PHP capabilities with your server.
There was a flaw uncovered in PHP versions before 7.2.24 regarding PHP-FPM and NGINX. The regexp in the fastcgi_split_path_info directive can be exploited, leading to remote code execution. A patch was released in PHP 7.2.24 and 7.3.11 to address this issue.
Before Getting Started
- Log in as root on your Ubuntu 16.04 LTS server, or add sudo before each command that does not already have it.
- Install NGINX on your Ubuntu 16.04 server.
- This tutorial uses NGINX 1.10.3. While older versions may work, it is a good idea to update to the latest version available before trying to configure PHP.
- This tutorial is running php7.0-fpm. PHP 5.6 is end of life and no longer supported.
Looking for a reliable Ubuntu VPS to run NGINX and PHP seamlessly? Deploy your Ubuntu server today with Liquid Web.
Step 1: Update All Packages
Run the following command to update all Linux packages.
sudo apt-get update && apt-get upgrade
Use the following command to check the current version of NGINX.
nginx -v
The result is the following output.

The best practice is to use the latest version of NGINX. Backup your NGINX and PHP configuration before you make any changes.
Test your NGINX configuration file for syntax errors with the following command.
nginx -t

If successful, you get a similar output to the following.
The nginx -t command gives you a starting point to look for errors if this was unsuccessful.
NGINX starts on its own after install. However, here are some commands to have on hand for controlling NGINX.
sudo systemctl stop nginx.service
sudo systemctl start nginx.service
sudo systemctl enable nginx.service
sudo systemctl restart nginx.service
Step 2: PHP Install and Version Check
If you need to install PHP, you can run the following line.
sudo apt-get -y install php7.0 php7.0-fpm
Replace 7.0 with whatever version of PHP is the most recent. You can check for updates here.
Alternatively, if you need to update PHP to the latest version, make a backup before any changes, then run the following.
sudo apt-get upgrade
Now it is time to check that PHP is running and what PHP version. Do so with the following command.
sudo systemctl status php7.0-fpm
You will see a similar output to this.

Step 3: NGINX PHP Configuration
Once NGINX and PHP are running on your system setup, configure the PHP settings.
From home, change directories into your NGINX folder using the cd command.
cd ~
cd /etc/nginx
To configure your NGINX PHP setup settings, cd into the etc/php folder.
cd etc/php/
We are looking for a file called the php.ini file. Access the file from your text editor using the following command.
vim 7.0/fpm/php.ini
Or
vim 7.1/fpm/php.ini
The folders differ depending on the PHP version used. Replace the 7.0 or 7.1 with the version of PHP you are using.
The php.ini is a large file that allows customization of your environment. The best practice is to make a copy of this file before making any changes. Use the following command to make a copy of the file.
cp php.ini php.ini_copy
In the Vim text editor, use the I command to insert, the Esc command to exit, and the :wq command to save the file. If you need to leave the file without saving it, use :q. Feel free to use the text editor with which you are most comfortable.
Here are some of the recommended values for the php.ini file.
max_execution_time = 300
max_input_time = 60
memory_limit = 256M
upload_max_filesize = 100M
Find these variables in the file and update the values.
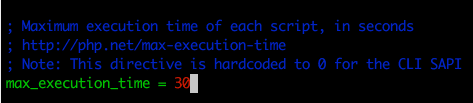
Before Edit :
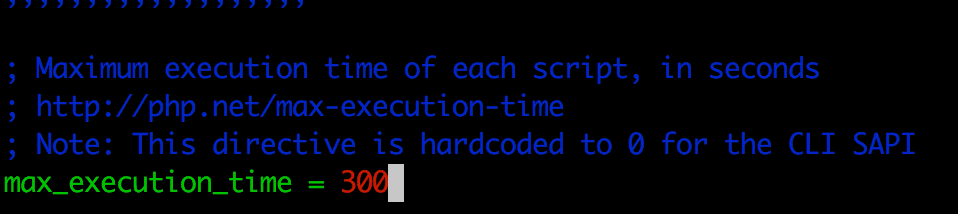
After edit:
Step 4: Default Sites Configuration
Now it is time to set your default sites environment. Open your sites configuration file. By default, it is at the following path.
/etc/nginx/sites-available/default
You can use the cd command to get there or open it using vim.
Remove the following commented out lines for both PHP7.0 and PHP 7.1.
PHP 7.0#
server {
listen 80 default_server;
listen [::]:80 default_server;
# SSL configuration
#
# listen 443 ssl default_server;
# listen [::]:443 ssl default_server;
#
# Note: You should disable gzip for SSL traffic.
# See: https://bugs.debian.org/773332
#
# Read up on ssl_ciphers to ensure a secure configuration.
# See: https://bugs.debian.org/765782
#
# Self signed certs generated by the ssl-cert package
# Don't use them in a production server!
#
# include snippets/snakeoil.conf;
root /var/www/html;
# Add index.php to the list if you are using PHP
index index.html index.htm index.nginx-debian.html;
server_name _;
location / {
# First attempt to serve request as file, then
# as directory, then fall back to displaying a 404.
try_files $uri $uri/ =404;
}
# pass the PHP scripts to FastCGI server listening on 127.0.0.1:9000
#
location ~ \.php$ {
include snippets/fastcgi-php.conf;
#
# # With php7.0-cgi alone:
# fastcgi_pass 127.0.0.1:9000;
# # With php7.0-fpm:
fastcgi_pass unix:/run/php/php7.0-fpm.sock;
}
PHP 7.1server {
listen 80;
listen [::]:80;
root /var/www/html;
index index.php index.html index.htm;
server_name example.com www.example.com;
location / {
try_files $uri $uri/ =404;
}
# pass PHP scripts to FastCGI server
#
location ~ \.php$ {
include snippets/fastcgi-php.conf;
#
# # With php-fpm (or other unix sockets):
fastcgi_pass unix:/var/run/php/php7.1-fpm.sock;
# # With php-cgi (or other tcp sockets):
# fastcgi_pass 127.0.0.1:9000;
}
}
Step 5: Testing PHP on NGINX
Once you have made the necessary edits, restart NGINX and PHP with the following lines.
sudo systemctl restart nginx.service
Use this syntax to test your PHP configuration by creating a phpinfo.php file in the /var/www/html file path.
sudo vim /var/www/html/phpinfo.php
Add the following inside the file and save.
<?php phpinfo( ); ?>
To test your setup, type your server IP followed by /phpinfo.php in your web browser.
http://yourserverip/phpinfo.php
If you see the following, you have successfully setup your NGINX PHP configuration.

Wrapping Up
Configuring NGINX to read PHP yields several benefits. While some additional pieces need to be in place before setting up your NGINX PHP configuration, the result is worth it.
Liquid Web’s dedicated servers have root access, allowing you to install and configure NGINX as you wish. Contact our sales team for more information.