Changes To CSF Country Blocking
Issue
Have you seen this error when restarting csf?
*ERROR*: Country Code Lookups setting MM_LICENSE_KEY must be set in
 /etc/csf/csf.conf to continue using the MaxMind databases
Recently MaxMind, the company that provides the IP lookup database based on country of origin for CSF, has decided to require a free license to be able to access that database now. They had to do this, so they can conform to the new state law in California for the CCPA act.
Several providers have provided more info about this issue in recent ConfigServer blog posts as well as being addressed in a blog post by MaxMind. Here are the GeoLite2 Databases that are affected.
- GeoLite2 Country
- GeoLite2 City
- GeoLite2 ASN
Steps for Modification
- Sign up for a MaxMind account. (no purchase required)
- Set your password and create a license key here: https://www.maxmind.com/en/accounts/current/license-key
- Set up your download mechanism by using the GeoIP Update program or create a direct download script.
- Once a key is obtained, there is a value in /etc/csf/csf.conf that needs to be updated with the free license key. After you make this change, be sure to restart CSF once the change has been made. Below is the specific value which has to be modified.
# MaxMind License Key:
MM_LICENSE_KEY = “addnewlicensekeyhere”
Once you make this change, make sure to restart CSF once the key is in place.
root@host [~]# csf -rSteps To Get A New Key
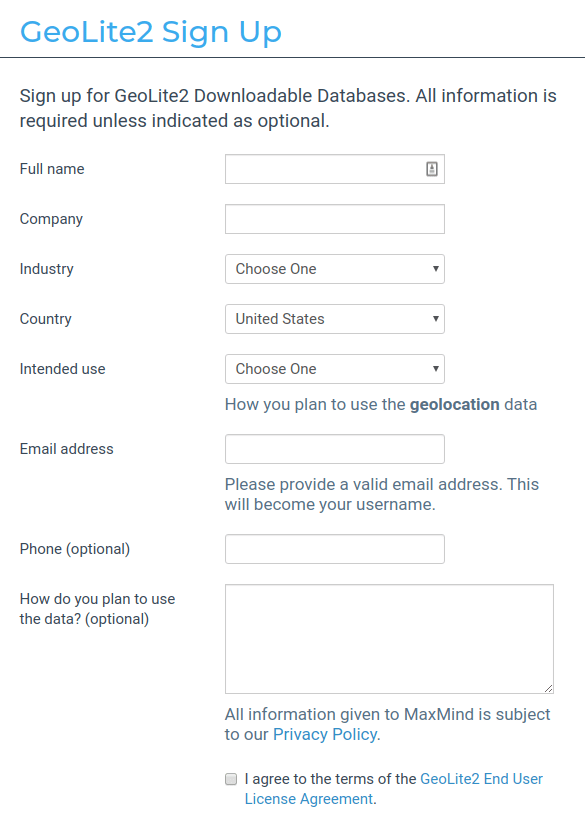
In order to obtain a key to implement this change, we first need to sign up for an account at MaxMind.
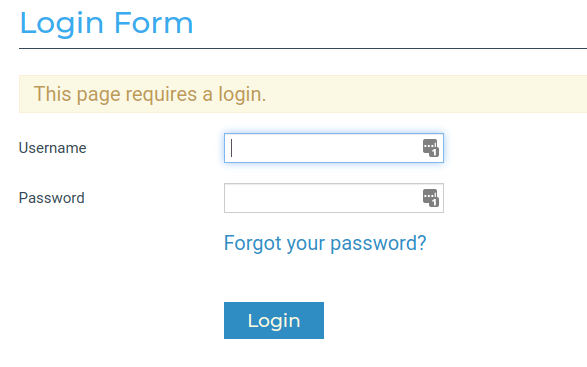
Once that is accomplished, we have to verify via email and then log in to the new MaxMind account.
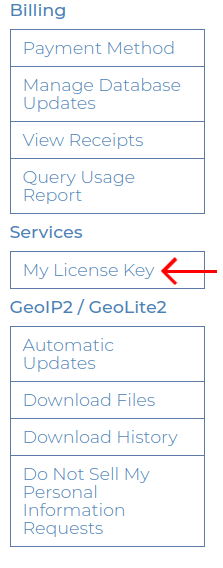
After logging in to the new account, you will need to browse to “My License Key” under the Services heading on the left menu.
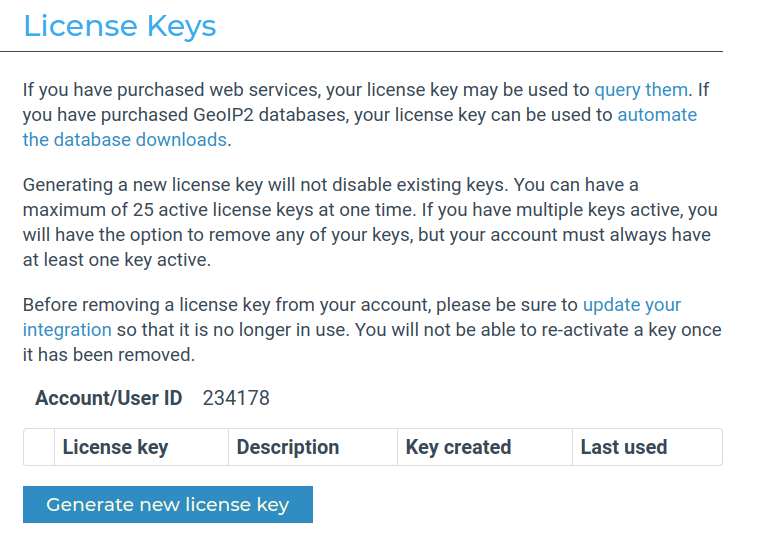
Once there, click on the “Generate new license key” button link, and then name the key.
Next, we need to click the “No” radio button for the “Will this key be used for GeoIP Update?” option.
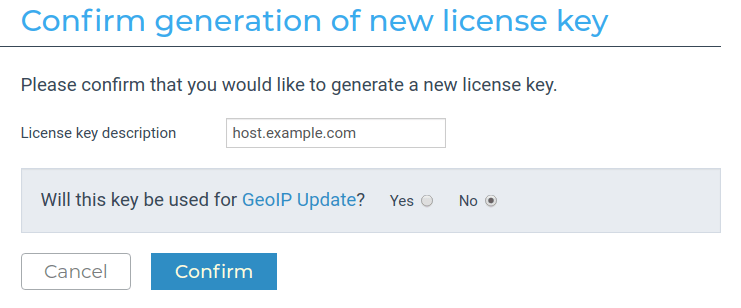
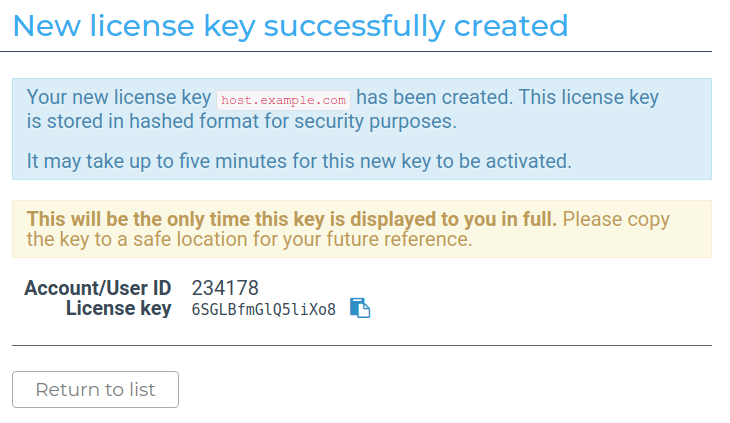
Then, click “Confirm”. You will then be provided a key.
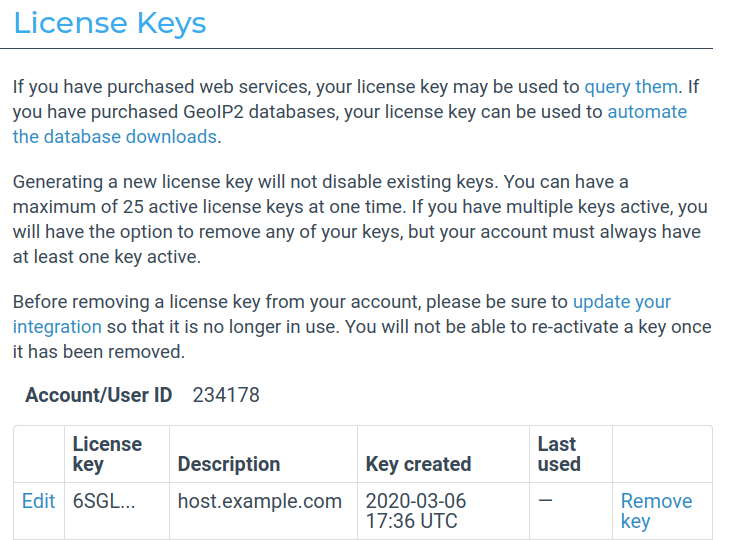
Should you wish to view, regenerate or remove the license key, that option is available under the “My License Key” link in the left menu. Clicking on it will let us view, edit, or remove our existing keys.
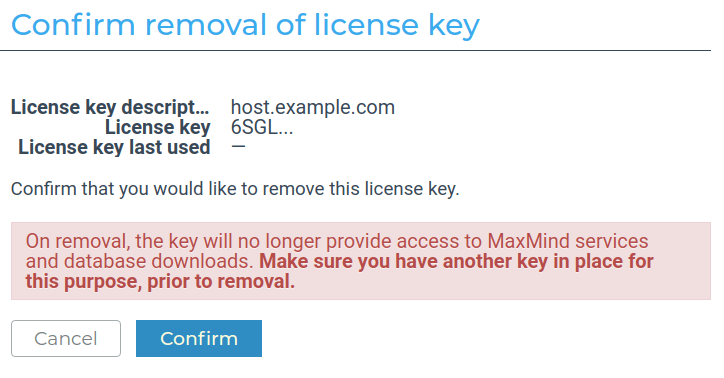
Should you wish to delete your key, simply click on the “Remove key” link on the right of the existing key and then click on the Confirm button.
Modify CSF Configuration
Once this is complete, we need to add the new license key into the /etc/csf/csf.conf file
FROM:
# MaxMind License Key:
MM_LICENSE_KEY = “"
TO:
# MaxMind License Key:
MM_LICENSE_KEY = “n3wl153nc3K3y”
Finally, we need to save the file (using “:wq” if editing in vim) and then restart CSF.
root@host [~]# csf -rDeny Country
CSF allows you to either blacklist or whitelist entire countries within the main csf.conf file. The CC_DENY and CC_ALLOW values within that file allow you to add country codes in order to deny access to any IP associated with a country. However, if you are using this feature, you will need to install IPSET via the yum command. if you choose to utilize country code blocking, run the following command to install IPSET.
root@host [~]# yum install ipsetAdditionally, we will also need to modify this value setting in the /etc/csf/csf.conf file. The following line in this selection will need to be modified like so. (This option will be on or around line 404 in the csf.conf file)
 378 # This option allows you to use ipset v6+ for the following csf options:

 379 # CC_* and /etc/csf/csf.blocklist, /etc/csf/csf.allow, /etc/csf/csf.deny,

 380 # GLOBAL_DENY, GLOBAL_ALLOW, DYNDNS, GLOBAL_DYNDNS, MESSENGER

 381 #

 382 # ipset will only be used with the above options when listing IPs and CIDRs.

 383 # Advanced Allow Filters and temporary blocks use traditional iptables

 384 #

 385 # Using ipset moves the onus of ip matching against large lists away from

 386 # iptables rules and to a purpose built and optimized database matching

 387 # utility. It also simplifies the switching in of updated lists

 388 #

 389 # To use this option you must have a fully functioning installation of ipset

 390 # installed either via rpm or source from http://ipset.netfilter.org/

 391 #

 392 # Note: Using ipset has many advantages, some disadvantages are that you will

 393 # no longer see packet and byte counts against IPs and it makes identifying

 394 # blocked/allowed IPs that little bit harder

 395 #

 396 # Note: If you mainly use IP address only entries in csf.deny, you can increase

 397 # the value of DENY_IP_LIMIT significantly if you wish

 398 #

 399 # Note: It's highly unlikely that ipset will function on Virtuozzo/OpenVZ

 400 # containers even if it has been installed

 401 #

 402 # If you find any problems, please post on forums.configserver.com with full

 403 # details of the issue

 404 LF_IPSET = “0”

MODIFY LINE 404 TO

404 LF_IPSET = “1”
Modifying this setting also has the added benefit of cutting down on CSF’s workload and by extension, iptables. This then lessens the possible warnings about server load caused by the firewall having to load up every IP from an individual country, which significantly increases the strain on the firewall. Not using IPSET can have the adverse effect of a CSF restart taking hours to complete.
Here is the official list of countrycodes that can be added and utilized to block incoming traffic to the server. If you are planning on blocking multiple countries, it may be in your best interest to review the hardware firewall options we offer. Using this type of appliance can significantly lessen the load on the server as the software firewall (CSF/IPTables) is replaced by the hardware firewall.
Modify in WHM
In order to modify this setting in WHM, follow the steps above to obtain the needed key from MaxMind and then log in to WHM. From there, head into Home »Plugins »ConfigServer Security & Firewall section. From there, click on the CSF tab and scroll down and click on the “Firewall Configuration” button.

This will open up a page where you can edit the csf.conf settings. Next, click on the dropdown menu on the top middle of the page and select the “Country Code Lists and Settings” section.

From there, scroll down in that section and locate the “MM_LICENsE_KEY” field and enter your key there.

Finally, scroll all the way down to the end of the page and click the “Change” button. This will save the new entry and restart the firewall.
Conclusion
Granted, this update may feel somewhat cumbersome to adjust, but it is a needed change to follow new privacy laws enacted which only serves to protect and enhance our overall privacy. Although a little work is needed to accomplish this task, we believe it is a welcome change for the better.
Related Articles:

About the Author: Dayne Larsen
Dayne was born into IT and remembers taking notes as a kid on old mainframe punch cards his mom brought home. With a degree in Technology Education from Montana State University, he enjoys being a helpful human to clients and loves to empower people to tackle challenges. He has worn many hats in his day, from a stay-at-home Dad, to a freelance web designer, LEGO company Merchandiser and even an antique store owner. In his free time you will find him fly fishing, snowboarding, working on his 66' Mustang, home improving, or enjoying his family.
Our Sales and Support teams are available 24 hours by phone or e-mail to assist.
Latest Articles
How to use kill commands in Linux
Read ArticleChange cPanel password from WebHost Manager (WHM)
Read ArticleChange cPanel password from WebHost Manager (WHM)
Read ArticleChange cPanel password from WebHost Manager (WHM)
Read ArticleChange the root password in WebHost Manager (WHM)
Read Article


