Using the cPanel Plugin for Acronis
The Acronis Backup system provided through Liquid Web is a powerful tool for backing up your dedicated server. Now you can have even easier access to your backups through an integrated cPanel Plugin. New servers with cPanel and Acronis will come with the plug-in preinstalled and preconfigured. If you have an existing server and would like the cPanel plug-in for Acronis added, just contact our Support Team and they will get it setup for you.
By default, your cPanel plug-in settings will mirror the default backup plan settings in your Acronis account. For more information about the default backup plan, see Accessing Acronis Backups. It’s best to modify your backup plans in the Acronis portal, then enable the plan in WHM (only the newest backup plan will be displayed in WHM under Acronis Backup). For more information about modifying your Acronis Backup Plans, see Modifying or Deleting Acronis Backups.
Running Backups Manually
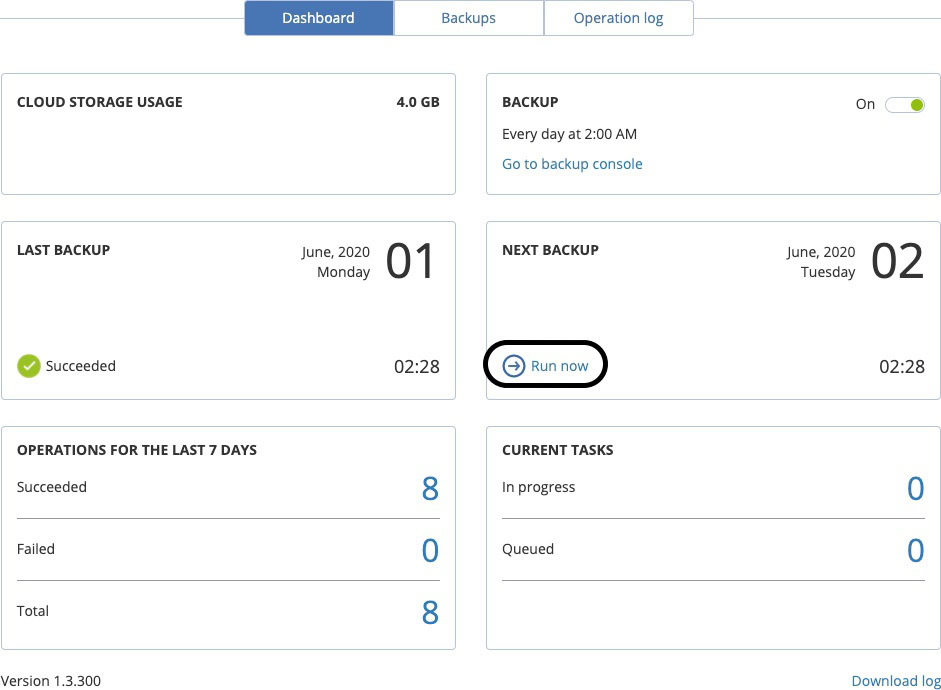
If you’d like to run a manual backup, you can do so by going to WHM -> Acronis Backups then clicking Run Now on the dashboard.
Restoring Files/Folders from WHM
To begin the restoration process within WHM, do the following:
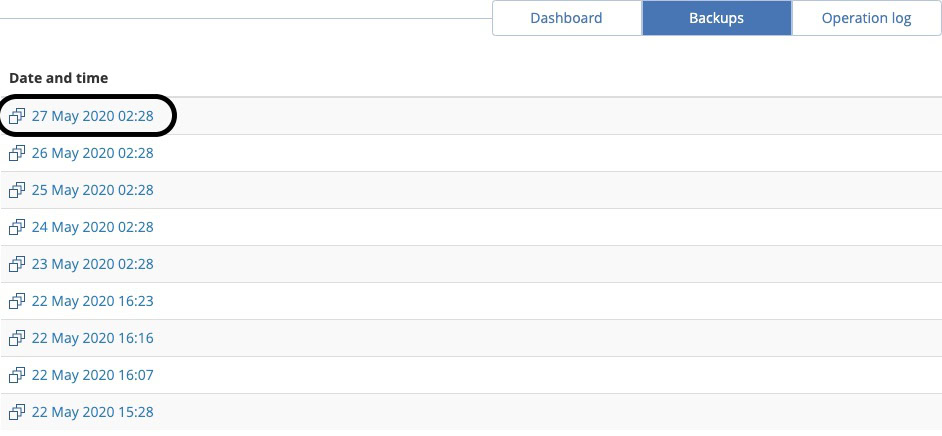
- Go to WHM -> Acronis Backups, then click on Backups.
- Select the timestamp of the backup.
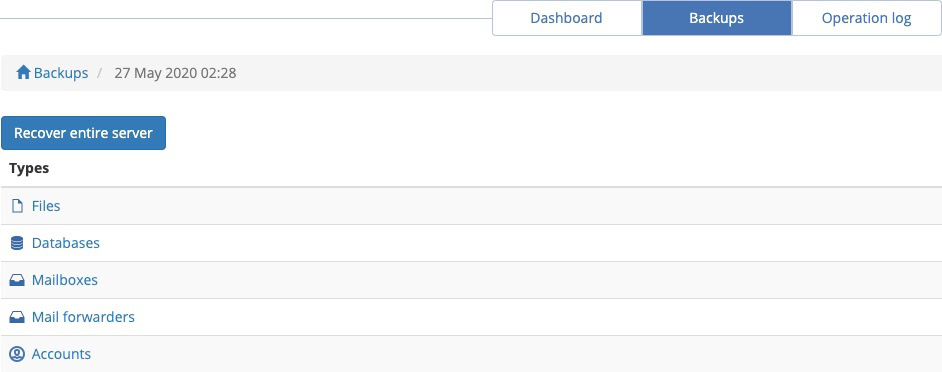
- Select the type of item that you want to restore.
- Currently, there is no option to restore a file to an alternate location, so you will need to either Recover the file(s) to their original location on the server or Download the file(s) to a directory on the server.
Restoring to the Original Location
Restoring a file or an account to its original location will copy the backup data to the place where it was copied from. However, any changes made since the backup will be overwritten. If you only need the files for comparison, you should download an archive of the selected files instead.
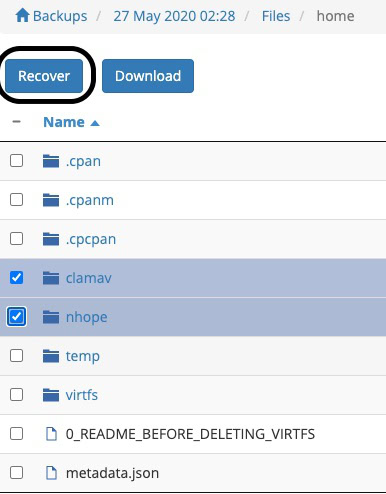
To restore files to their original location:
- Select the files and click Recover.
- If you are restoring a directory, you can also choose to remove any files in the directory that are newer than those found in the backup.
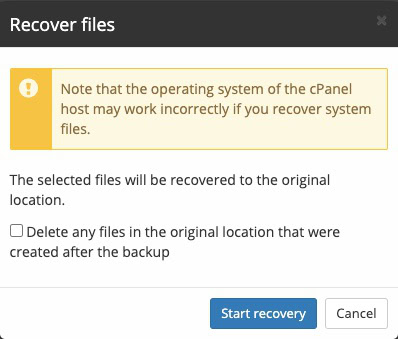
- To start the recovery, click Start recovery.
- When the process is complete, the plugin will indicate that the process has succeeded:

Downloading Selected Files
If you want to compare or review files from the backup before restoring them to your live server, you can download the selected. Files will be stored in zip files, located in /root/backup_cloud/. If you’d like to unzip the file to a specific location, you can use the following command at the command line of the server:
unzip /path/to/archive.zip -d /destination/directory
Restoring to Download:
- Select the files and click the Download button.
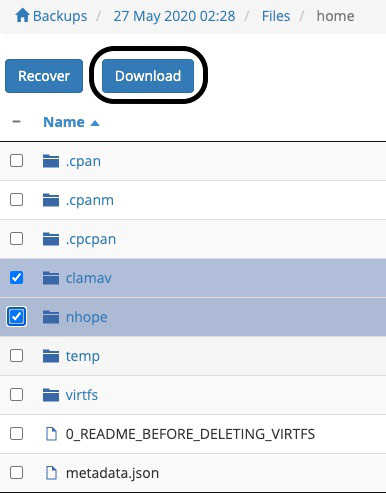
- Acronis will transfer the files and create a zip archive.
- When the process is complete, you can click the Download link or find the generated zip file on the server in /root/backup_cloud/
![]()
Restoring Databases
Compared to basic files or folders, databases have special concerns when restoring them. Specifically, database ownership and permissions are preserved, whether the database is being renamed or overwritten. As with other backup objects, databases can be restored to their original location or downloaded. They can also be renamed, so that both databases can be compared for data integrity.
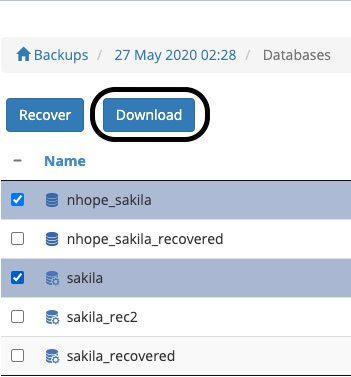
- Select the Databases product type.
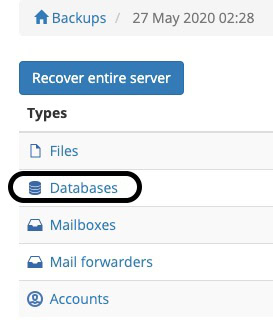
- Select the databases to be restored, then click either Recover or Download.
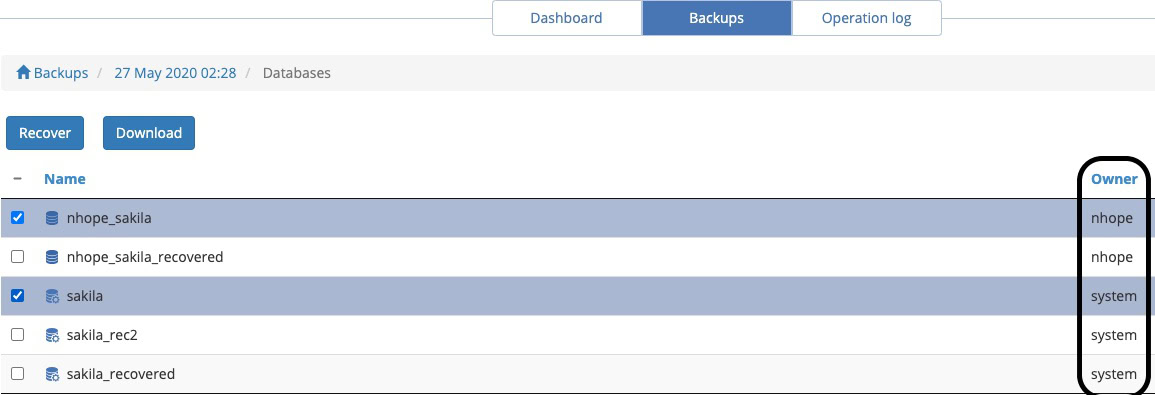
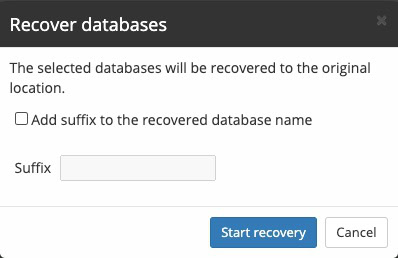
- To replace the current database, click Start recovery. NOTE: any new data since the backup was created will be destroyed. To restore to an alternate database, click Add suffix, then enter a suffix name and click Start recovery.
- Once the database has been restored, you will see a success message in the plugin.
- If you want to download a copy of the database instead of restoring it, select the database, then click Download.
- Once Acronis has prepared the database for download, you can click the Download link to download the file or find the file in /root/backup_cloud/.
Restoring Other Backup Objects
You can also restore mailboxes, mail forwarders, and cPanel accounts, both to their original locations or as downloads/archives. cPanel users can also manage their account level backups in the same way (with the exception of restoring the entire cPanel account).