IMAP Email Migration to Premium Business Email
Follow our step-by-step guide to self-migrate email to Premium Business Email. Use an IMAP client like Thunderbird to manually move your messages.
Introduction
This article walks you through how to manually self-migrate your email from your old server (or service) to Premium Business Email using an email client connected via IMAP.
Do not cancel your source email server until you have confirmed with all users that they have access to their email and that all messages are still in place.
Prerequisites
Free and cross-platform, Thunderbird is our preferred email client. The general concepts described here apply to other email clients, such as Outlook and Mac Mail, but the specific steps may differ.
- A Premium Business Email Plan.
- Credentials for every mailbox you want to migrate.
- Source email server or provider that supports IMAP.
- Thunderbird, or another email client that supports IMAP.
- The ability to update DNS for the domain you want to migrate.
Step-by-step Instructions
Please allow some time for your emails to sync after the migration. For larger mailboxes with many messages, this can take up to an hour or longer.
- Verify the size of your current mailboxes at the source. Make sure not to exceed your new mailbox’s size capacity. If needed, you can download, and/or delete email on your source email server before proceeding.
- Open Mozilla Thunderbird.
- Click File and select New and choose Existing Mail Account from the menu.

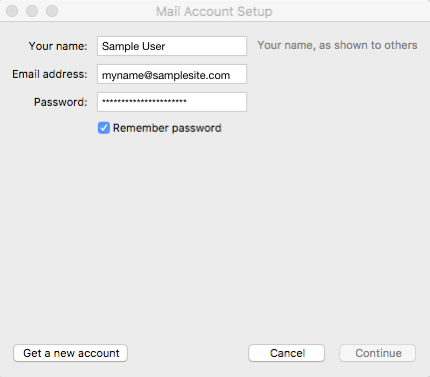
- Enter the email address and password for the new mailbox into the pop-up. Click Continue to be connected.

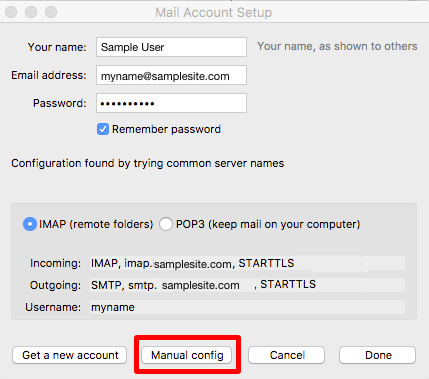
- Select Manual config from the buttons on the bottom of the pop-up once you have connected with the new email account.
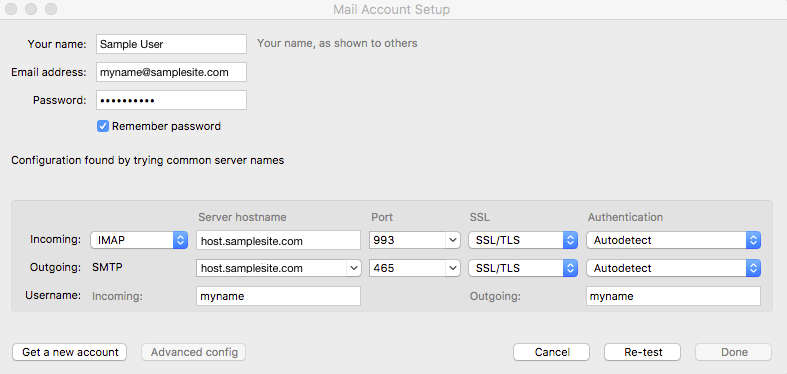
- Enter the new incoming and outgoing email configuration in the Manual config section.

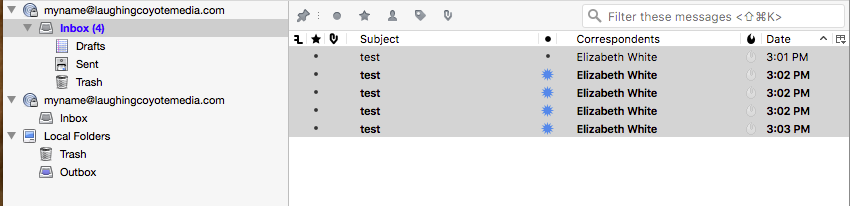
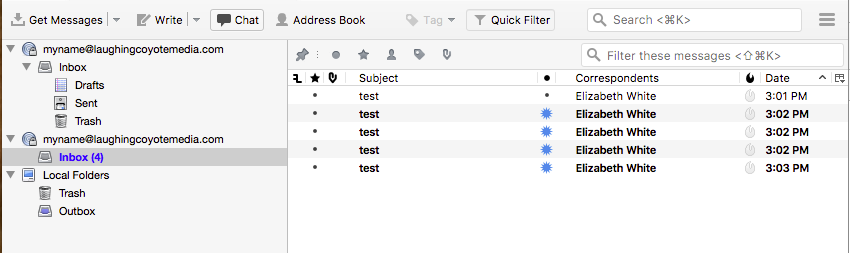
- Once both email inboxes (old and new) are showing in Thunderbird, select all your emails on the original email account in Thunderbird.

- Drag the emails to the inbox of the new inbox you created.

You have now successfully migrated your email to your new Premium Business Email mailbox!
Next Steps
With your email data officially in Premium Business Email, only a few final steps remain:
- Check your migrated email in the Premium Business Email Webmail portal. If you notice any issues, or missing emails, you may need to pull your data again. If an IMAP migration isn’t working, follow the steps in our Migrate to Premium Business Email guide to request a Support-assisted migration.
- Adjust your domain’s DNS once everything is in order to start receiving email to your Premium Business Email plan.
- Users will need to adjust their preferred email clients. See our article for more information: Setup Your Email Client for Premium Business Email.