Instructor Role Menu Settings
With the Instructor Role Menu Settings in LearnDash, you can easily customize what instructors see and access in their dashboard. This helps create a simpler, more focused environment by showing only the tools and features Instructors need. It’s a simple way to enhance the instructor experience and ensure they have everything they need to succeed.
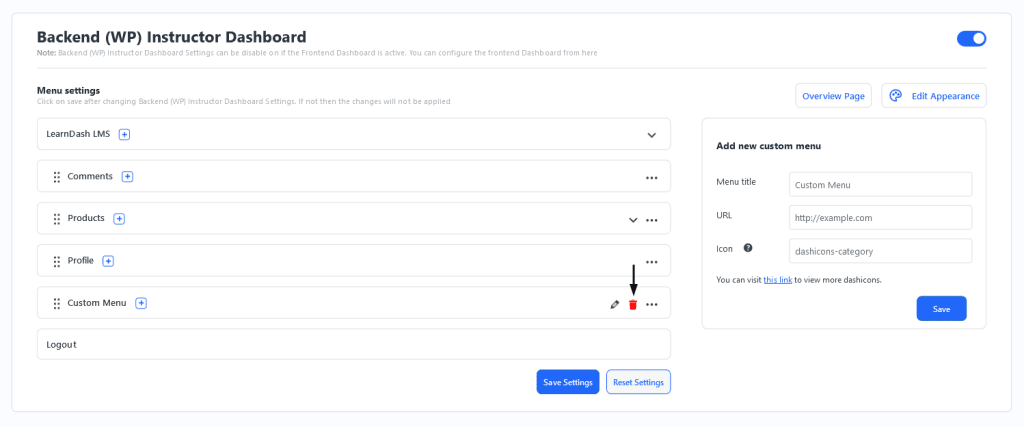
Start by going to your WordPress dashboard > LearnDash LMS > Instructor > Dashboard Settings.

Menu Settings
Let’s dive into the details for customizing the Instructor Role Menu. You can reorder, hide, or restrict menu items, as well as add custom links to tailor the sidebar to your instructors’ needs, enhancing usability.
Default Instructor menu
The Instructor Role Dashboard contains five menus by default:
- LearnDash LMS
- Products (This menu will be only active if dependent plugins are active)
- Profile
- Comments
- Logout
Instructor menu actions
Menus in the Action Drawer can now be hidden or restricted using the Hide Settings option. When a menu is marked to be hidden, it will no longer appear in the menu, but it will still be accessible via its direct URL. If a menu is hidden, a specific tooltip will appear, indicating its status. If the menu is both hidden and restricted, a different tooltip will be displayed to show that the menu is not accessible.
Adding a Custom Menu
Custom Menu creation allows you to build a menu with the elements that suit your instructors’ needs best.
Menu Title
The Menu Title field is a required field. You’ll want to include a title that helps describe the purpose of the menu.
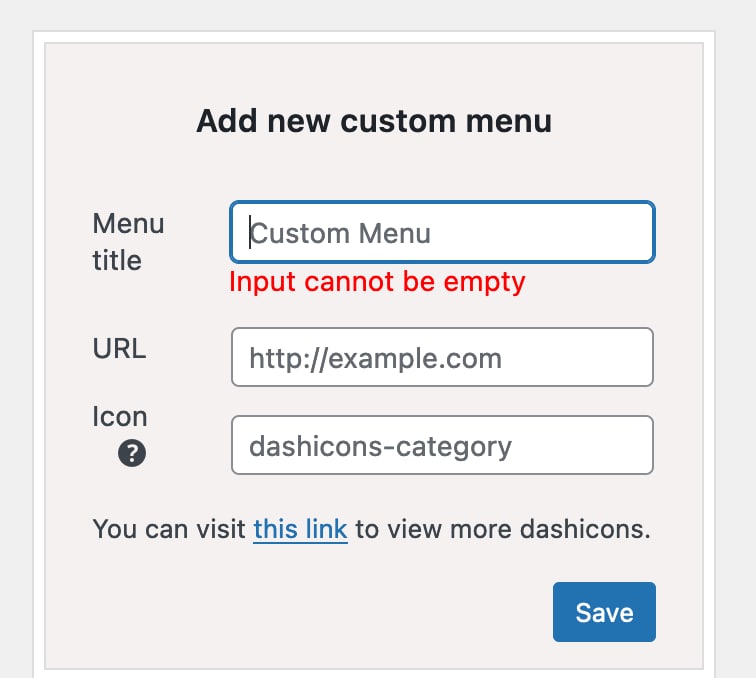
Menu URL input
The URL field is a required field that needs a valid URL.

Menu icon input
You have the option to include dash icons in menus. If this is left blank, the system will use a default embedded dash icon.
Default menu dash icons
You can refer to the WordPress documentation for a dash icons reference.
Updating Custom Menus
Once a custom menu is added to the Menu List it can be edited.
NOTE: If you use the URL of a new submenu that matches an existing submenu’s URL, the submenu list of the existing menu will be replaced by the submenu list of the current menu. This means the new submenu will overwrite the previous submenu list under that URL.
Deleting Custom Menus
To delete custom menus, click the trash button, and a confirmation prompt will appear. Once confirmed, the item will be removed from the menu list. Remember to save your changes for the deletion to be applied and persist in the menu settings.

Submenu settings
Submenus can be customized by setting titles, defining URLs, or by adding new submenus where they are most helpful.
Click the Add Submenu button beneath the highlighted option in the main menu list to create a submenu. The submenu title field and URL field are required and cannot be left blank. Make sure you use a valid URL, just like you would in a Main Menu.
Submenus can be edited in the same way that Menus are edited and updated.
Deleting Submenus
Deleting a Menu and its Associated Submenus
If a user decides to delete a menu, it will be erased along with all of its sub-menus.