Conditional Cart Banners

Shop Kit’s Conditional Cart Banners feature is excellent for adding banners to your customer’s carts when they meet specific conditions. You can design the banner’s text, button function, and styles. Some of the features allow you to apply coupon codes when particular products are in the cart, to upgrade a product, or to add additional products to the cart at the click of a button. It would help if you had a conditional cart banner to remind your customers to include batteries at a discount for their new product.
Enable Conditional Cart Banners
After installing Shop Kit, navigate to the Shop Kit settings. Click on Conditional Cart Banners and activate the switch to Enable Cart Banners. A message tells you to find your Cart Banners under the WooCommerce menu item.

Creating a Conditional Cart Banner
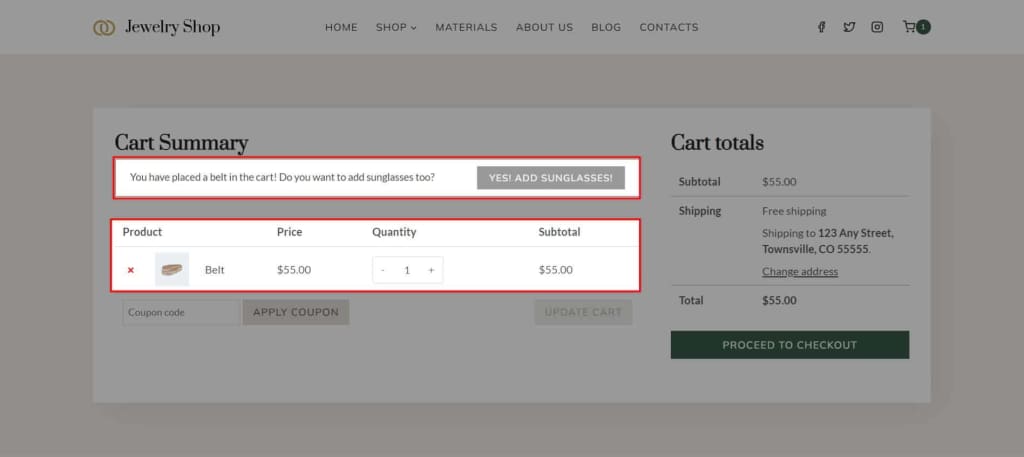
A Cart Banner appears above the products the customer wants to purchase on the cart page. For example, this article will explain how to make a cart banner that appears when you add a belt to your cart. The banner will confirm that you added a belt and ask if you want to add sunglasses too. Your customer can press the button, and WooCommerce will add sunglasses to the cart.
Navigate to WooCommerce → Cart Banners and click the Add New Cart Notice button.

When creating a cart banner, there are a few points to consider. There is a Display Type, a Cart Notice Message, and a button. Cart Banners have other options besides these, but these options are instrumental to the function of the banner.

Display Type
The Display Type is essential because it lets Shop Kit know when to show the banner. Options include always showing when a particular product or category is in the cart, when a total cart price is more or less than an amount, or when the total cart weight is more or less than an amount. To make the example I mentioned, I’ll set the Display Type to Show when a specific product is in the cart. Then, a dropdown appears that let me choose a product. I decided on a belt from my product list. Secondary options will occur depending on the Display Type you select.

Cart Notice Message
This section is where you place the text message you want to show your customers. For example, I wrote: You have placed a belt in the cart! Do you want to add sunglasses too?
Two Cart Notice variables can be used to dynamically populate the notice message.
- {cart_difference}: Shows the remaining amount needed to reach the target value set in the notice conditions.
- {cart_total}: Shows the current total value of the cart.
Cart Notice Button
The Cart Notice Button is a text field that sets the text for the button in the banner. For my banner, I put the text: Yes! Add Sunglasses! Your banner can read whatever you want, or you can leave it blank to exclude the button.

Button Type
The Button Type option is crucial because it tells Shop Kit what the button does. The button can be a custom link, add coupon code, add a coupon code and a product, upgrade a product, or upgrade a product and add a coupon code. Remember, if you leave the Cart Notice Button text field empty, the banner excludes the button. To continue the example, I selected Add a Product to Cart. Depending on the button type, different options will appear to let you add a URL, pick a product, or a coupon.

Cart Notice Expiration
Another great feature of the Cart Notice Settings is the Cart Notice Expiration feature. This setting allows a banner to display only until a date and time you control. An expiration is helpful if you have a sale and only want a coupon code added until the deal ends. If you want to display the banner indefinitely, ignore this setting. Shop Kit does not delete the banner if you pass the expiration date, the banner only stops showing for your customers, and you can always change the time to reenable the banner.
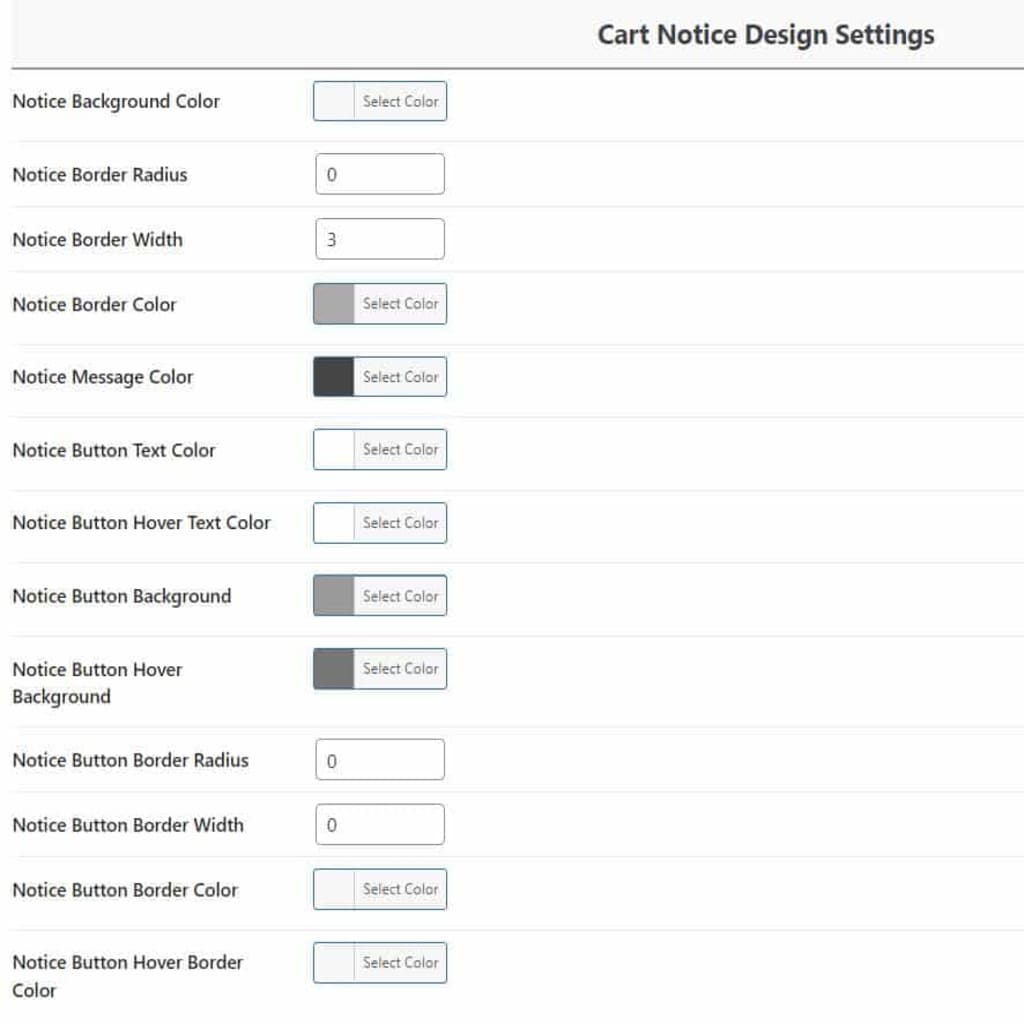
Cart Notice Design Settings
The last section is the Cart Notice Design Settings. These settings allow you to change the design of your message, button, and background. Using these settings, you can make stunning banners to show your customers for different scenarios.