What Is Jailed Shell and How Can You Use It?
Jailed Shell is a secure, restricted command-line environment that limits a user’s access to the server’s file system. This is commonly used in shared hosting or multi-user environments to allow shell access while keeping users contained within their own directory structure.
In this article, we’ll explain what Jailed Shell is, how it’s useful, and how to enable it through cPanel, Plesk, and directly via the Linux command line.
What Is Jailed Shell?
Jailed Shell, also called Chroot Shell, is a restricted shell environment where users are “jailed” into a limited section of the file system (usually their home directory). This prevents them from accessing or viewing other parts of the server, improving overall security.
Why Use Jailed Shell?
Jailed Shell is useful for:
- Shared Hosting Environments: Prevent users from navigating outside their own directories.
- Security-Conscious Projects: Limit user access while still offering shell functionality.
- Development Needs: Developers can safely use Git, Composer, Node, and other CLI tools without risking server integrity.
How to Enable Jailed Shell
Option 1: WHM/cPanel
- Log into WHM as root.
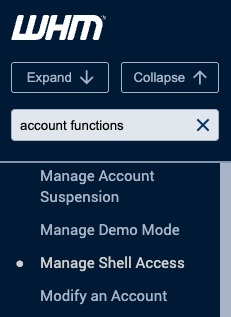
- Navigate to: Account Functions → Manage Shell Access.

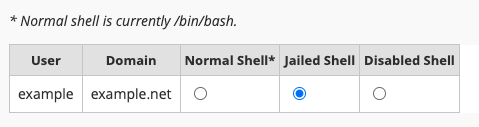
- Find the username you wish to modify.
- Choose Jailed Shell from the listed options.

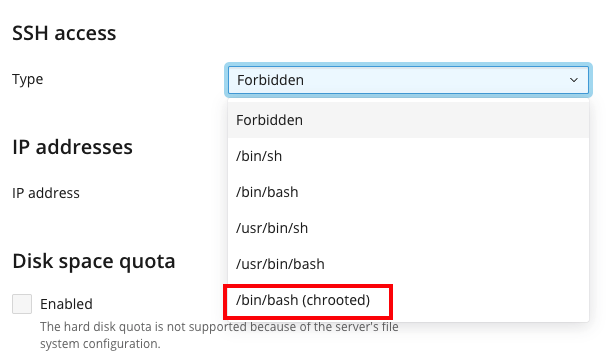
Option 2: Plesk
- Log into Plesk as admin.
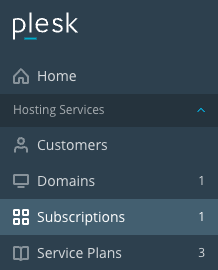
- Go to Subscriptions and select the desired domain.

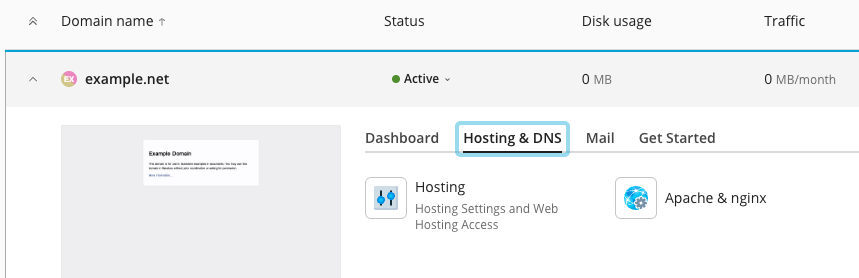
- Under Hosting and DNS, click Hosting.

- Find SSH Access. From the drop down menu, choose /bin/bash (chrooted).

- Save changes.
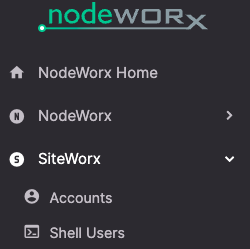
Option 3: Interworx
- Log into NodeWorx from the browser (https://ip.ad.dr.ess:2443/nodeworx)
- From NodeWorx, navigate to SiteWorx > Shell Users

- Check the box next to the user you want to change.
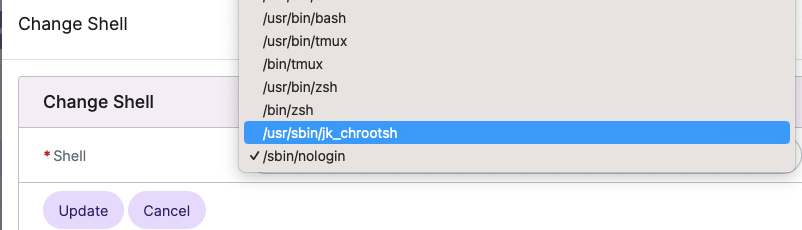
- Click the drop down next to With Selected and select Change Shell. Click Go.

- Select /usr/sbin/jk_chrootsh from the Shell dropdown

- Check the box next to the user again and from the With Selected drop down menu, choose Enable. Click Go.

- Click Enable again to confirm.


Option 4: Command Line (Linux)
If you’re a system administrator, you can create a chrooted jailed shell manually using the command line.
Note: This setup requires root access and is typically done on VPS or dedicated servers.
1. Create the Jailed Environment
mkdir -p /home/jail/{bin,lib,lib64,home}
2. Copy Required Binaries
Let’s say we want to allow basic commands like bash, ls, and mkdir.
cp /bin/bash /home/jail/bin/
cp /bin/ls /home/jail/bin/
cp /bin/mkdir /home/jail/bin/
3. Copy Required Libraries
Use ldd to find dependencies:
ldd /bin/bash
Copy each listed .so file into /home/jail/lib or /home/jail/lib64, preserving folder structure.
Example:
cp /lib/x86_64-linux-gnu/libtinfo.so.6 /home/jail/lib/
cp /lib/x86_64-linux-gnu/libc.so.6 /home/jail/lib/
cp /lib64/ld-linux-x86-64.so.2 /home/jail/lib64/
4. Create User and Assign Home in Jail
useradd -d /home/jail/home/username -s /bin/bash jaileduser
mkdir /home/jail/home/username
chown jaileduser:jaileduser /home/jail/home/username
5. Use chroot to Enter the Jail
chroot /home/jail /bin/bash
Now the user is jailed in /home/jail, and won’t be able to access the rest of the system.
Tip: For automation or multiple users, consider using tools like rssh, jk_chroot, or pre-built jailing environments (like those available with cPanel).
What You Can Do in a Jailed Shell
- Run basic Linux commands.
- Use Git, PHP, or Node (if installed inside the jail).
- Manage files in your home directory.
- Deploy or test code securely.
Limitations
- Cannot access other users’ data or root directories.
- May need additional libraries copied into the jail.
- Nonstandard ports or advanced services won’t work unless explicitly configured.
Final Thoughts
Jailed Shell offers a safe, powerful way to give users command-line access without exposing sensitive parts of your server. Whether you’re using cPanel, Plesk, or managing your server manually via SSH, enabling Jailed Shell helps maintain security and control.