Using cPHulk to Prevent Brute-Force Attacks
cPHulk is an additional security feature in WHM that will block login attempts in cPanel, WHM, SSH, FTP and IMAP/POP3 services. Just like LFD, it blocks IP addresses after too many failed logins from a single IP address. The main difference between cPHulk and LFD is that cPHulk will not block traffic from IP addresses, whereas LFD will block logins and traffic from those IP addresses that are being blocked.
Liquid Web managed servers with cPanel come with ConfigServer Security & Firewall protection automatically, meaning you have LFD enabled to combat brute-force attacks. Learn more in our article What Is the Login Failure Daemon (LFD)?
Before Enabling cPHulk |
Before you enable cPHulk, there are a couple of things to consider when enabling it for brute-force detection:
|
If you’d like to learn more about upgrading to EasyApache 4, see our article What is EasyApache 4? In order to have the option to disable root lockout in cPHulk, you will also need to upgrade to WHM 64. Please review the WHM System Requirements to verify that your server is able to be upgraded if you choose to do so.
Depending on the version of WHM you have, the steps to enable cPHulk will differ, use the links to be directed to the instructions for your version:
Enable on WHM 62
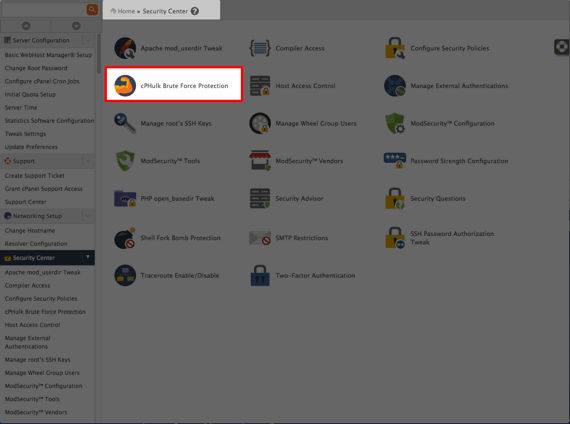
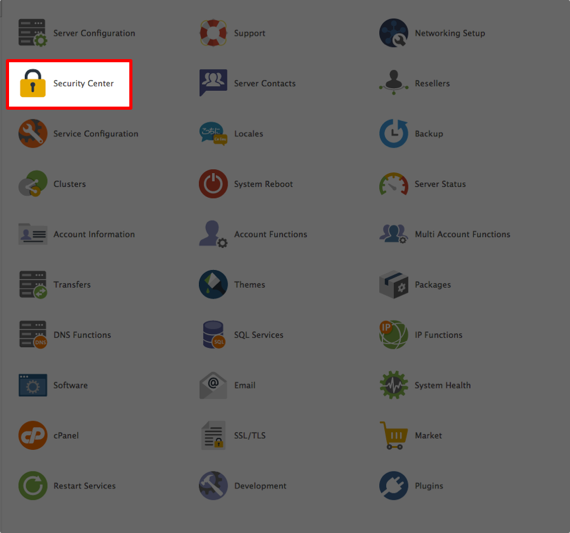
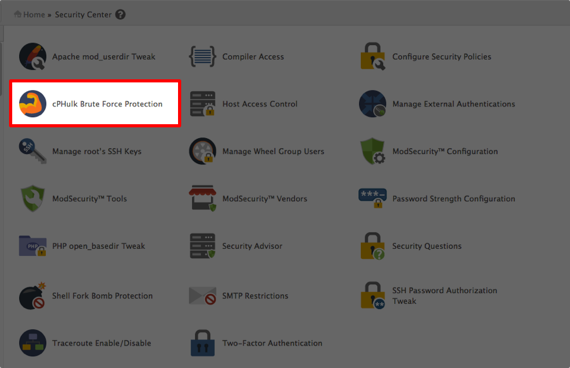
- To enable cPHulk, click on the Security Center icon in WHM.

- Click cPHulk Brute Force Protection from the home page of the Security Center.

- If cPHulk is disabled, click the button on the left-hand side of the page to enable it.

- The first tab is the Configuration Settings. Here, you can:
- Track login attempts for user accounts.

- Turn on IP address based protection to track logins from specific IP addresses.

- You can also set the maximum failures per IP address in a single day.

- The Login History section allows you to set the duration for retaining failed logins (in minutes).

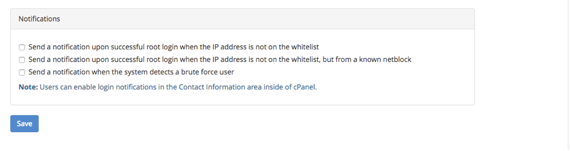
- You can set up notifications that will send an email to notify you of logins and brute force users.

- Track login attempts for user accounts.
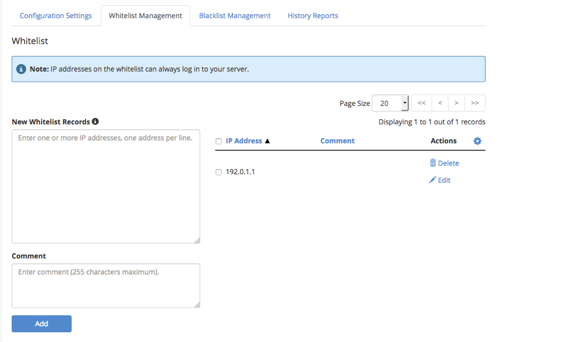
- The Whitelist Management tab allows you to specifically list IP addresses you want to always be allowed to log into your server.
Enter IP Addresses to Whitelist
Make sure you enter your IP and any other administrators IP address here at the time of setup to avoid being locked out in the case of an attack. 
- You can also permanently blacklist IP addresses using the Blacklist Management tab.

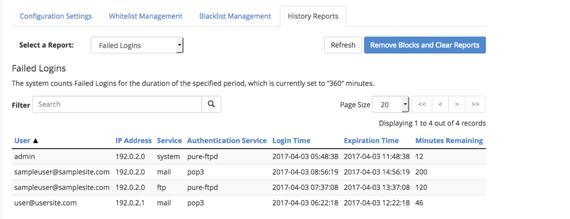
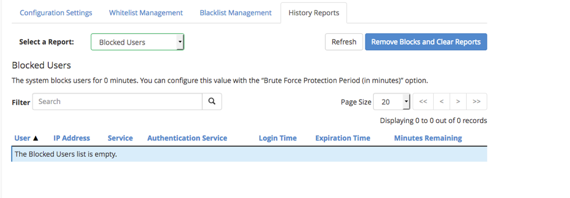
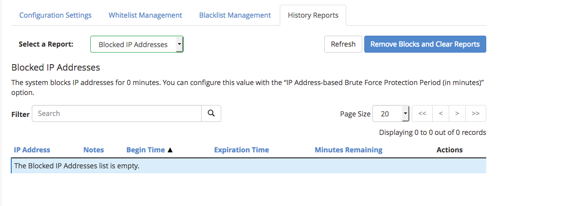
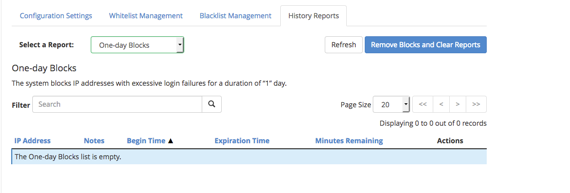
- The History Reports tab has a drop-down menu that gives you the ability to view:
- Failed logins (using the duration you set in the Login History):

- Blocked user attempts:

- Blocked IP attempts:

- One-day blocked IP addresses:

- Failed logins (using the duration you set in the Login History):


Enable on WHM 64
- Navigate to cPHulk through the Security Center on the home page of WHM.

- Change cPHulk from disabled to enabled.
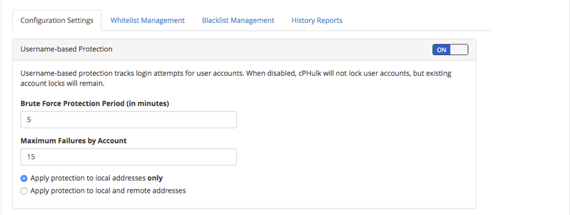
- In the Configuration Settings tab, you can:
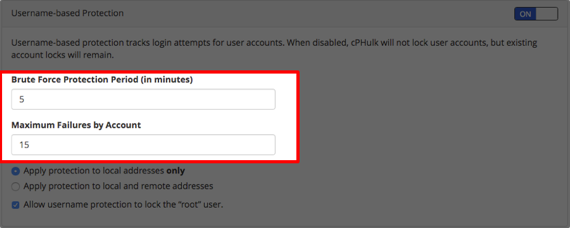
- Configure Username-based Protections by:
- Setting the protection period (in minutes) and set the maximum failures by account.

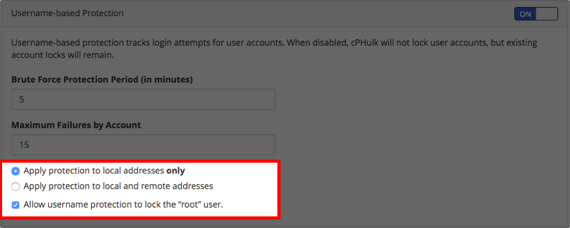
- Choosing what to apply protection to and enable protection to keep cPHulk from locking the root user.
Enable and Apply Protection
If this box is checked, cPHulk will lock out the root user and you will be unable to access your accounts.
- Setting the protection period (in minutes) and set the maximum failures by account.
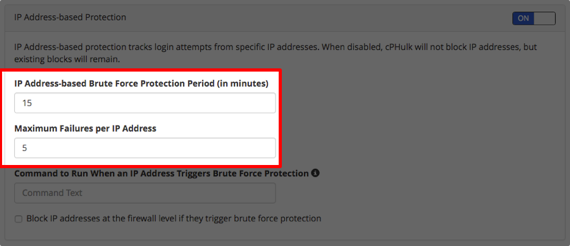
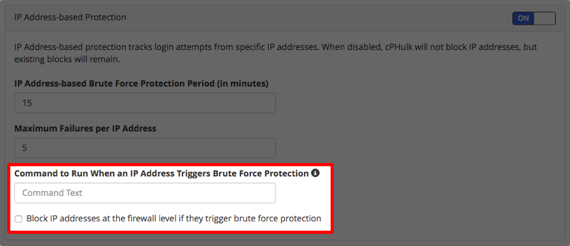
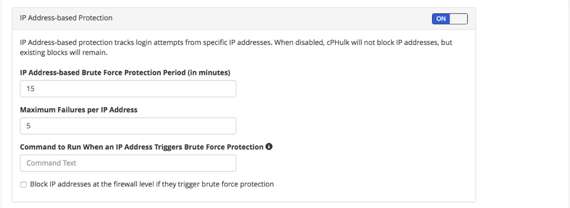
- With IP Address based Protection:
- You can set an IP address based protection period (in minutes) and maximum failures per IP address.

- You can also set a command to run when an IP address triggers the brute-force protection and block IP addresses at the firewall level.
- You can set an IP address based protection period (in minutes) and maximum failures per IP address.
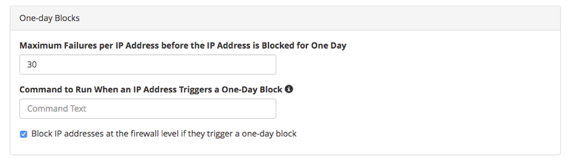
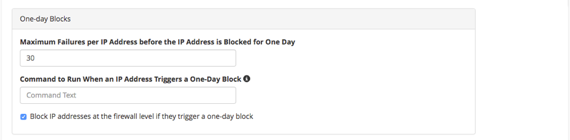
- With One-day Blocks you can:
- Set the maximum failures per IP address and select a command to run when the IP triggers the block.

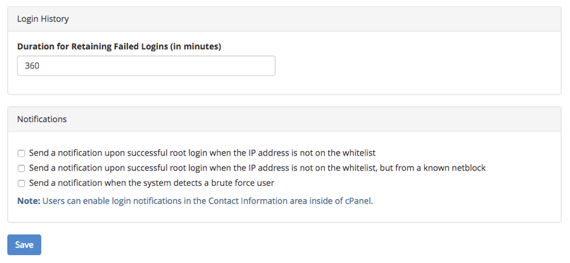
- The Login History and Notifications let you set how long you want to retain failed logins (in minutes) and choose the types of notifications you’d like to receive when there is an issue.

- Set the maximum failures per IP address and select a command to run when the IP triggers the block.
- The Whitelist Management tab allows you to specifically list IP addresses you want to always be allowed to log into your server.
Whitelist IP Addresses
Make sure you enter your IP and any other administrators IP address here at the time of setup to avoid being locked out. - You can also permanently blacklist IP addresses using the Blacklist Management tab.
- The History Reports tab has a drop-down menu that gives you the ability to view:
- Failed logins (using the duration you set in the Login History):
- Blocked user attempts:
- Blocked IP attempts:
- One-day blocked IP addresses:
- Failed logins (using the duration you set in the Login History):
- Configure Username-based Protections by: