Renewing an SSL Certificate on a Windows Core Managed Server
Renewing an SSL Certificate in IIS on Windows Core Managed server is even simpler than installing the original certificate. For more information about installing an SSL certificate, see Installing an SSL Certificate on a Windows Core Managed Server.
Just as with a new SSL purchase, you will need to copy the contents of the SSL certificate into a cer file or download a certificate file to the server. Once you have your renewed certificate saved in a cer file on the server, you can complete the renewal by following these steps.
Step 1: Complete the Certificate Request
- Go to IIS on your server, click the server name, and double-click Server Certificates.
- Now click Complete Certificate Request.
- For the first field, find the .cer file that you copied to the server. Click the … button and browse to the file.
- Enter a name for the certificate, usually the name of your domain, and choose a certificate store (generally “Personal” is a good choice).
- Click OK.
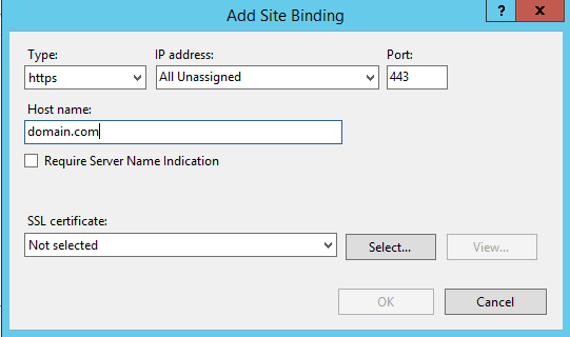
Step 2: Binding the SSL to your site
- Click on the name of the site in IIS (under Sites) for which you want to apply the SSL.
- Click Bindings on the right side of the screen.
- Click the https binding for the site and select the new SSL you created from the drop-down list.

- Do this for each of the https bindings listed for the site (for instance, if you have a binding for www.domain.com, make sure that binding is also using the new certificate).
That’s everything! Your site should now be updated to use the SSL that you just renewed. You can verify that the site is using the SSL by using our SSL checker in our Internet Web Hosting Toolkit or going to a third-party SSL checker, like SSL Shopper.
As always, feel free to contact our Support team to assist with this process if needed.