Search through Premium Business Email Archive
After your email data has been received and indexed in a Premium Business Email Archive, you can perform a search through your Archive searches.
The system automatically indexes your email, adding it to the archive. You can also run a collection manually through the Archive Manager.
Search
- Log in to the Archive Manager.
- In the upper-right corner of the window, click Search to access the Search dashboard.
- Click the Search tab.
- Click Start new search.
- Click the tab for the type of search and choose from four different search types:
- Simple – Search for text in messages or attachments.
- Wizard – Add conditions to the search query and inspect all parts of the message, including sender, recipient, subject, body, and attachment.
- Advanced – Search by sender, recipient, subject, body, and attachment with greater fine-tuning control. For more information, see “Advanced Search” after these steps.
- Enter a name for the search.
- Enter any terms you wish to search for under Search Terms, as appropriate.
- If you wish to send alerts whenever a search is conducted, click Enable Search Alerting on this search. You can select which users receive the alert by their permission level (ie. if you select, “Search User” any user with Admin User access will receive an alert).
- You now can choose any optional parameters for the search.
- Dates allows you to select when dates you want the search to include.
- Tags assist in categorizing searches. Tags can be predefined under the Settings tab. To access predefined tags, click Tags on the New Search page.
- Legal hold allows you to sort out results on legal hold.
- Note allows you to describe the search.
- Click Permissions and designate which users can access, change the scope of, or export the search.
- To search and display results immediately, click Save and display results. To save the search and return to the list of searches, click Save and return to list.
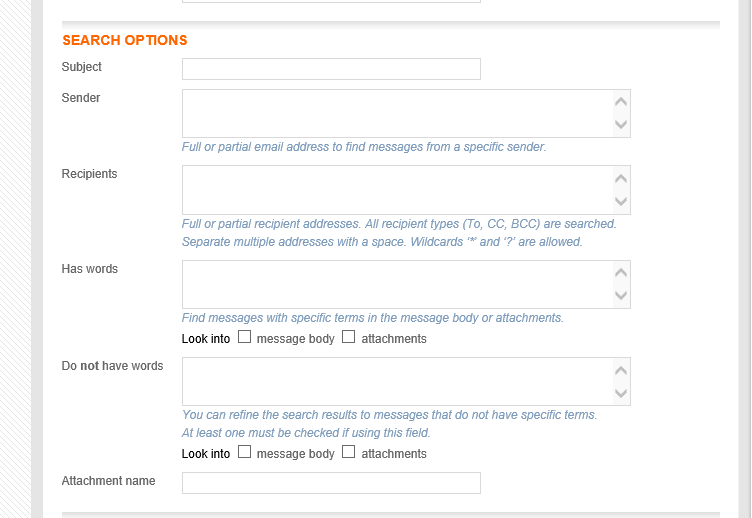
Advanced search
Sometimes your search results can be too large to sort through, and in cases when you are looking for something specific, it is often best to use the Advanced Search option.
Enter as much available search information as possible in the fields under Search Options – the more specific information you give the search, the better and more accurate your results will be.
Export Your Search Results
Export your search results with the Premium Business Email Archive to easily share a list of emails with outside parties, helpful for audit or legal requests, and historical reviews.
- Log in to the Archive Manager.
- In the upper-right corner of the window, click Search to access the Search dashboard.
When going through the dashboards, take note of the three dashboards: Search, Admin, and Admin User
- Click the Search tab.
- Locate the search name that you want to export, and click the View option.
- Select the type of export: PST, File (.eml format), Text, PDF, or HTML.
- (Optional) Add a note that will be displayed next to the export file in the search list.
- (Optional) Select to be notified by email when the file is ready for download.
- Click Export.
- To begin the download process, click the Search tab.
- Locate the search that you exported, and click the number in the Exp column. All export files for this search are displayed.
- Click the file name to save the file.