Rename Mailboxes in Premium Business Email
You can rename both “Standard” and “Plus” Premium Business Email mailboxes within the Email Control Panel.
1. To rename the email address of your “Standard” or “Plus Premium Business Email mailbox, log into your Email Control Panel.
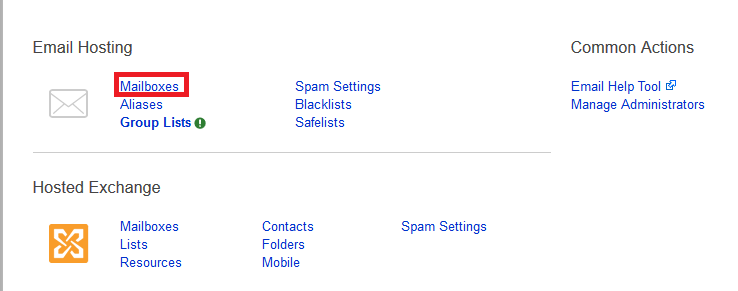
2. In the Email Hosting section of the Email control panel, click on the Mailboxes link.
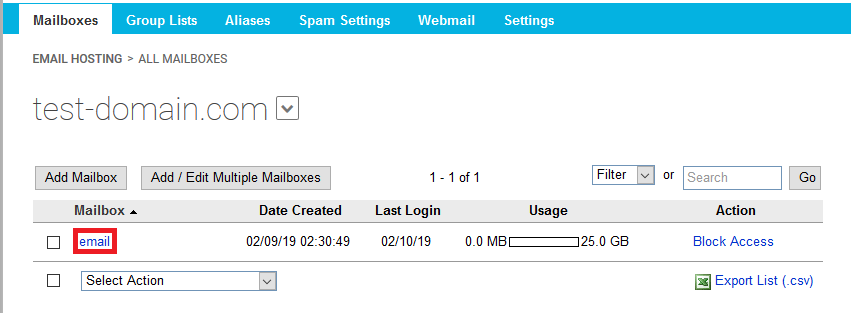
3. Click on the Mailbox you would like to rename:
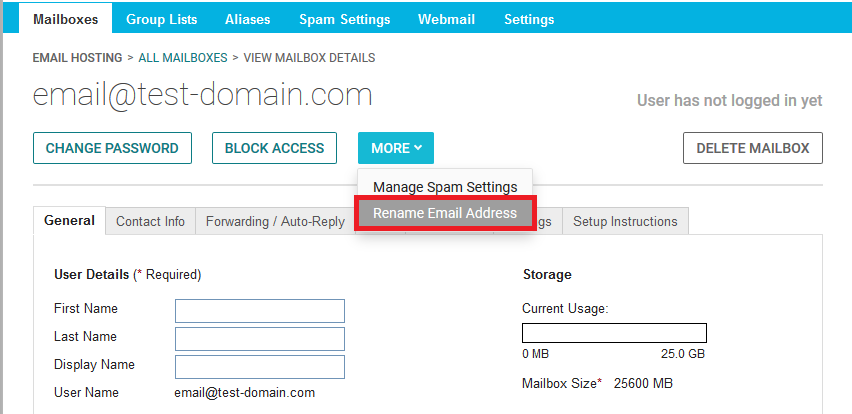
4. Once in the User Details, click More -> Rename Email Address
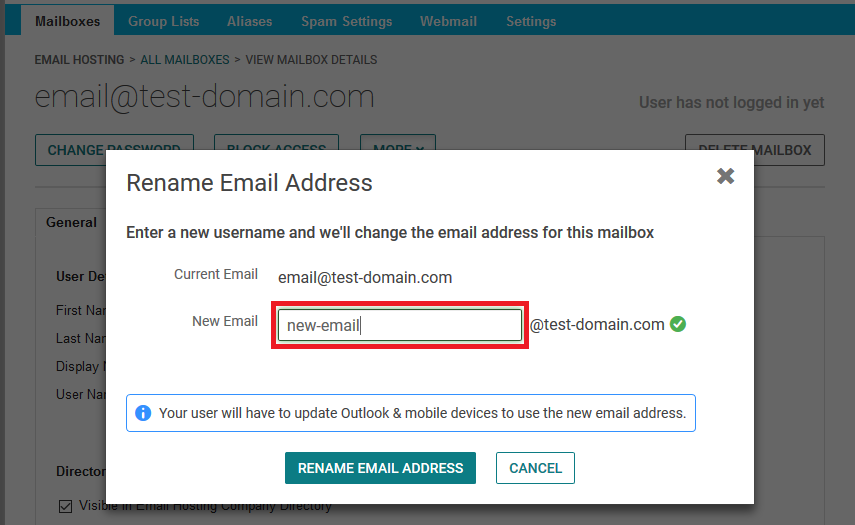
5. A popup will appear, where you can type in your requested new Email Address.
If the new Email Address is available, a green check icon will appear to the right.
Complete the process by clicking on the “Rename Email Address” button:
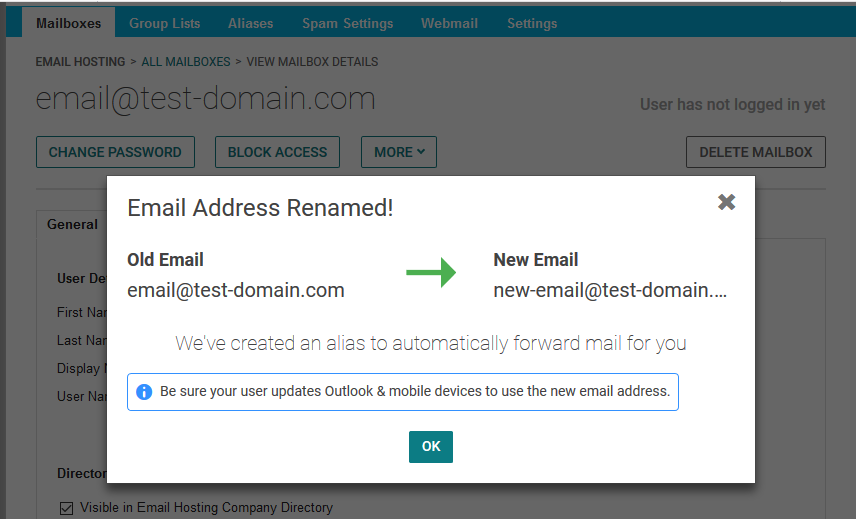
6. An Alias of the now “old” Email Address will be automatically created and applied to the newly renamed Email Address:
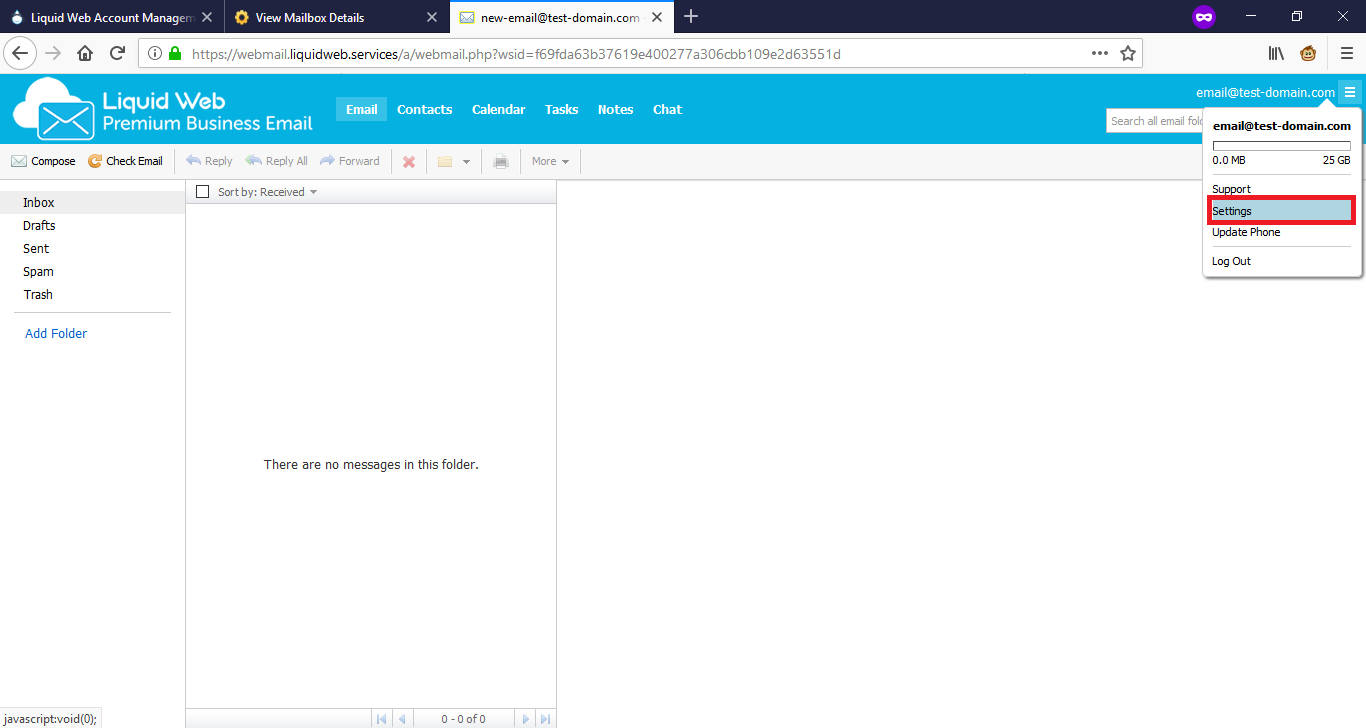
7. If you send and receive messages through Webmail, you will also need to change to the new Email Address in the Settings there as well:
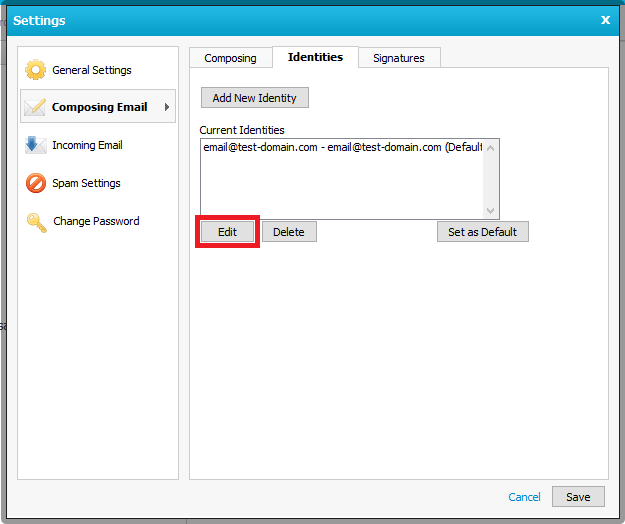
8. After selecting/clicking the Current Identity, then click the Edit button:
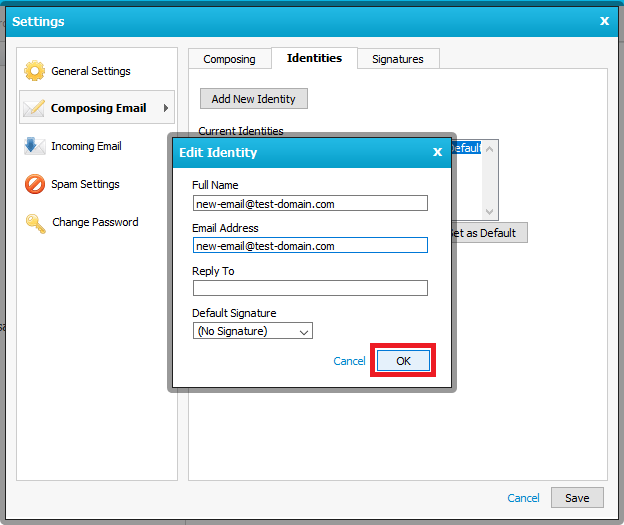
9. Type the new Email Address in the respective “Edit Identity” field, then click OK:
10. Lastly, you will need to update to the new Email Address in mail client/mobile devices.
Please see Using the Email Help Tool for Premium Business Email and Hosted Exchange.