Removing an Application from Softaculous
To uninstall an application in Softaculous, follow these steps, ensuring you have a backup as a precaution. The process may vary for different applications.
If you are no longer using an application you installed in Softaculous, you can remove it in just a few easy steps. Before removing, make sure you take a backup, just in case you want to restore it at some point later on or need the information available for later use. See how to take a manual backup in our article Backing Up Applications in Softaculous.
Note: |
This tutorial walks you through the application removal process of a WordPress installation. However, depending on database and other application dependencies the removal requirements may differ for other applications. |
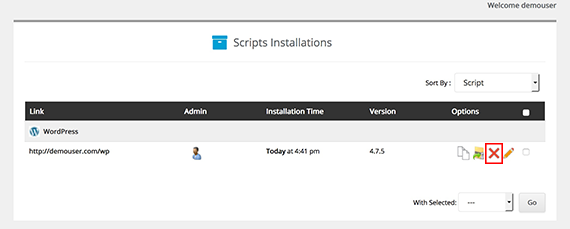
- From the home page of Softaculous, click the Installations icon at the top of the page.

- This will take you to the Scripts Installations home page. A list of your installations will show, click the red X icon to delete the instance.

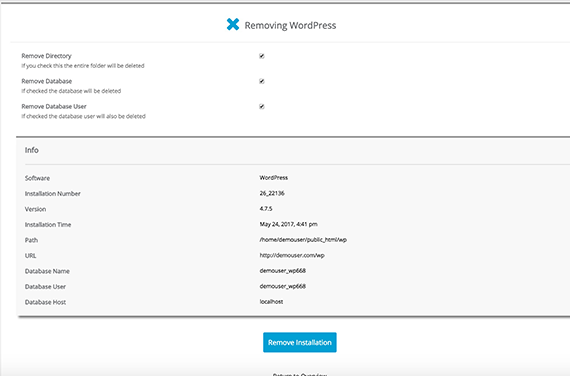
- You will be directed to a page to choose the delete options. You can delete the directory, database and user. If you want to completely remove all three, make sure to check all the boxes next to them. Click Remove Installation.

- A pop-up will appear to confirm you want to delete the installation. Click on OK to confirm.
Warning:
Removing an installation is permanent and irreversible. Make sure you’ve taken a backup before you confirm deletion.

- Once the installation is removed, a success message will appear at the top of the page.
- Any backups you created for the installation will still be available in the Backups and Restore section. See our article Restoring from a Backup in Softaculous for information on how to restore an installation.