Changing Your Website’s Nameservers
Your nameservers are a vital part of the Domain Name System (DNS). They tell other servers how to match your website’s domain name with IP addresses so the right website content gets shown to your website visitors. Without nameservers, servers can’t find the rest of your DNS records to properly direct traffic.
When you migrate a site to a different server, you may want to change where your DNS is hosted to make managing your site settings easier.
If you want to change where your DNS is hosted, you need to change your nameservers, too. Your nameservers give directions to your DNS records, so if you create DNS records somewhere new without changing your nameservers, no one will be able to find your website. You change your nameservers where you registered your domain. This article will give you general directions on changing your nameservers: the process will be different depending on where you registered your domain.
DNS Delays
There are three main parts to changing your nameservers:
- Finding out where your domain is registered.
- Deciding on your new nameservers.
- Changing your nameservers.
Once you’ve changed your nameservers, you can move your DNS records to where the nameservers are pointing. As an example, we will use a domain registered at NameCheap and change the nameservers so you can edit your DNS in your Liquid Web account.
Your Domain Registrar
When you register your domain, nameservers are automatically set for you. If you don’t change your nameservers, you’ll set your DNS records in your account with your registrar. When you want to change your nameservers (and be able to edit your DNS records somewhere else), you need to know where your domain is registered so you can change your nameservers in the right place.
If you don’t know who your registrar is, you can find it at https://www.internic.net/whois.html or perform a whois search from your command line terminal.
To search for your registrar, open your terminal program and type the following:
whois mysite.com
Remember to replace “mysite.com” with your domain name. Once you press Enter, the following information will be returned:
Domain Name: MYSITE.COM
Registrar: NAMECHEAP
Sponsoring Registrar IANA ID: 000
Whois Server: whois.mysite.com
Referral URL: http://www.mysite.com
Name Server: NS1.SAMPLESERVER.COM
Name Server: NS2.SAMPLESERVER.COM
Status: clientDeleteProhibited https://icann.org/epp#clientDeleteProhibited
Status: clientRenewProhibited https://icann.org/epp#clientRenewProhibited
Status: clientTransferProhibited https://icann.org/epp#clientTransferProhibited
Status: clientUpdateProhibited https://icann.org/epp#clientUpdateProhibited
Updated Date: 13-apr-2016
Creation Date: 02-nov-2014
Expiration Date: 02-nov-2016
Registered Your Domain in Your Liquid Web Account?
Once you know where your domain name is registered, you can determine what nameservers you’ll be changing to.
Your New Nameservers
There are three general places your DNS could be hosted (and therefore, where your nameservers will be pointing):
- At your domain registrar
- On a server you manage (these are called custom or private nameservers)
- At your hosting provider (Liquid Web)
To change your nameservers, you need to determine what your new nameservers will be.
Domain registrars will tell you what nameservers to use on their website. If you’re moving your nameservers to where your domain is registered, you’ll need to log into your account at the registrar to find these nameservers.
If you want to start using custom nameservers, we recommend you follow our tutorial if you have a cPanel server. Using custom nameservers can make it difficult for Liquid Web to support your DNS issues and may cause significant problems with your websites or Managed Sites.
If you are going to use Liquid Web’s nameservers, you can choose between two sets of nameservers:
- ns.liquidweb.com and ns1.liquidweb.com
- ns.sourcedns.com and ns1.sourcedns.com
For example, if you registered your domain at NameCheap but want to use Liquid Web nameservers (and host your DNS at Liquid Web), the nameservers you’ll want to start using are ns.liquidweb.com and ns1.liquidweb.com or ns.sourcedns.com and ns1.sourcedns.com.
It’s recommended that you have two nameservers for redundancy, so note all the nameservers listed where you want to host your DNS. Once you have a list of the nameservers you’ll be using, you can change your current nameservers.
Changing Your Nameservers
Up until now, you’ve been gathering the information you need to change your nameservers. First you figured out where your domain is registered. Then you figured out what nameservers you will use. Now, you’ll enter your new nameservers where your domain is registered.
If your domain is hosted at Liquid Web, then this part is easy!
Using my.liquidweb.com
- Login to your Liquid Web account. For more information on accessing your Liquid Web account, see Exploring Your My Liquid Web Account.
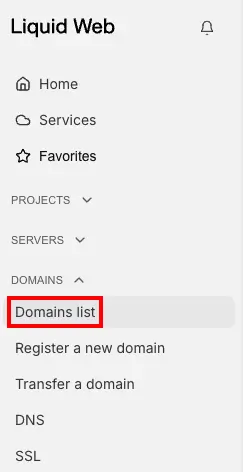
- At the left of the screen, click Domains list.

- Click on the domain for which you want to change nameservers.
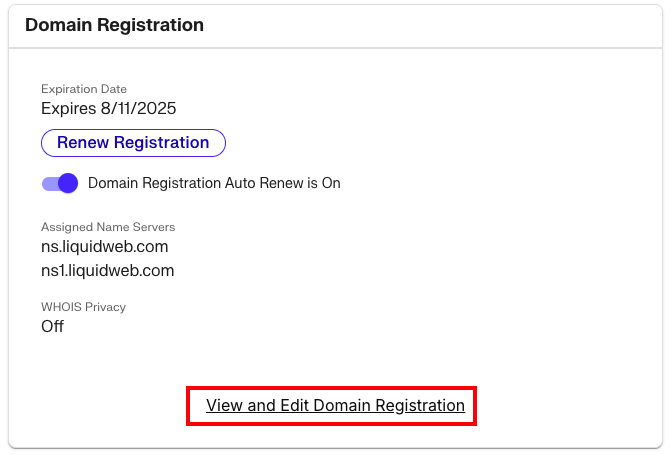
- Under Domain Registration, click View and Edit Domain Registration.

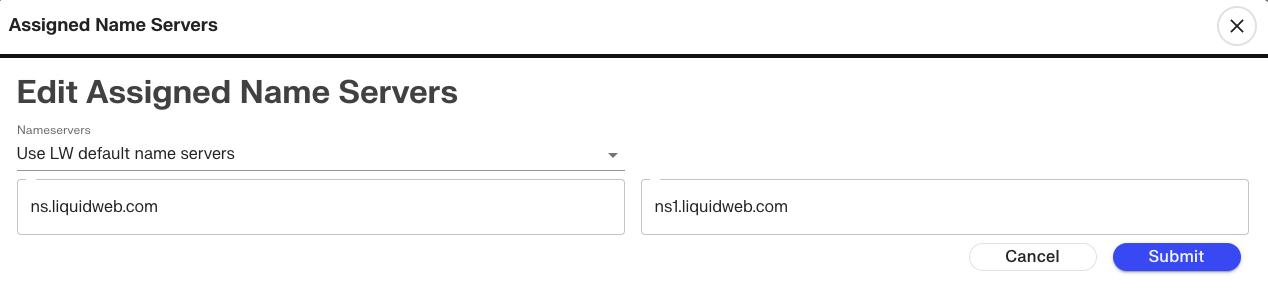
- Click the gear icon next to Assigned Nameservers.

- From the drop-down menu, choose Liquid Web’s default nameservers, Liquid Web’s default un-branded nameservers, or Custom Nameservers. If you are using custom nameservers, enter them in the boxes provided. Click Submit to save your changes. (Note: nameserver changes may take up to 48 hours to propagate throughout the Internet).

Unfortunately, we do not have access to external registrars. If your domain is registered with another company, we can’t provide you detailed instructions on changing your nameservers. We recommend contacting your registrar’s support department if you need specific assistance.