Cloudflare SSL with Cloudflare origin certificate
Are you using Cloudflare on your website? Suppose you do not want to purchase a commercial SSL certificate authority or use a free Let’s Encrypt SSL. In that case, you can install a Cloudflare origin certificate on your hosting server to maintain end-to-end encryption without paying a dime.
This tutorial will show you how to create a free Cloudflare origin certificate for SSL and how to install it.
Cloudflare origin certificate prerequisites
To complete this tutorial, you will need the following:
- A Cloudflare account.
- A registered domain that is live and added to your Cloudflare account. The registered domain should point to your Liquid Web hosting server.
Cloudflare is one of the world’s largest cloud network platforms, speeding up and protecting millions of websites. It also offers free Content Delivery Networks (CDNs), as well as encryption and fraud prevention.
By creating a free account with Cloudflare and adding your website, you can use Cloudflare for free. It takes about 24 hours for your website to be enabled for HTTPS. Learn how to do it here.
Cloudflare offers three modes of SSL encryption options that are Flexible, Full, and Full (strict). Visit their site for more information.
Cloudflare SSL modes
Cloudflare SSL has several modes that have different characteristics:
- Off — Choose this option if you don’t want to use SSL certificates. This option is not recommended.
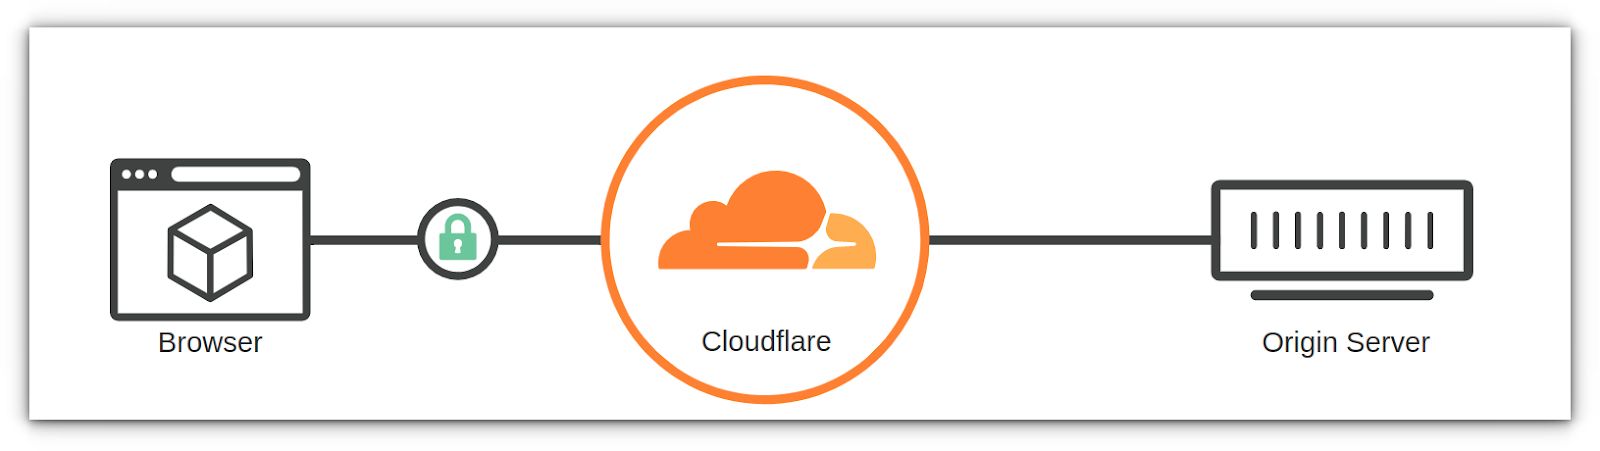
- Flexible SSL — This option secures the traffic between Cloudflare and your visitor but not between Cloudflare and your web origin server.
- Full SSL — Ensures end-to-end protection between Cloudflare and your visitors, as well as Cloudflare and your web server.
- Full (Strict) SSL — This option also gives you a wholly secure connection with the added benefits of authentication. It is issued by a publicly trusted certificate authority or Cloudflare’s origin certificate authority.
As long as you’re using Cloudflare’s free SSL in Full SSL or Full SSL (Strict) mode, the connection between the client and your server will be secured properly.
To enable HTTPS encryption on your website, log in to your Cloudflare account and choose the domain name. Now, go to the SSL tab and select Flexible SSL mode from the dropdown:
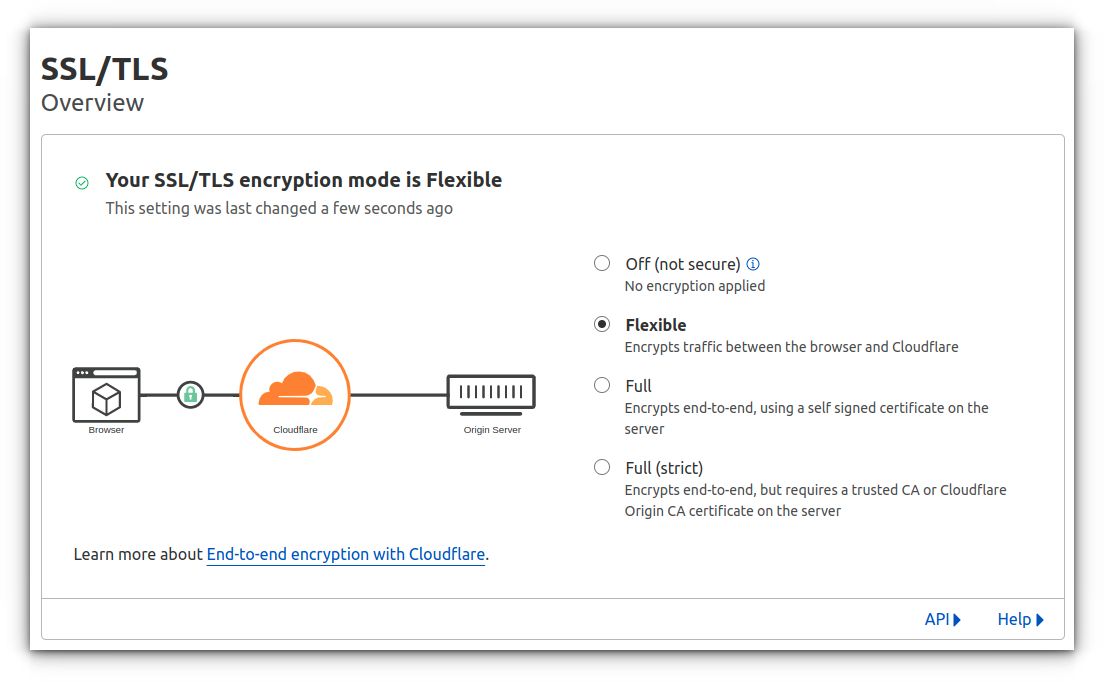
This Flexible SSL configuration will allow your site to be accessed over HTTPS (for example, https://example.com/).
Despite turning on the Flexible SSL encryption, you have not accomplished the more secure full end-to-end encryption. Flexible SSL will only encrypt data your visitors send to the Cloudflare server, not data that travels from the Cloudflare server to your hosting server.
To achieve full end-to-end encryption, you will need to use Full SSL or Full (Strict) SSL mode. Both will require you to create an origin certificate or purchase a dedicated certificate:
Follow the instructions below on how to get a free Cloudflare origin certificate and install it on our hosting server.
How to configure Cloudflare origin certificate
When it comes to configuring you Cloudflare origin certificate, let’s review the three main steps in the sections that follow:
- Generate certificate and private key.
- Install Cloudflare SSL on your domain.
- Review DNS and SSL settings.
Generate certificate and private key
To generate a Cloudflare origin certificate, Log in to your Cloudflare account. Select the domain and navigate to the SSL/TLS icon > Origin Server tab option > Create Certificate button:
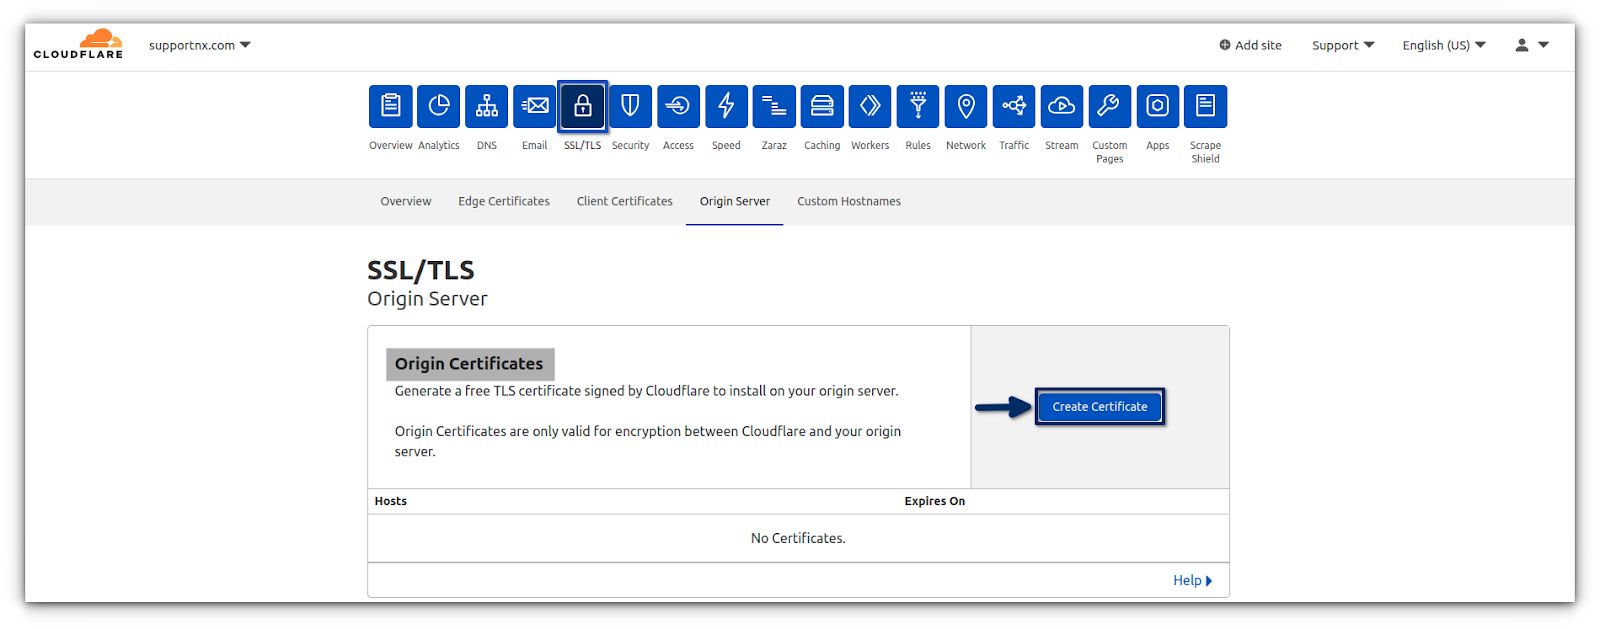
By clicking on the Create Certificate button, you will be taken to the next page, where you will need to follow these steps:
1a. Generate a private key and Certificate Signing Request (CSR) with Cloudflare.
1b. Make sure your domain name is listed in the Hostnames field.
1c. Decide how long the SSL certificate should be valid for.
1d. If all of the above steps are done, click the Create button:

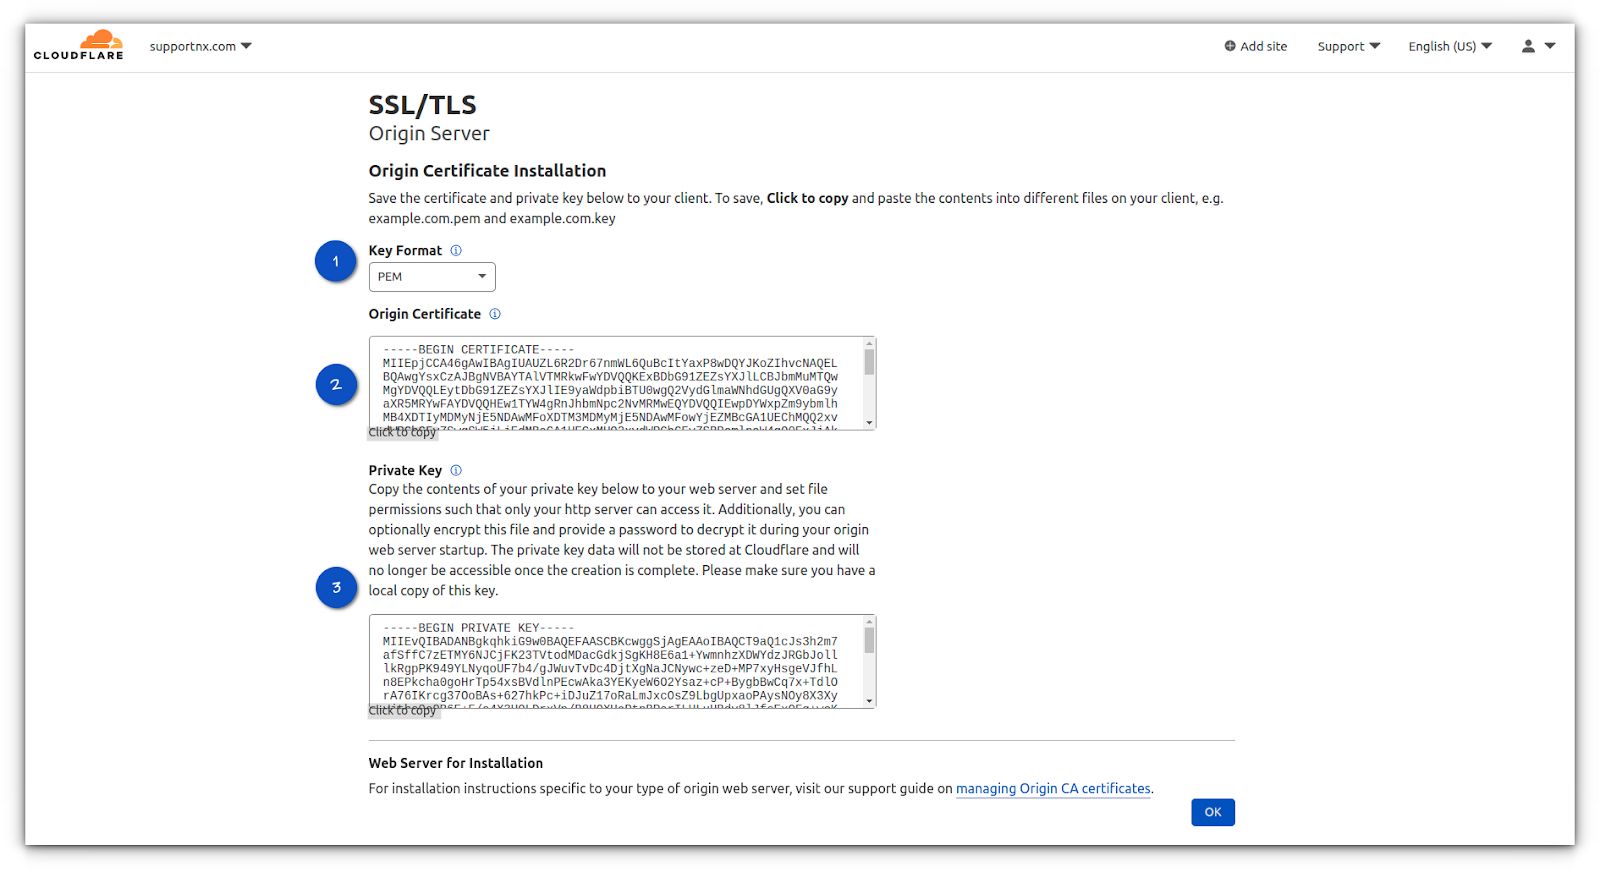
Upon creating the Cloudflare origin certificate, you will be directed to a page where you can copy the Cloudflare origin certificate and private key. This information is required to install SSL on your web origin server, and the Key Format should be PEM:
You will also need the Cloudflare CA Bundle to establish the full chain of trust. You can download the Cloudflare CA root certificate here:
Add Cloudflare Origin CA Root Certificates
You must choose the Cloudflare Origin RSA PEM format:
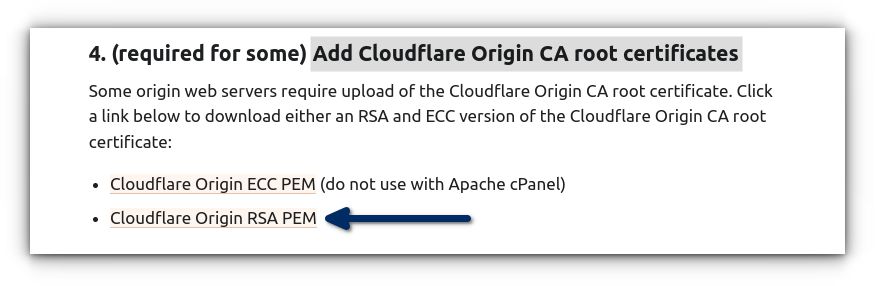
Thus, you will need these three pieces of SSL to install an SSL certificate:
- A private key
- Origin certificate (CSR)
- Origin CA root certificate (Cloudflare Origin RSA PEM)
Install Cloudflare SSL on your domain
Here is how you can install Cloudflare SSL within your Nexcess Client Portal:
2a. Navigate to the SSL tab in my.nexcess.net by following the below instructions.
2b. From the homepage select the Domain Name on which you want to install SSL, by going to Plans > Plan Dashboard > Sites > Domain Name.
2c. Choose SSL from the menu options.
2d. If Let’s Encrypt SSL is enabled on your domain, you will need to turn it off by toggling the switch left to see the Upload New Certificate section.
2e. Now in the Upload New Certificate section, fill in the fields for Private Key, Certificate (Origin Certificate), and Chain Certificate (Cloudflare CA Root Certificate) to upload the new certificate.
2f. Click Install when ready.

In just a few minutes, your SSL certificate should be installed. Please note that this certificate is renewed/revoked at Cloudflare’s end.
Review DNS and SSL settings
To ensure the SSL works correctly on your domain, there are couple of last steps to take:
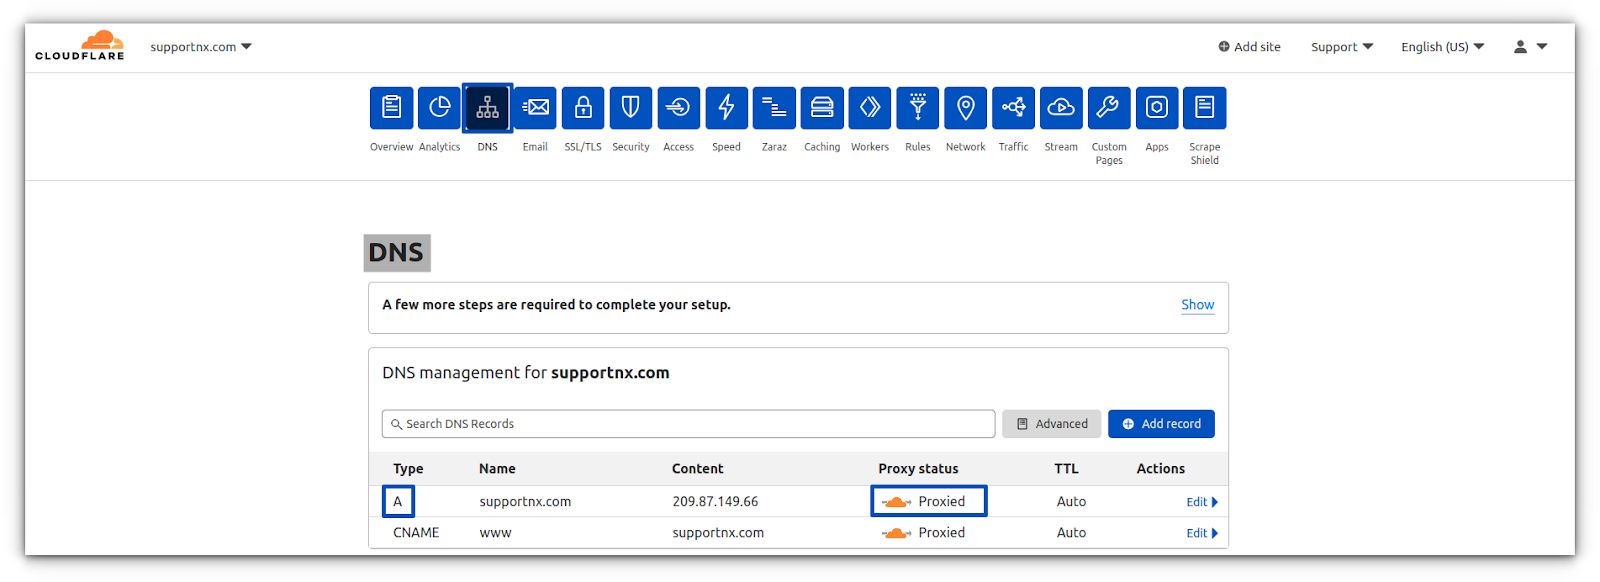
3a. You must ensure the domain’s DNS A record is proxied behind Cloudflare:
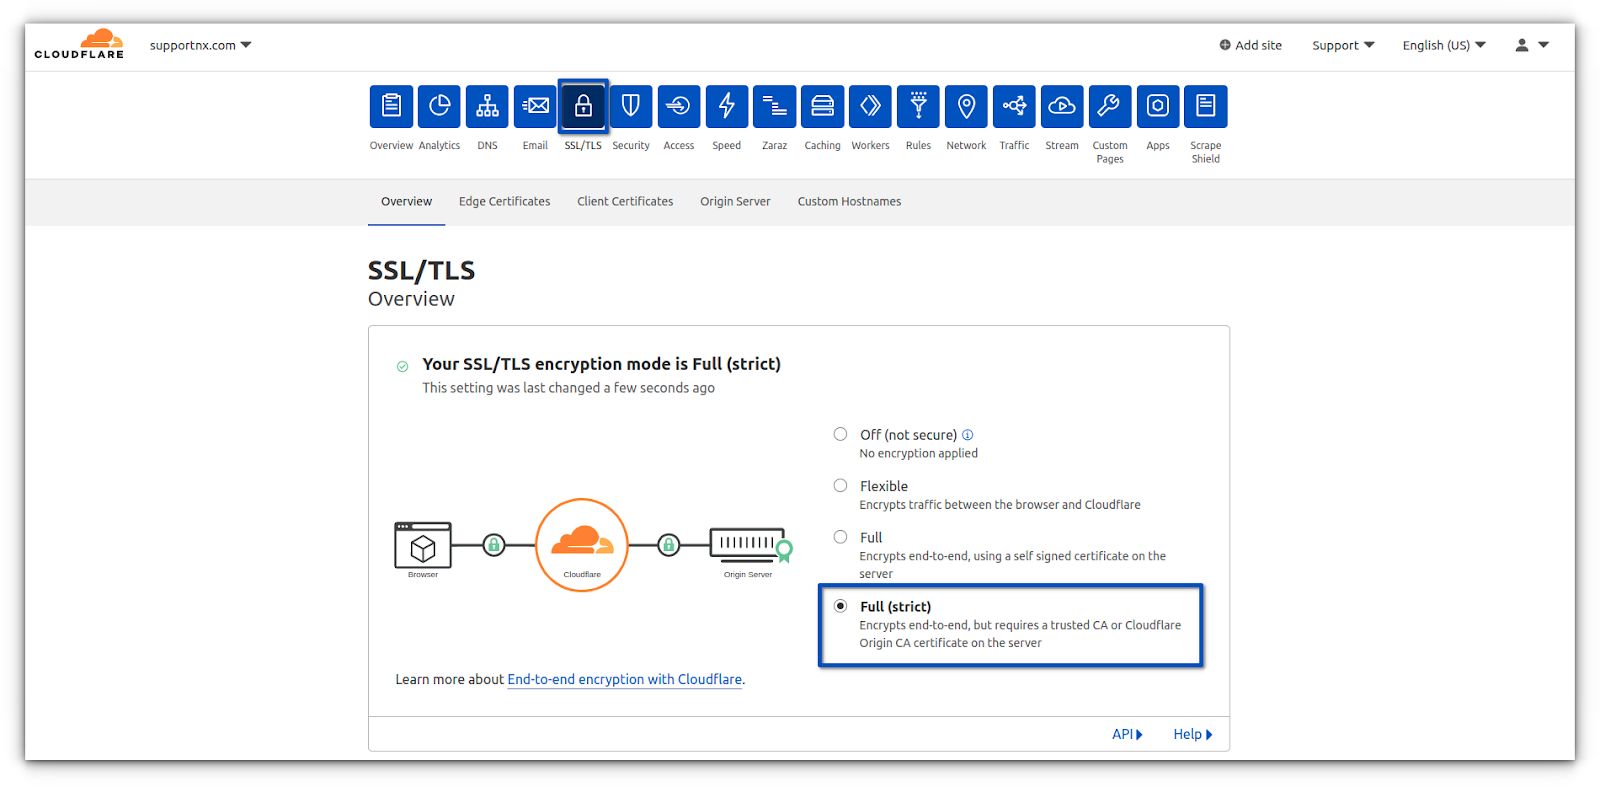
3b. You will also need to ensure the SSL/TLS encryption mode is set to Full (Strict) mode:
There you go! Congratulations! Your domain is secured with Cloudflare SSL, which uses the Cloudflare origin certificate.
Limitations of Cloudflare’s origin certificate
Usually, SSL certificates are a bit costly, so why is this SSL certificate from Cloudflare free? It comes with a catch, but it is so minor that it shouldn’t bother most website admins.
About the requirement to use the Cloudflare proxy when using Cloudflare’s origin certificate
So Cloudflare enforces the requirement to use the Cloudflare proxy when using Cloudflare’s origin certificate. For it to work properly, your domain must always use the Cloudflare proxy on which you have installed the SSL certificate.
The Cloudflare origin certificate becomes useless if you stop using Cloudflare’s protection on your domain. If you bypass Cloudflare for some reason, the self-signed certificate will warn any user trying to connect to your website, indicating that the site is not secure.
It is recommended that you always use Cloudflare’s proxy, as that’s how they cache your assets. However, using this certificate essentially locks you into using Cloudflare until you decide to pay for an SSL certificate.
Conclusion
Setup is complete! It’s that simple. You have now learned how to protect your website by encrypting the traffic between Cloudflare and the origin server using a Cloudflare origin certificate.
Installing the Cloudflare origin certificate on your domain means you do not have to worry about renewing the Let’s Encrypt certificate every 90 days or paying for yearly commercial SSL renewals.