Manage DNS in Cloud Sites
Managing DNS records is a critical part of web hosting. The process for Cloud Sites is somewhat different due to Alias DNS record implementation.
Managing your DNS with Cloud Sites can easily be done through your Liquid Web account. You can navigate directly to your account from the Cloud Sites control panel. Depending on where your site is registered, you can also set up a custom nameserver or use Liquid Web nameservers. See Where Is My DNS Hosted?
Cloud Sites IP Address |
| Before navigating away from the Cloud Sites control panel, be sure to copy either the Domain Name ALIAS or the IP address of the site you are creating the DNS Record for in the DNS file. We recommend creating an ALIAS Record for the domain if your DNS records are hosted with Liquid Web. (If your Website details doesn’t show a Domain Name ALIAS, you can click the Generate button to create one for the site). You will create an A Record for the domain if your DNS host does not support ALIAS record types. The ALIAS hostname or IP address is found in the site details. 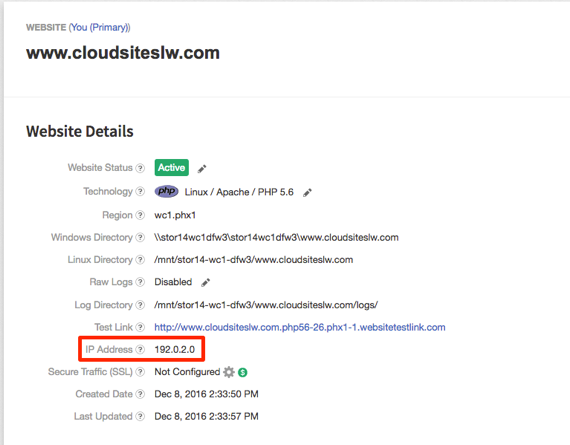 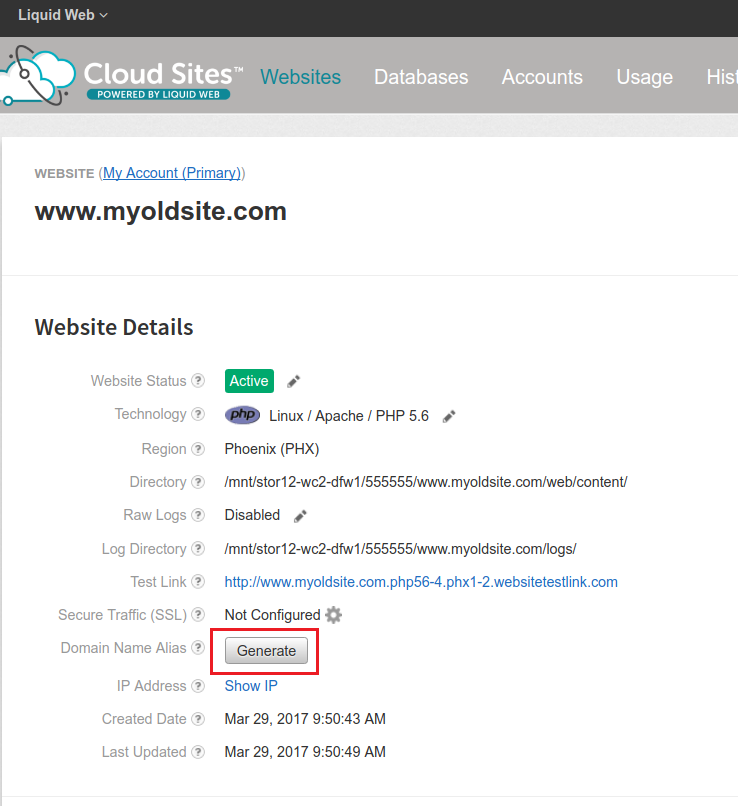 |
NOTE: |
| If you are using a Dedicated SSL IP, you will not be able to use Domain Name Alias records. |
ALIAS Configuration
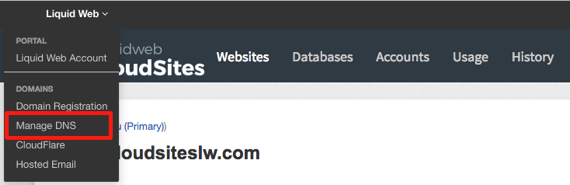
- From the Cloud Sites control panel, click on the Liquid Web link at the upper left-hand section of the page. Select Manage DNS from the drop-down menu.

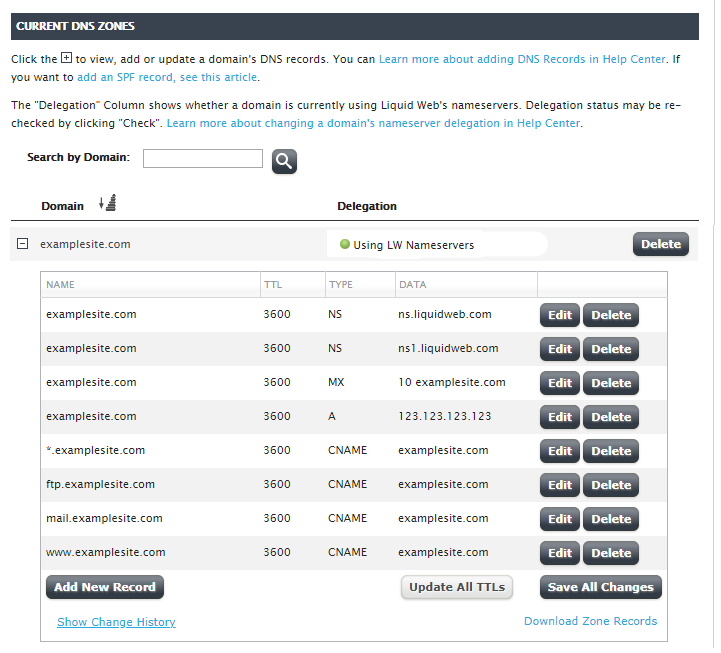
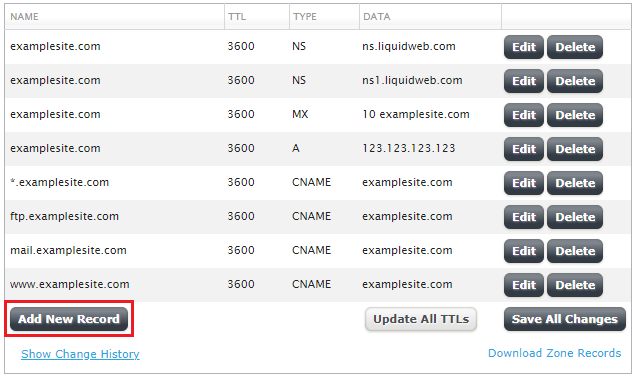
- This will open the Domain section of your Liquid Web account. Scroll down to the DNS Zones section of the page.

- Click the [+] plus sign next to the domain name for which you are adding the ALIAS Record to expand the list.
- Click Add New Record at the bottom of the domain list.

- A blank new record will appear at the bottom of the list. Select ALIAS in the Type drop-down menu. Type in the ALIAS hostname in the data field and then click the green check box to save the record. (If an A record exists for the domain, you will need to delete it at this time).

- Once the record is saved, it will now show in the DNS Zone list. Your website is now pointing to the correct IP address and is live for viewing. If your website fails to resolve in your browser, ensure your website’s Domain Name Registrar is pointed to Liquid Web’s DNS nameservers (see Changing Your Website’s Nameservers).
IP Configuration
- From the Cloud Sites control panel, click on the Liquid Web link at the upper left-hand section of the page. Select Manage DNS from the drop-down menu.
- This will open the Domain section of your Liquid Web account. Scroll down to the DNS Zones section of the page.
- Click the [+] plus sign next to the domain name for which you are adding the A Record to expand the list.
- Click Add New Record at the bottom of the domain list (or Edit if there is already an A record for the domain).
- A blank new record will appear at the bottom of the list. Type in the credentials to make the A Record and then click the green check box to save the record.

- Once the record is saved, it will now show in the DNS Zone list. Your website is now pointing to the correct IP address and is live for viewing. If your website fails to resolve in your browser, ensure your website’s Domain Name Registrar is pointed to Liquid Web’s DNS nameservers (see Changing Your Website’s Nameservers).