Modifying or Deleting Acronis Backups
Adjusting the Backup Schedule
Since the Acronis Cyber Backup schedule is setup by default when the service is purchased, one of the first things you may need to change is the timing or frequency of the backup schedule. Since the backup process is most effective when the server is the least busy, you may want to adjust when the backup starts to a more appropriate time for your business.
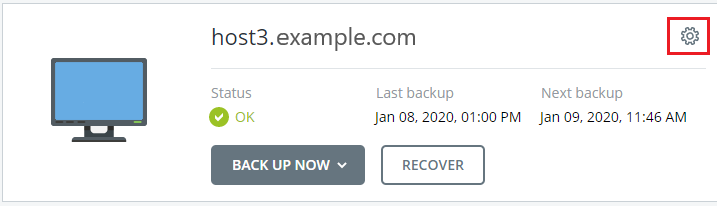
- To access your backup schedules, find the server on the main Acronis Backup Portal (in the Devices section) and click the gear icon to the right side of the server name (some browsers show the sub-menu without having to click on the gear icon).

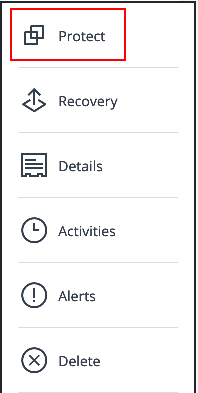
- Select Protect from the menu.

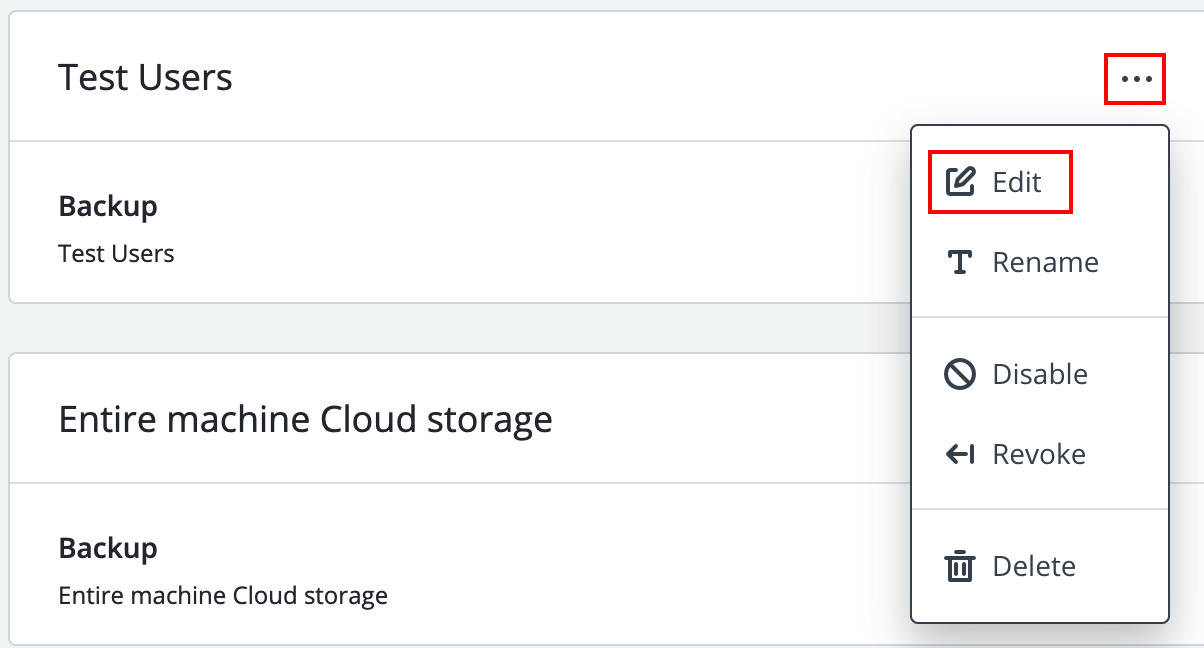
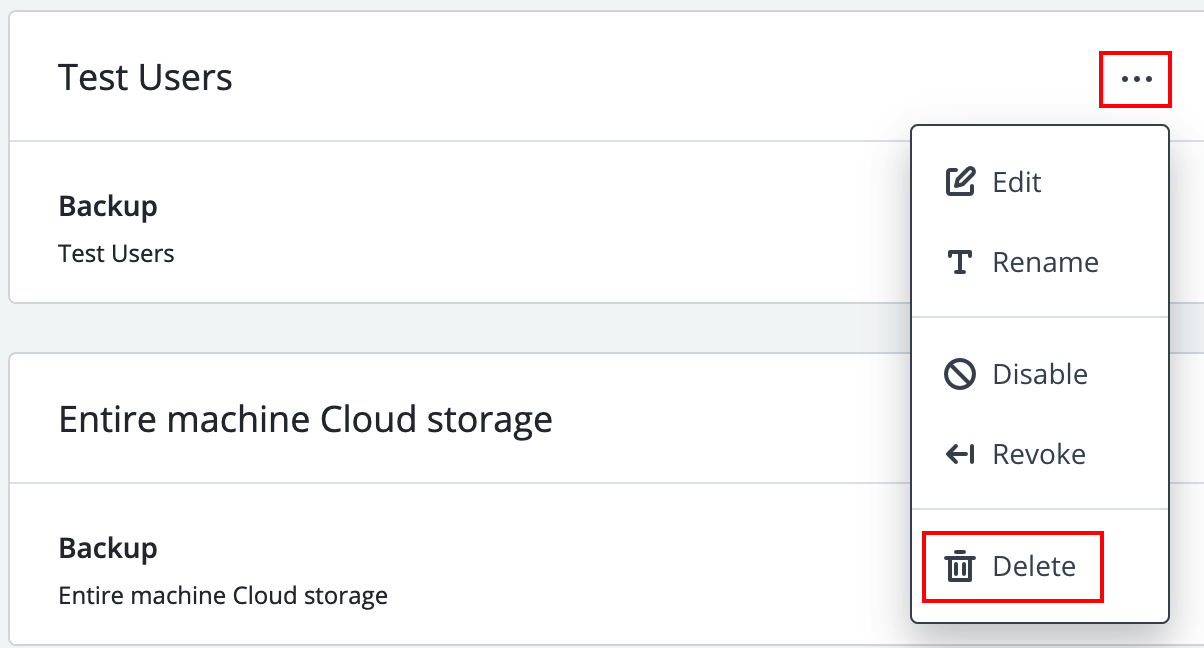
- Select the Protection Plan you want to modify from the list. Click the three dots to the right of the protection plan to modify the details. Click Edit to change the details. You can also Rename, Disable, Revoke, or Delete the protection plan from this location.

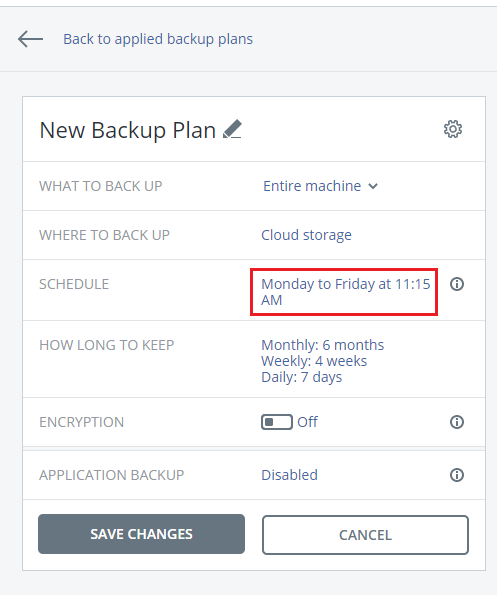
- Click on the scheduled time to modify the start time and frequency of the backups. Click Save to save the changes and begin using the new schedule.
Modifying a Protection Plan
While your Acronis Backups start with a default protection plan, you may want to modify that plan to include different encryption options, a different retention cycle, etc. To access your protection plans, find the server on the main Acronis Backup Portal and click the gear icon to the right side of the server name (some browsers show the sub-menu without having to click on the gear icon).
- Select Protect from the menu.

- Select the Protection Plan you want to modify from the list. Click the three dots to the right of the backup plan to modify the details. Click Edit to change the details. You can also Rename, Disable, Revoke, or Delete the protection plan from this location.
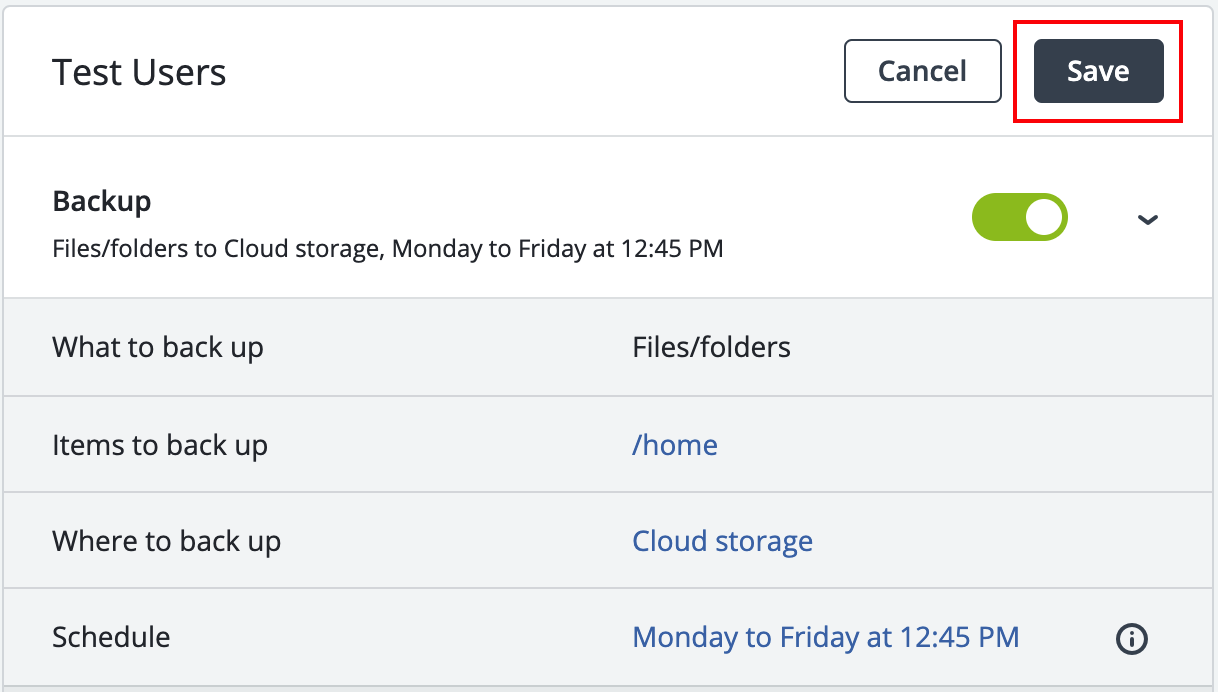
- Click any details that you want to modify. NOTE: some items cannot be edited (such as What to Backup, or Encryption). If you need to change these details, just create a new Backup Plan (see Creating Acronis Backups). Once you’ve modified the settings as desired, click Save next to the plan name to save the plan and resume backups according to the new selections.
Deleting Individual Backups
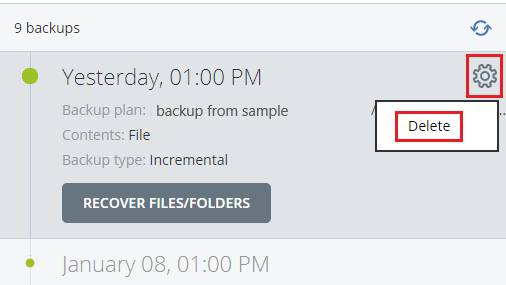
If you need to reduce the space your backups are using on the account, you can manually delete old backups. Find the backup you wish to remove by going to the Device, then clicking Recover (since that is the location for viewing existing backups). Find the time stamp of the backup that you wish to remove and click the gear icon to the right of the time stamp. Click Delete to remove the backup from your account.
| WARNING: |
| You cannot recover data from a deleted backup. Make sure you have a copy of the data that you need before deleting a backup! |
Deleting Protection Plans
You may want to completely remove a protection plan (and all its associated backups) and start a fresh protection plan. To delete a Protection Plan, go to the Devices page, find the machine for which you want to remove the plan, click on the gear icon to the right of the machine name (some browsers show the sub-menu without having to click on the gear icon), then click Protect.
This will display your current list of Protection Plans. To delete a protection plan, click the three dots to the right of the Protection Plan name, then click delete.
| WARNING: |
| You cannot recover data from a deleted Backup Plan. Make sure you have a copy of the data that you need before deleting a Backup Plan! |