Blacklisting Email Addresses, Domains, and IPs in Premium Business Email
If you find that spam from certain senders, domains, or IP addresses is sneaking through the Premium Business Email spam filter, you can create a blacklist to block certain senders from being able to send you email.
If you find that spam from certain senders, domains, or IP addresses is sneaking through the Premium Business Email spam filter, you can create a blacklist to block certain senders from being able to send you email. It’s quick and easy to do!
There are three ways to blacklist in Premium Business Email:
- within your Premium Business Email administration panel for a whole domain
- within your Premium Business Email administration panel for a single mailbox
- within your webmail interface
Blacklisting from the Administration Panel (Whole Domain)
- Log into your Premium Business Email administration panel.
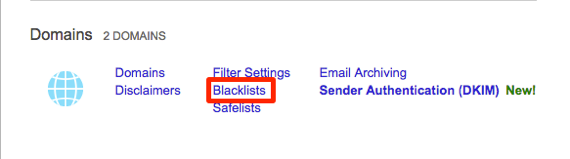
- In the Domains section, click on Blacklists.

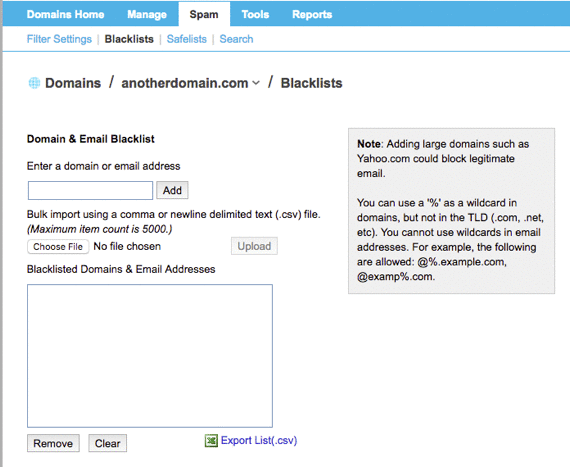
- Enter a domain, email address, or IP and click Add. Keep entering information until you’ve blacklisted everything you need.

- Click Save at the bottom of the page.

Blacklisting from the Administration Panel (Mailbox)
- Log into your Premium Business Email administration panel.
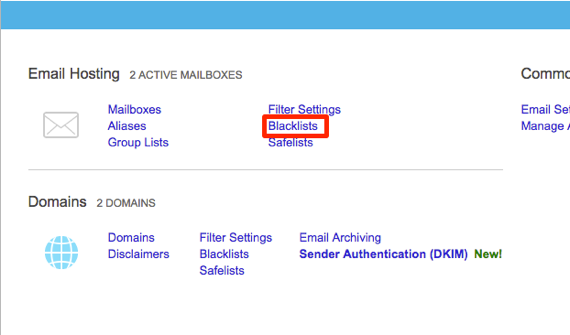
- In the Email Hosting section, click on Blacklists.

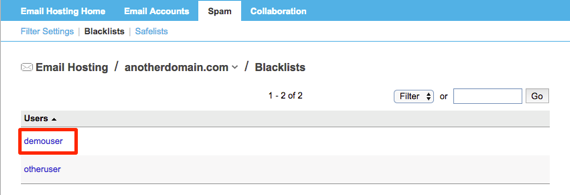
- Click on the mailbox where you’ll be editing the blacklist.

- Enter a domain, email address, or IP and click Add. Keep entering information until you’ve blacklisted everything you need.
- Click Save at the bottom of the page.
Blacklisting from Webmail
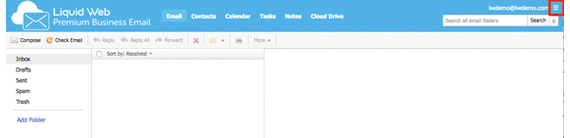
- Log into your Premium Business Email webmail.
- In the upper right hand corner, click on the
 icon and then click Settings.
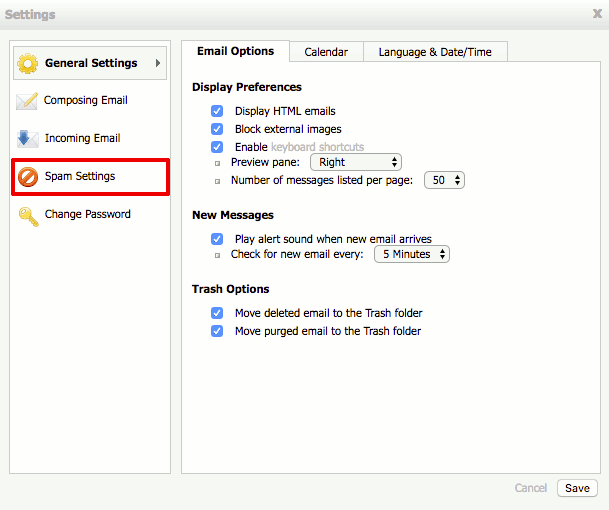
- In the Settings pop-up box left navigation menu, click Spam Settings. Then click the Blacklist tab.

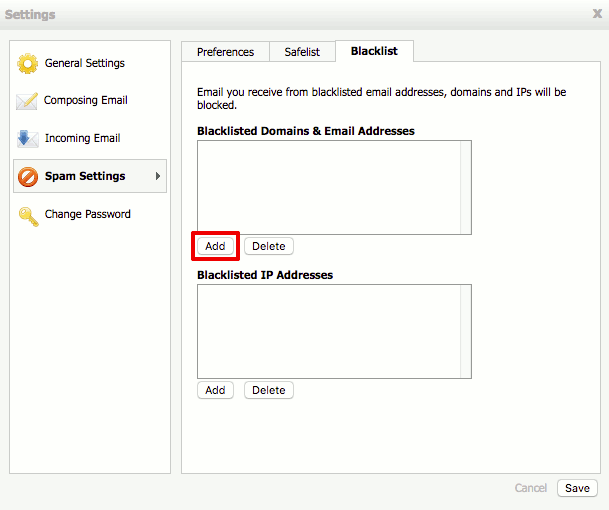
- Click Add, then enter the domain, email address, or IP in the pop-up box and click Add again. Keep entering information until you’ve blacklisted everything you need.
- Click Save at the bottom of the page.
 icon and then click Settings.