Adding Multiple Mailboxes in Premium Business Email
If you have one or two mailboxes to create, doing them one-by-one is pretty easy as we saw in our article Adding a Mailbox in Premium Business Email. But what if you have fifty or a hundred (or more) mailboxes? Our Premium Business Email provides you with a CSV or Excel file upload tool that will automatically create the mailbox and enter the contact information.
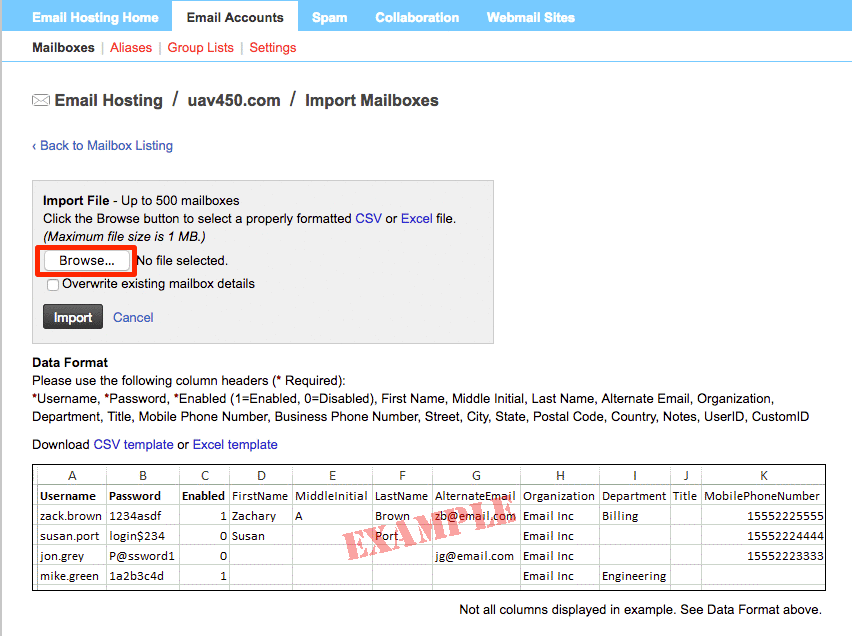
Before you start your upload, you will want to format an Excel spreadsheet or CSV so that you avoid any issues with the upload.
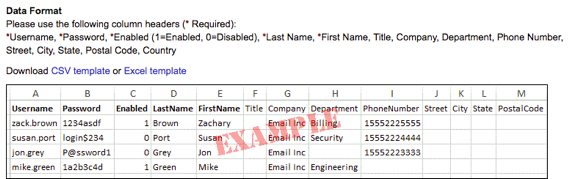
In the example provided above, the username, password and enabled/disabled columns are required to be completed in your file. Additional information such as the first and last name, alternate email, organization, contact information are optional and can be completed at a later date by the user.
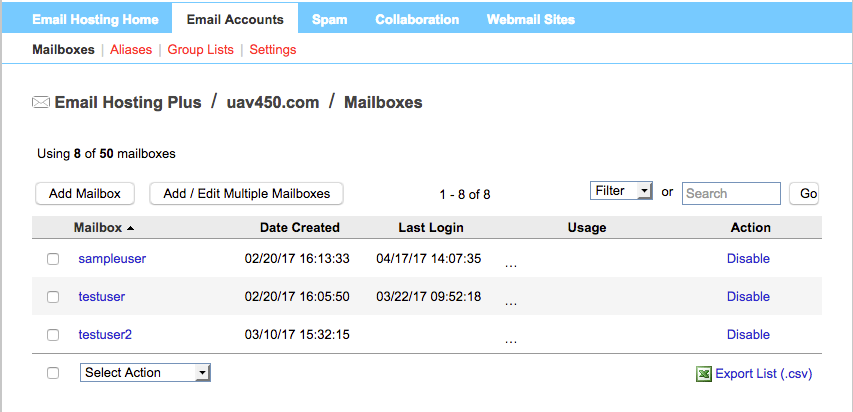
- Once you’ve created the file you are going to upload, navigate to the Email Accounts tab in your control panel.

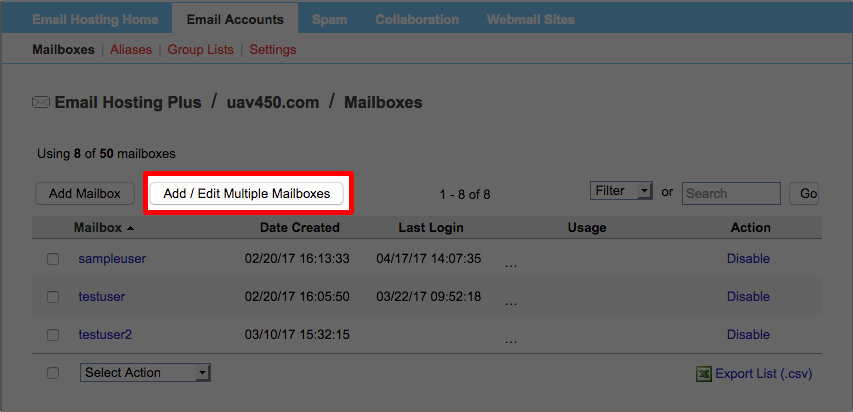
- Click the Add/Edit Multiple Mailboxes button.
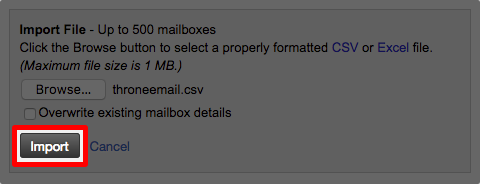
- To upload your file, click the Browse… button and select the file from your computer. Selecting the checkbox to overwrite existing mailbox details will allow you to import changes made to mailboxes already created.

- Click the Import button to begin importing the file.

- You will be redirected to a status page for the upload. You do not have to stay on this page while the file loads.
Note:
Depending on the number of mailboxes being created and user data entered for them, it can take a few moments or a few hours for the mailboxes to create.
- When your upload has completed, you will be directed back to the Mailboxes page and you will see the new mailboxes in the user list.
Note:If you have blank rows in your CSV or Excel spreadsheet, an error will occur after upload. The system will tell you certain mailboxes could not be created. This is only for the blank rows, the rows you have populated with information will show in your Mailboxes list. |