Adding a Mailbox in Premium Business Email
For Premium Business Email, add mailboxes individually or in bulk using a CSV/Excel file. This article focuses on adding a single mailbox.
With your Premium Business Email (PBE) account, you can add one mailbox at a time, or add multiple mailboxes using a CSV or Microsoft Excel File. In this article, we will walk through adding a single mailbox. If you want to add multiple mailboxes, see our article Adding Multiple Mailboxes in Premium Business Email
Watch this video or scroll down for further instructions:
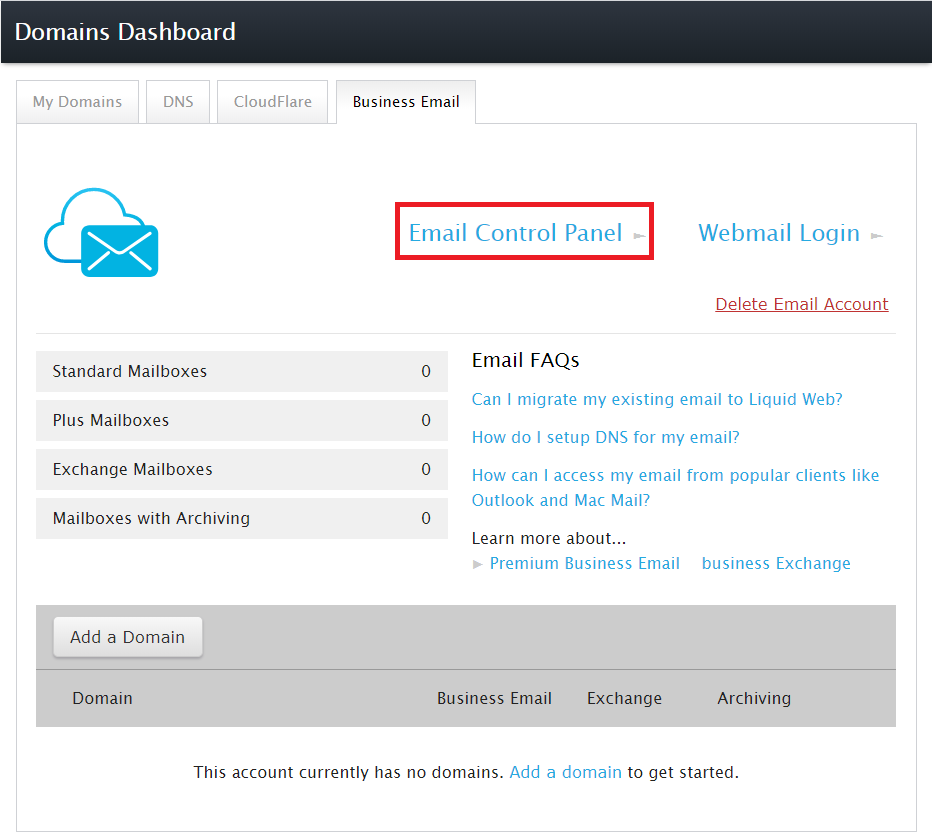
- Use the link to login to your Premium Business Email Control Panel or click on Email Control Panel in your Business Email Dashboard.
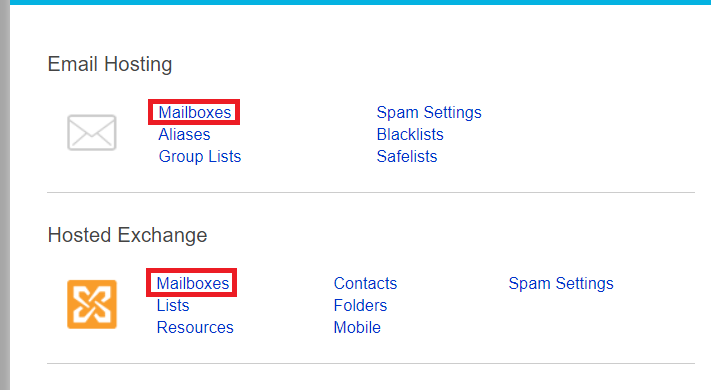
- From the Email Hosting Home page, click on the Mailboxes link for PBE.
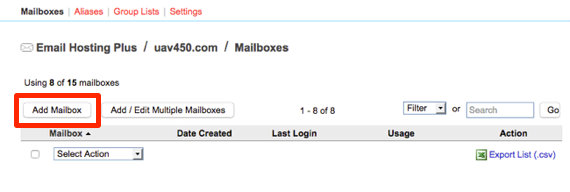
- Click on the Add Mailbox button in the Email Accounts home page.
For Premium Business Email
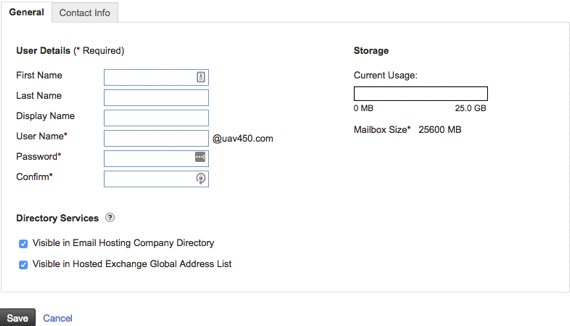
- In the General tab, fill out the users first and last name, this will populate the Display Name. If you want their name to display differently in the company directory, you can enter a different display name. Next, enter the username (email address) and password.
Display Name:
The Display Name will not change the email address for the user, if you want to create an alias please see our article Creating an Email Alias in Premium Business Email. 
- You can manage the directories they are visible to in the Directory Services section. Make them visible to your company directory or address list by checking the box next to the directory.
- The second tab is Contact Info, and just like it sounds, it houses all the information to contact the user. Enter their name, organization, department, mailing address and phone numbers.
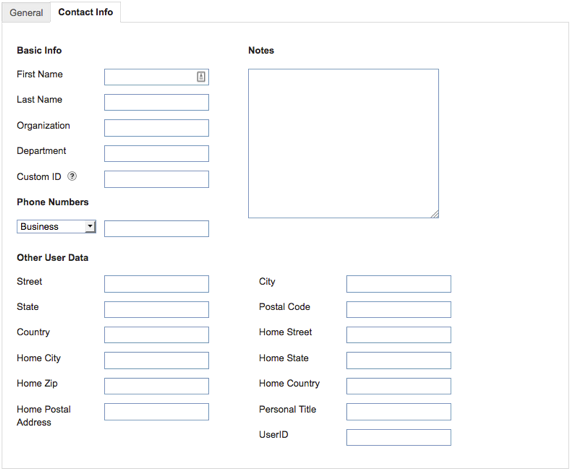
Custom ID: |
One section to point out in this tab, is the Custom ID. This section allows you to choose and enter a custom name or number to tie the mailbox to external systems and allow for you to search for the user by their ID.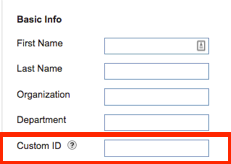 |