Deploying new VMs in VMware Multi-Tenant
Adding Virtual Machines (VMs) to your Virtual Data Center allows you to create the server environment necessary to meet your processing needs. Whether you are expanding your server farm or just spinning up new test servers, deploying VMs is a basic part of managing your VMware infrastructure.
Adding Virtual Machines (VMs) to your Virtual Data Center allows you to create the server environment necessary to meet your processing needs. Whether you are expanding your server farm or just spinning up new test servers, deploying VMs is a basic part of managing your VMware infrastructure.
NOTE: |
| Templates for VMware Multi-Tenant are only available for self-managed VMs. For new Fully-Managed or Core-Managed VMs, contact our Support Team for help. |
Preparing to Add a VM
- Login to the VDC you will be deploying your new VM to. For help logging in, see Logging in to the VDC in VMware Multi-Tenant.
- Gather the networking information (public/private IP’s) to be used in the VM deployment. For more information, see Managing Networking in VMware Multi-Tenant.
- Public IP Addresses
- For the Public IP you will be assigning a private IP which will act as the NAT for the public IP.
- Private IP Addresses
- For a private IP address, a dedicated private network has been setup by default. You can assign a private IP to the VM after it is deployed.
- Public IP Addresses
- After you have your IP(s) sorted out you will need to setup new NAT rules and the Firewall for the VM. To do this see Managing Networking in VMware Multi-Tenant and Managing Firewall Rules in VMware Multi-Tenant.
Adding a VM from a Template
- Log in to your Virtual Data Center (VDC). For help logging in, see Logging into the VDC in VMware Multi-Tenant.
- Click the box containing the details of the VDC to which you want to add the VM.
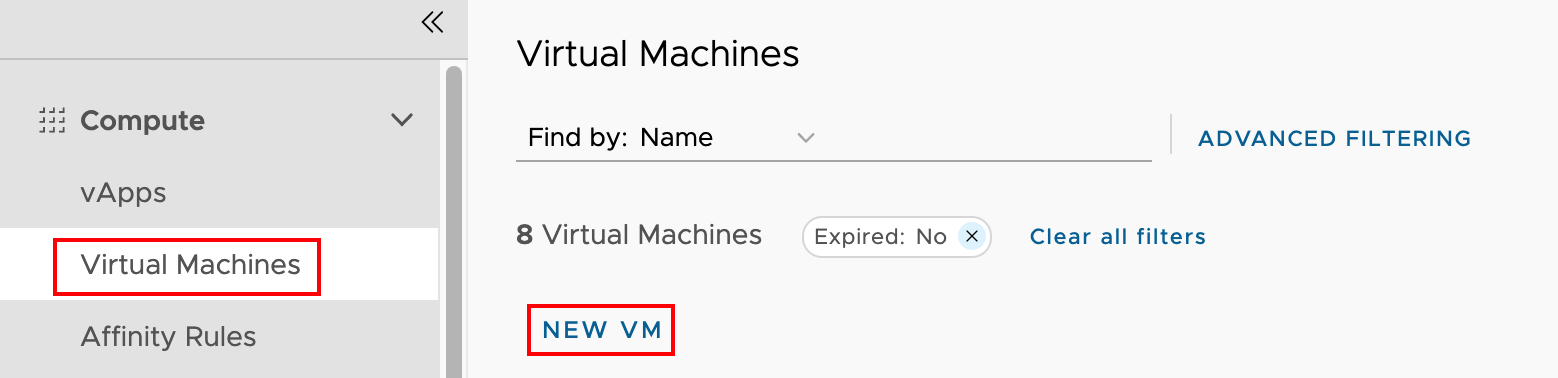
- In the Virtual Machines section, click New VM.

- Assign a name to the VM and to the Computer (these can be the same).

NOTE: |
| Name: This is generally a simple name for the VM based on use (“File server”, “web node1”, etc). Computer Name: This is the “local” part of the systems hostname FQDN – if the server’s fully qualified name would be web01.example.com, then this value would be web01. Be aware, this is limited to 15 characters on all VMs due to Windows OS limitation on computer names. |
- Add a Description of the VM if desired (optional).
- Click the radio button next to From Template.

- Un-Select the Power-on toggle! It is easier to manage the rest of the deploy with the VM powered off.
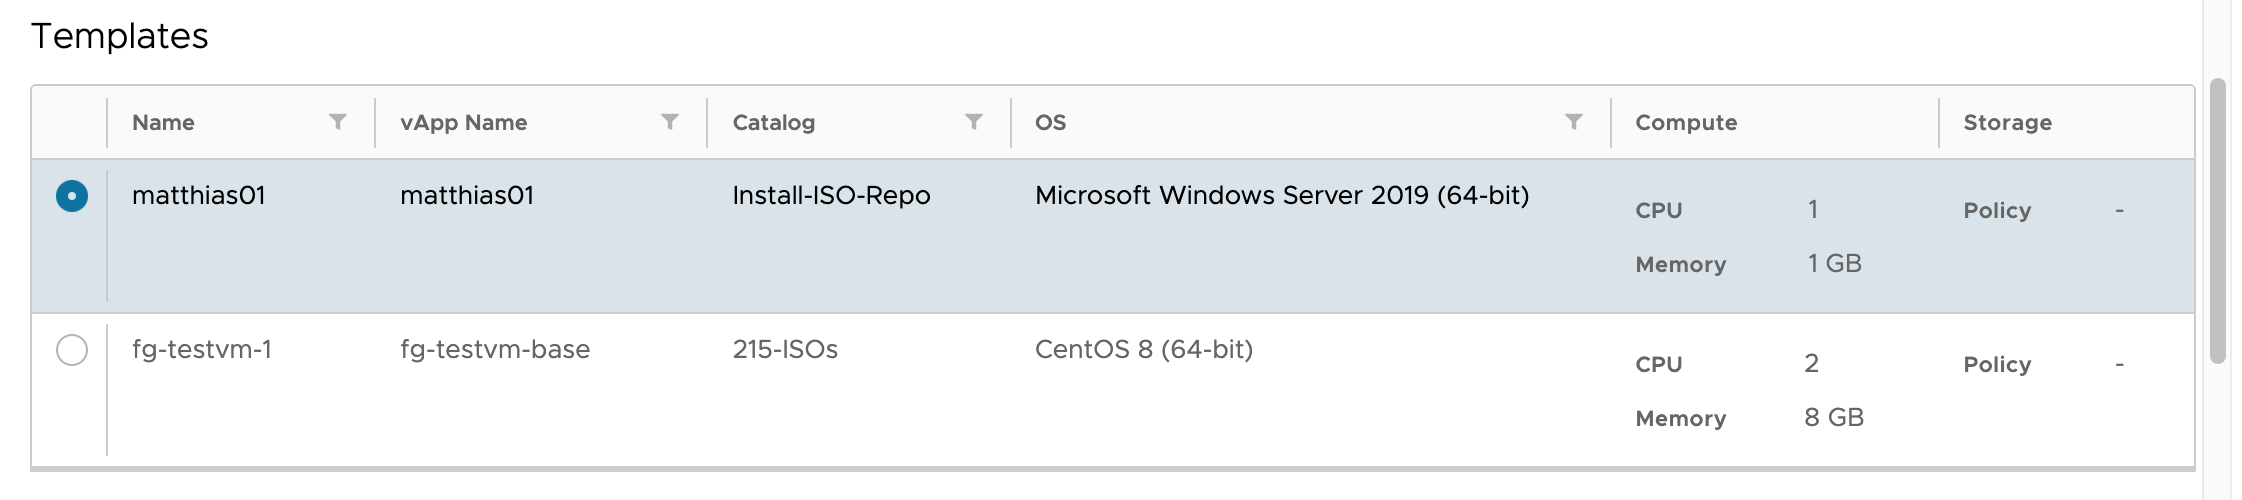
- Select the desired Template from the list provided.
- Select the desired Storage Policy. For more information on Storage Policies, see Selecting Storage Options in VMware Multi-Tenant.
- System resources are set by the template. If you require different CPU, Hard Drive, or Memory resources, you can resize the VM after it is deployed. For more help, see Resizing a VM in VMware Multi-Tenant.
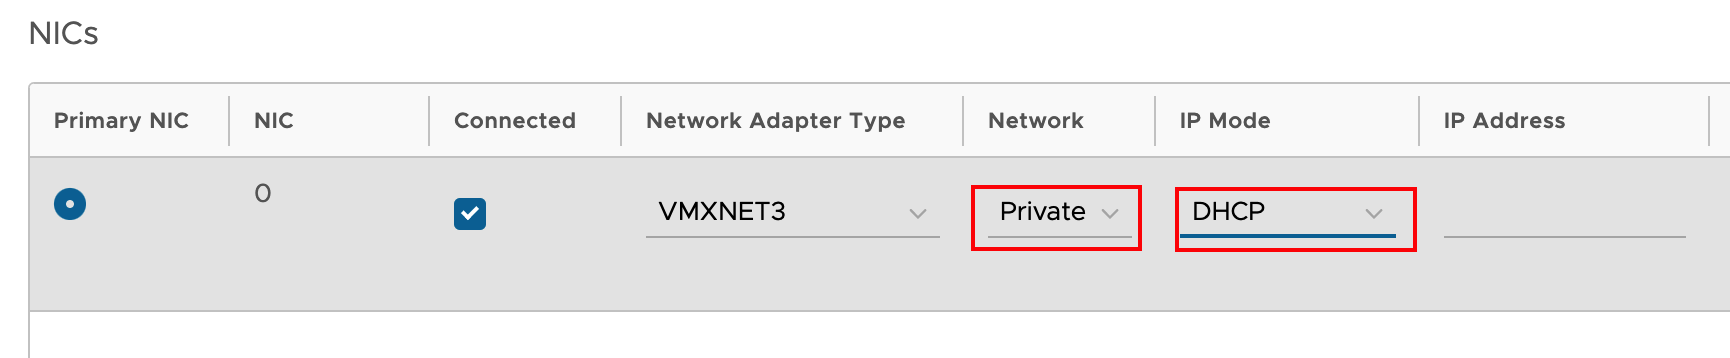
- Select the PrivateNet Network (default for all VDCs) and choose DHCP for IP Mode.

- Once all of the information has been entered, click OK to deploy the VM.
NOTE: |
| To deploy a VM from a Windows Template, you’ll need to complete a few extra steps to synchronize with Liquid Web licensing. Set DNS for the VM to 10.10.10.10 Run the following 2 commands: cscript c:windowssystem32slmgr.vbs /skms kms.win.liquidweb.com:1688 cscript c:windowssystem32slmgr.vbs /ato |
Adding a VM from an OVA or OVF image
- Log in to your Virtual Data Center (VDC). For help logging in, see Logging in to the VDC in VMware Multi-Tenant.
- Click the box containing the details of the VDC to which you want to add the VM.
- In the Virtual Machines section, click New VM.
- Assign a name to the VM and to the Computer (these can be the same).

- Add a Description of the VM if desired (optional).
- Click the radio button next to New.
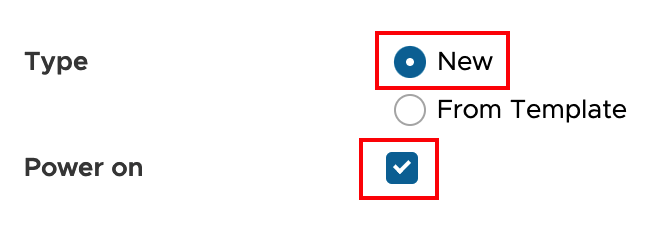
- Un-Select the Power-on toggle! It is easier to manage the rest of the deploy with the VM powered off.
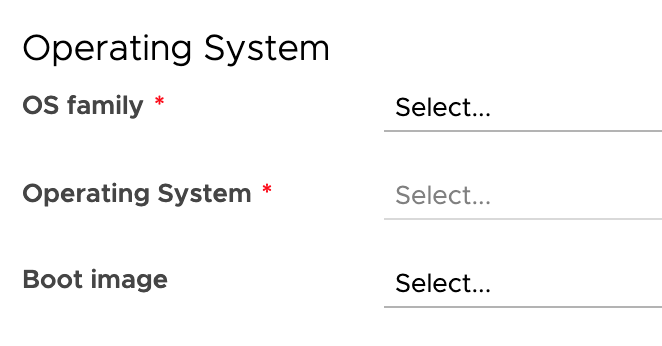
- Select the OS Family, Operating System, and Boot image for the VM. (To add an OVA or OVF image to your VDC, go to Libraries -> Media & Other and click ADD).
- System resources are set by the template. If you require different CPU, Hard Drive, or Memory resources, you can resize the VM after it is deployed. For more help, see Resizing a VM in VMware Multi-Tenant.
- Select a Storage Policy and size for the VM. For more information on Storage Policies, see Selecting Storage Options in VMware Multi-Tenant.

- Select the PrivateNet Network (default for all VDCs) and choose DHCP for IP Mode.
- Once all of the information has been entered, click OK to deploy the VM.
Complete Deployment
Completing the VM deployment involves several steps. Depending on the operating system you are using with your VM, the directions for each of these steps vary.
- Update the password on the VM from the generated password to something secure and unique. See Best Practice: Creating a Secure Password.
- Expand the file system to match the disk space you allocated to the VM.
- Verify that the Network settings are accurate and functional.
- Update the operating system if needed.
NOTE: |
| To view the password generated by the deploy process, open the VM details, the go to Guest OS Customization. Click on the Edit button to see the password reset options (including viewing the auto-generated password). |