Create Email Accounts in Plesk
Plesk makes it simple to create email accounts customized to your domain. Having a myname@mysite.com email address makes your website look professional and separates your personal email from your website email.
There are three parts to setting up your email address:
Creating an Email Account in Plesk
- Log into Plesk. If you have never logged into Plesk, read Getting Started with Plesk.
- In Power User view, click on Mail in the left navigation. If you already have email addresses, they will be listed here. In Service Provider view, click on Subscriptions under Hosting Services. Click on the domain where you want to create an email address. Then click on the Mail tab.

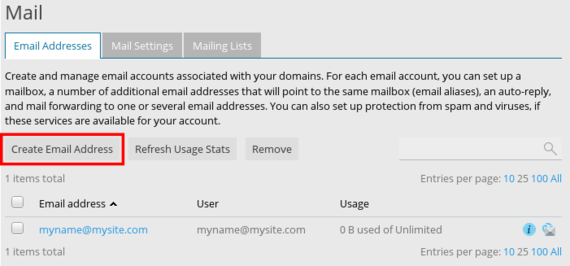
- To create an email address, click Create Email Address.

- Choose your Email Address.
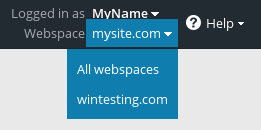
Tip: Webspaces
If you have more than one domain, you should see a drop-down menu to choose the new email address’s domain. If you have more than one domain and there isn’t a drop-down menu, you can change the domain in the upper right hand corner of the screen. Simply click the drop-down menu next to Webspace to change the domain.

- If you check the box next to Access to the Customer Panel, you’ll be able to log into Plesk with these email credentials.
Tip:
If you give this email address access to Plesk, the email user will only be able to see their email in Plesk: they won’t be able to change any settings or make any changes to websites. But, you can give them permissions to do these things by clicking on Users in the left navigation menu. - Choose and confirm a strong Password, learn more about secure passwords in our article Best Practice: Creating a Secure Password.
- If you’d like to limit the mailbox size, click the radio button next to Another size and enter your preferred mailbox size. The default mailbox size is unlimited.

- Add a Description to your email address if necessary. If you are going to use many different email addresses, a description might be helpful.
- Click OK to create your email address.
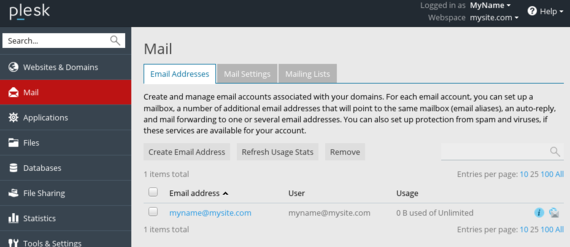
You’ll be able to see the new email address in your Mail section of Plesk.
DNS for Sending and Receiving Email
In order to send and receive email, you need to make sure there’s an appropriate MX record in your DNS. MX records are set up a little bit differently than A records. If you aren’t familiar with different types of DNS records, read What Are DNS Records? before changing anything involving your DNS.
An MX record tells your mail client how email messages will be delivered to your inbox. Having multiple mail servers is definitely an advanced technique, so we won’t cover it here.
Every domain you will be sending mail to and from needs an MX record. Here’s how to add an MX record for your domain (This assumes your DNS records are hosted with Liquid Web. If you aren’t sure, see Where Is My DNS Hosted?).
- Log into your Liquid Web account interface, select Domains from the left menu and click on the DNS tab. Scroll down to the Current DNS Zones section, then click on the [+] next to the domain you need to set up email for.
- Click on Add New Record at the bottom of the DNS information. From the dropdown menu, select MX. Two new input boxes should show up to the left of the record type you just selected.
- Now that you’ve selected the right record, you can go back to the start of the record and fill the rest in. Hovering your cursor over each input field will give you more information about that field.
- Name: This is the first field. When you’re setting up an MX record, you can leave this blank. Leaving it blank creates a record that applies to the whole domain.
- TTL: TTL stands for Time to Live. TTL stands for Time to Live. This is the time, in seconds, that it will take for any changes to the DNS record to go into effect. With a TTL of 3600, all changes to this example record should be refreshed every 3600 seconds (one hour). You can choose any TTL you’d like, but 3600 is a good starting point.
- Priority: The priority for MX records is a number that tells the server how important your particular mail server is in your DNS. Lower numbers mean a higher priority. It’s like running a race: first place gets there first. The default priority is 10. If you only have one mail server, the priority doesn’t matter: mail will always go through your only mail server! Setting up multiple mail servers is definitely an advanced technique.
- Exchange: This is your domain name, written as mysite.com


If you’d like to learn even more about managing DNS records in your Liquid Web account, check out Adding and Editing DNS Records.
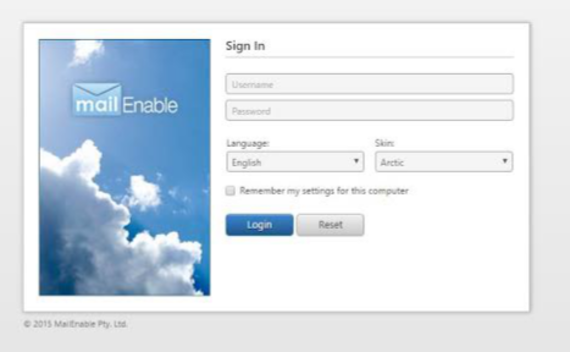
Accessing Webmail
You can access your webmail right from your Plesk account.
- Log into your Plesk account.
- Click on Mail in the left navigation menu.
- You’ll see a list of all the email addresses you’ve set up for your account. On the far right, there is an envelope icon. Click on this icon to load your webmail.

- Your webmail client will load and you’re ready to send email! Try it out by sending a test email to a different email address and by sending an email to your new email address. This will make sure you can send and receive email from your new address.

Tip:
You can also log into your webmail by going directly to: webmail.mysite.com
Remember to replace “mysite.com” with your domain name. Then, log in with your full email address and email password.