Creating Email Accounts in InterWorx
InterWorx makes it simple to create email accounts customized to your domain. Having a myname@mysite.com email address makes your website look professional and separates your personal email from your website email.
InterWorx makes it simple to create email accounts customized to your domain. Having a myname@mysite.com email address makes your website look professional and separates your personal email from your website email.
Setting Up an Email Account
- Login to your InterWorx account as the Domain user for the domain you want to add an email address to. For more information on logging in, see Logging into Interworx Web Panel.
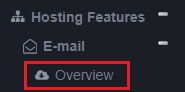
- In the left navigation bar, go to Hosting Features -> Email -> Overview. Click the Overview link.
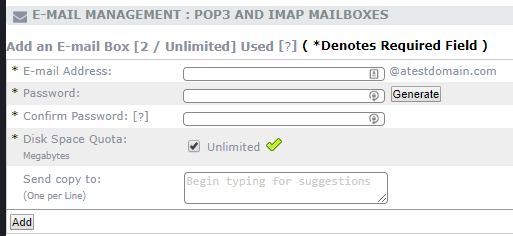
- To create a new email account, fill in the required fields and click Add.
DNS Settings
In order to send and receive email, you need to make sure there’s an appropriate MX record in your DNS. MX records are set up a little bit differently than A records. If you aren’t familiar with different types of DNS records, read What Are DNS Records? before changing anything involving your DNS.An MX record tells your mail client how email messages will be delivered to your inbox. Having multiple mail servers is definitely an advanced technique, so we won’t cover it here.Every domain you will be sending mail to and from needs an MX record. Here’s how to add an MX record for your domain (This assumes your DNS records are hosted with Liquid Web. If you aren’t sure, see Where Is My DNS Hosted?).
- Log into your Liquid Web account interface, select Domains from the left menu and click on the DNS tab. Scroll down to the Current DNS Zones section, then click on the [+] next to the domain you need to set up email for.
- Click on Add New Record at the bottom of the DNS information. From the dropdown menu, select MX. Two new input boxes should show up to the left of the record type you just selected.
- Now that you’ve selected the right record, you can go back to the start of the record and fill the rest in. Hovering your cursor over each input field will give you more information about that field.
- Name: This is the first field. When you’re setting up an MX record, you can leave this blank. Leaving it blank creates a record that applies to the whole domain.
- TTL: TTL stands for Time to Live. TTL stands for Time to Live. This is the time, in seconds, that it will take for any changes to the DNS record to go into effect. With a TTL of 3600, all changes to this example record should be refreshed every 3600 seconds (one hour). You can choose any TTL you’d like, but 3600 is a good starting point.
- Priority: The priority for MX records is a number that tells the server how important your particular mail server is in your DNS. Lower numbers mean a higher priority. It’s like running a race: first place gets there first. The default priority is 10. If you only have one mail server, the priority doesn’t matter: mail will always go through your only mail server! Setting up multiple mail servers is definitely an advanced technique.
- Exchange: This is your domain name, written as mysite.com
If you’d like to learn even more about managing DNS records in your Liquid Web account, check out Adding and Editing DNS Records.
Accessing Your Email via Webmail
While you can set up an email client to access your new email account, the quickest and easiest way to access the email is from the Webmail site on your server. To access Webmail, see Using Webmail in InterWorx Web Panel.