Create a Cron Job in Cloud Sites
Example Scripts |
| All scripts and urls shown in this tutorial are examples only to provide a visual representation for training purposes. Your scripts and file structure will differ based on your individual site setup. Liquid Web does not support scripts or code as per our Terms of Service. |
You can set up Cron jobs or scheduled tasks easily using the Crons section of your Cloud Sites control panel. With just a few steps, you can run the tasks monthly, daily, hourly or by the minute.
Script Languages
Cloud Sites control panel allows you to use PHP, Perl/Bash, Python and cURL to run scheduled Cron jobs from your sites. The way these are input into your Cron job differs if you are using a script file or a url.
Using PHP, Perl/Bash and Python
- From your preferred text editor, save your scripts in the Linux or Windows directory file path. It should look something like this:
- Using PHP:
web/content/backups/backup.php
- Using Perl/Bash:
web/content/backups/backup.sh
or
web/content/backups/backup.pl
- Using Python:
web/content/backups/backup.py
- Using PHP:
- Upload the script via your FTP client. If you are unsure about how to use FTP to upload your files, see our article Using FTP in Cloud Sites for instructions.
- Once you’ve completed the script, copy the file path and follow the instructions below for creating the cron job in cloud sites.
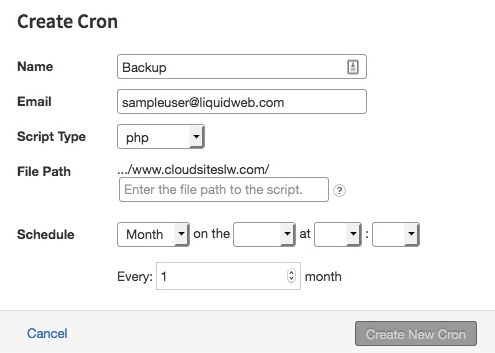
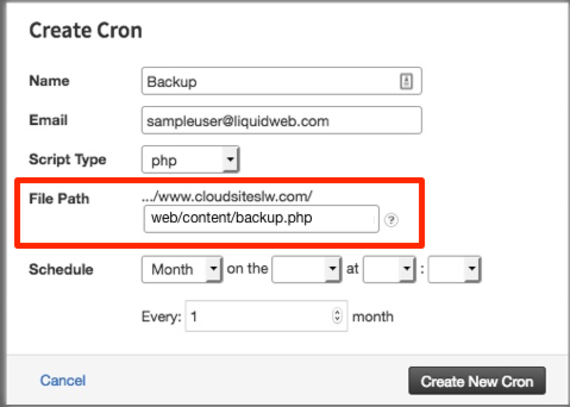
Cron File Path
When pasting the file path you created for your Cron. The Cloud Sites directory path will already populate. The path you paste in should look like: web/content/backups/backup.php
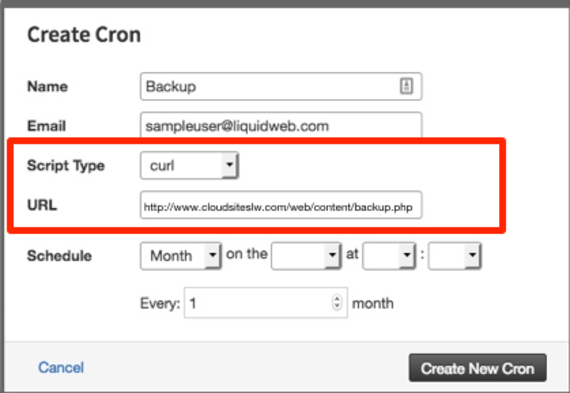
Using cURL
If you’ve created scripts that run via PHP on your website, you can directly link the url into your Cron job by using cURL and schedule the task.
cURL Filepath |
The url path for using cURL should look like:http://www.cloudsiteslw.com/web/content/backup.php |
Creating a Cron
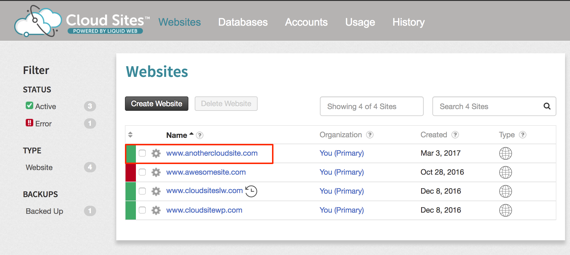
- Click on the website you want to create the Cron for on your control panel home page.

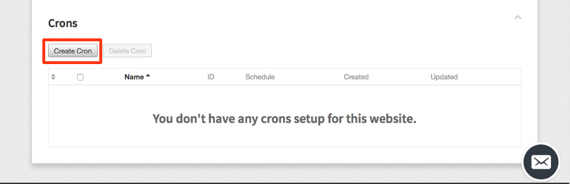
- Open the Crons section in your website details.
- Click Create Cron.

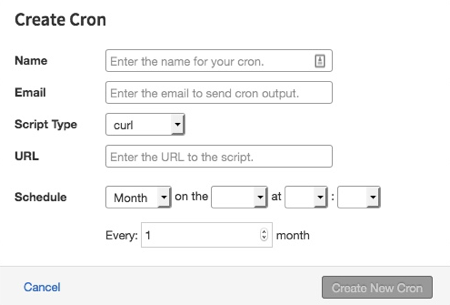
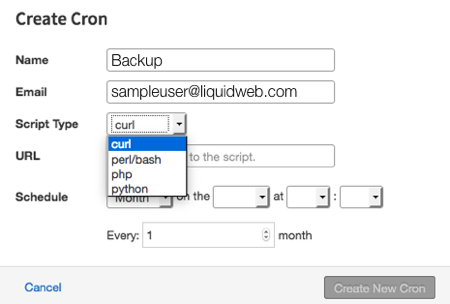
- A pop-up will appear for you to enter the information for the Cron job.

- Enter the name and email address for your Cron.
- Select the Script Type you are using for your Cron: cURL, Perl/Bash, PHP or Python.
- Enter the URL or File Path for the script you have created for this Cron job.


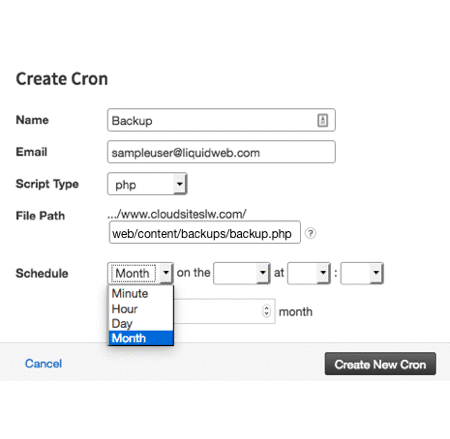
- Create the Schedule you would like the Cron to run on. You can choose from monthly, daily, hourly or by the minute.
- Once you have completed all sections, click Create New Cron.
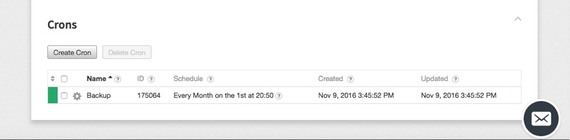
- The Cron will show in the list once it is created.

Access Cron Log
The Cron tasks you schedule can be found in the /logs/ directory via your FTP client.
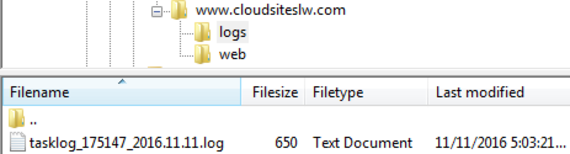
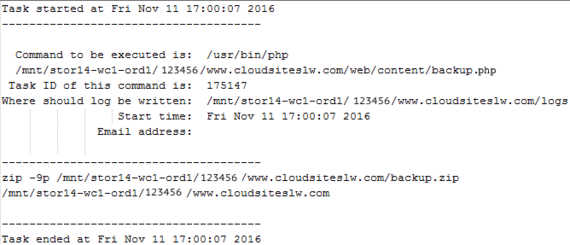
You can download the log and view it in any text editor. Once opened, you will see details of when the cron ran successfully. Any errors will be in the same log and provide details as to why it failed and the line number that the error occurred on.