Create an Email Alias in Premium Business Email
An Email Alias can be created for a mailbox user to forward email to another mailbox or multiple mailboxes on a domain. This is helpful when an email address might be confusing or if people change names. For example, Krista Jones-Smith has an email address krista@domain.com, and aliases kjones@domain.com, ksmith@domain.com and kjsmith@domain.com. All incoming messages arrive in one inbox, because she really only has one email address – krista@domain.com. And all outgoing emails come from that address. If you are looking to create an email address that contains a group of addresses to send to, see our article Creating a Group Email List in Premium Business Email for information.
Creating Aliases: |
| Users cannot create their own alias. You must be an administrator to add an alias in Premium Business Email. |
Watch this video or scroll down for further instructions:
Add Single Alias
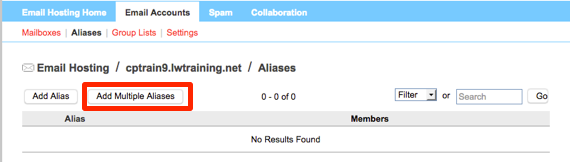
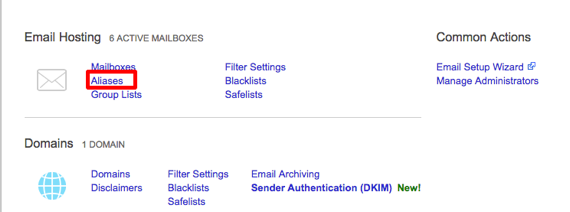
- To begin creating an alias log into your Email Control Panel.
- In the Email Hosting section of the control panel, click the Aliases link.

- Click the Add Alias button.

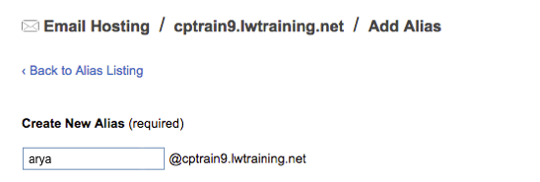
- Create the new alias email address. This will be the email address that will be used for incoming and outgoing emails.

- Add the member of your domain that you want to use this alias from the list on the left hand side.

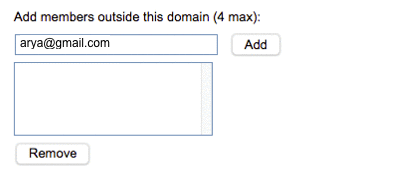
- If the user has additional email addresses outside of the domain that they’d also like included, enter up to 4 in the section at the bottom of the page.

- Click Save to create the alias.
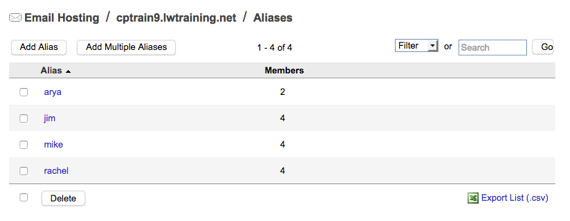
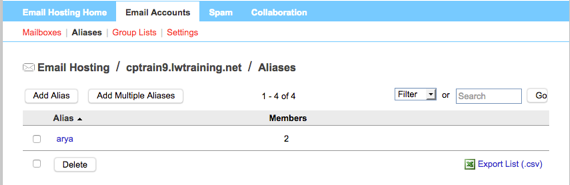
- Aliases that are created will show in the list once they are saved.


Add Multiple Aliases
You can add multiple aliases at once by uploading a CSV or Excel file. This comes in handy if you have a number of users who want to have multiple email addresses point to a single email address.
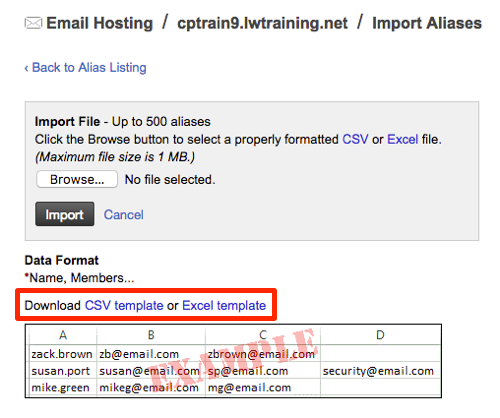
- Click on the Add Multiple Aliases button in the Aliases tab from the control panel.
- Download the CSV or Excel template to enter the information needed to create multiple aliases.
Email CSV Upload Fields:
Make sure the first field in the file is the email name you want for the alias. For example: I want the email alias to be jim@domain.com, the first field will be jim, then I will add all the email addresses I want assigned to the alias.

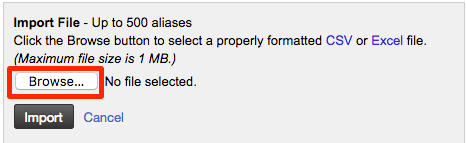
- Once you’ve created the file and saved it, use the Browse button to upload the file.
- Click the Import button to begin the creation of the aliases.
- Once they are created, they will show in the list of Aliases on the home page.