Create a Website in Cloud Sites
Create websites via the Cloud Sites control panel and begin to develop and manage them.
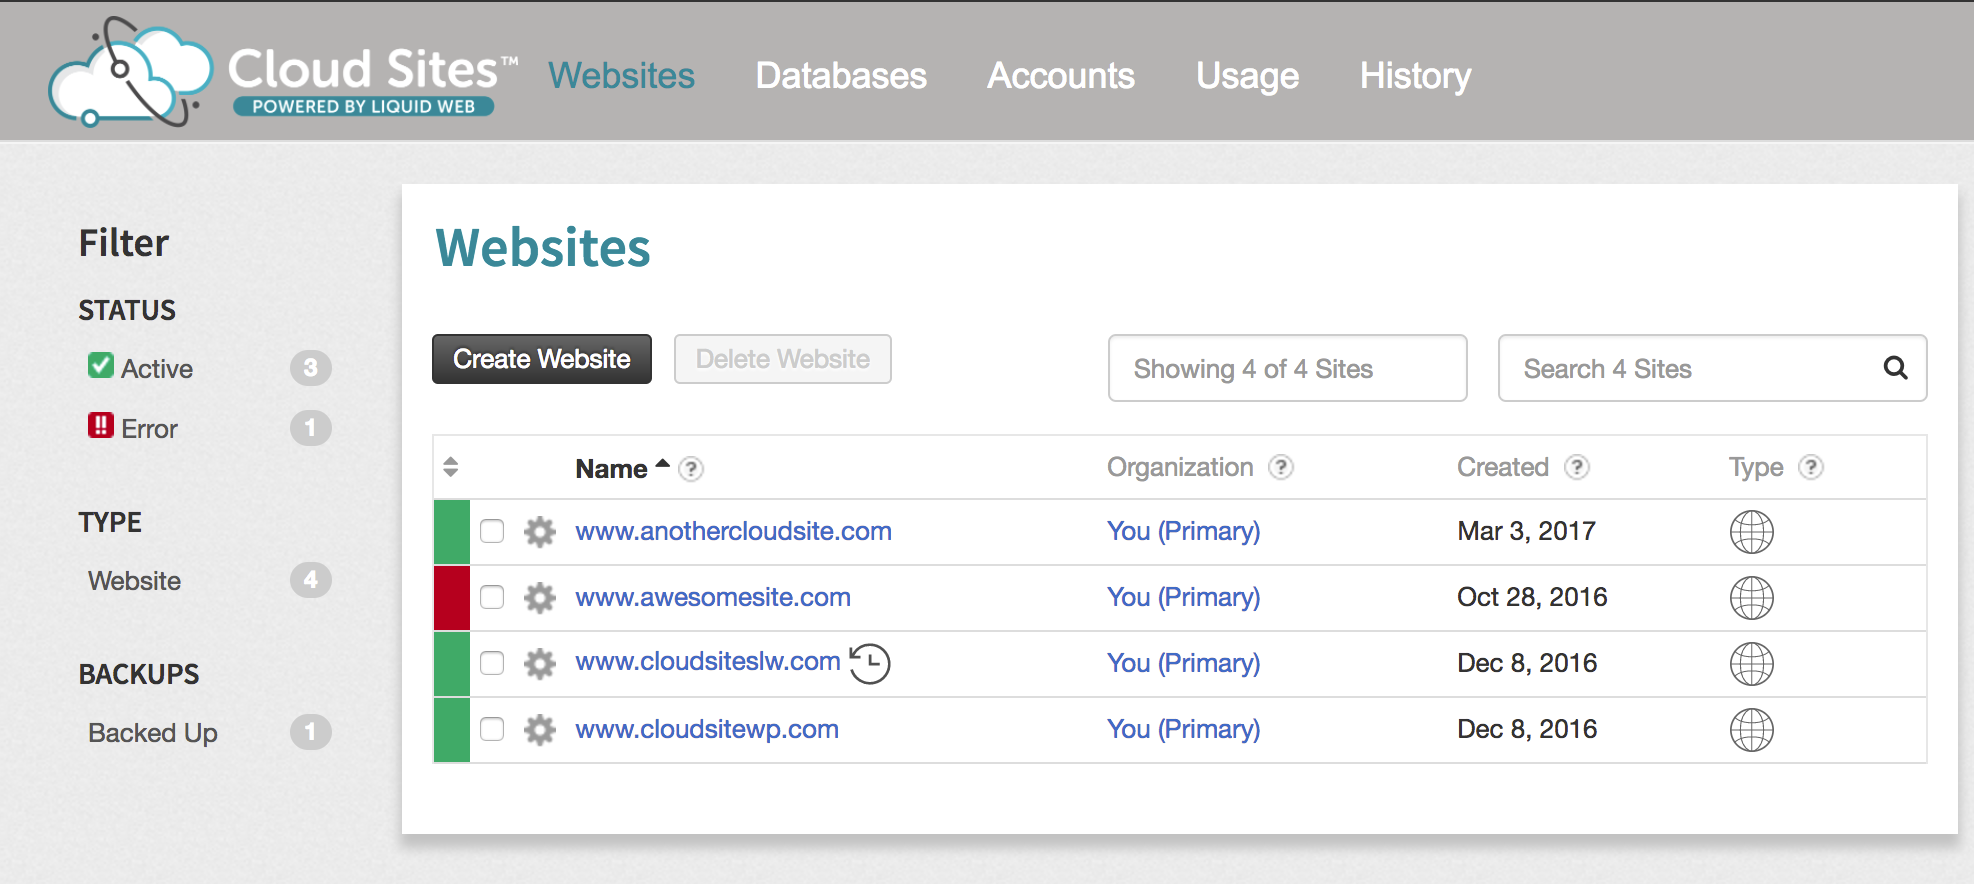
You can now add websites to the Cloud Sites control panel and begin developing and managing them after the control panel has been added to your Liquid Web account.
- Once you’ve registered your domain using the steps in our article Registering a Domain Name (Main URL), navigate to your Cloud Sites control panel.

Registering a Domain
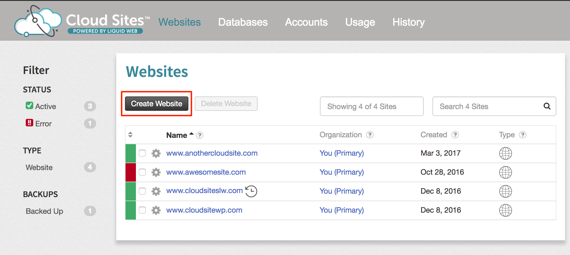
The instructions for registering a domain are for newly created websites being put on Cloud Sites control panel. If you have an existing website, please see Managing Your DNS with Cloud Sites for instructions to change your DNS to be pointed correctly to use Cloud Sites control panel. - Click Create New Site button at the top of your website list.
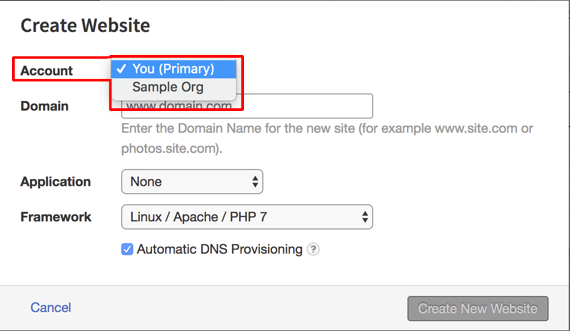
- Select the Account this site will belong to. See our article Creating Client Accounts in Cloud Sites to add client accounts to your portal.

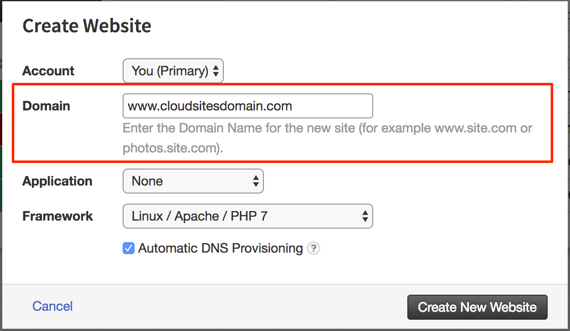
- Enter the domain name of your site.
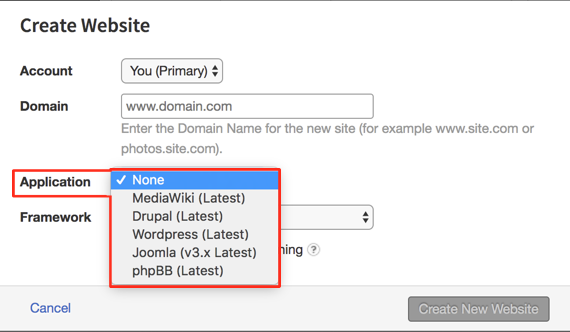
- The Application section is for choosing a CMS to build your site. If you are using a CMS, please see our article Installing a CMS in Cloud Sites to see how to use these applications with Cloud Sites.

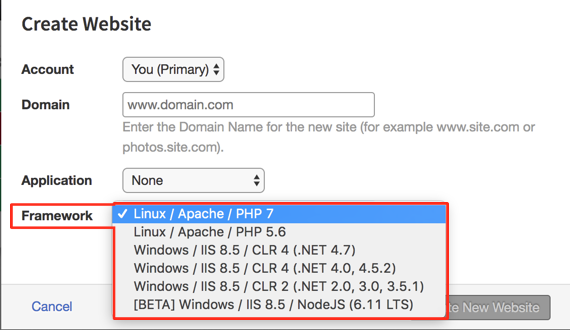
- Choose the Framework for your site. You can select Linux/Apache/PHP 7.1, Linux/Apache/PHP 7.2, Windows/IIS 8.5/CLR 4(.NET 4.0. 4.5.2 4.7) or Windows IIS 8.5/CLR 2 (.NET 2.0, 3.0, 3.5.1).
Warning:
Once you create a site with either a Linux or Windows Framework, it cannot be changed to a CMS installation. You can only change Frameworks between Linux and Windows. 
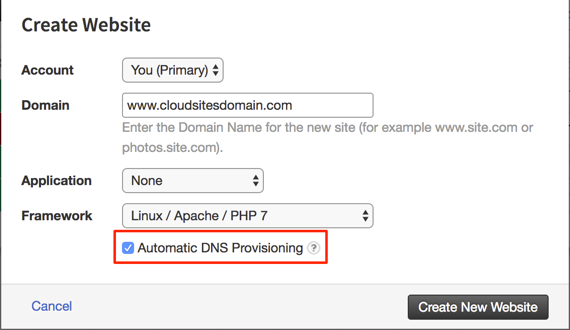
- If you would like to enable Automatic DNS Provisioning you can do that next. As long as you are using Liquid Web nameservers, Cloud Sites can automatically create necessary DNS records. If you choose automatic DNS provisioning, you’ll be able to manage your DNS.
- Click on the Create New Website button in the pop-up.
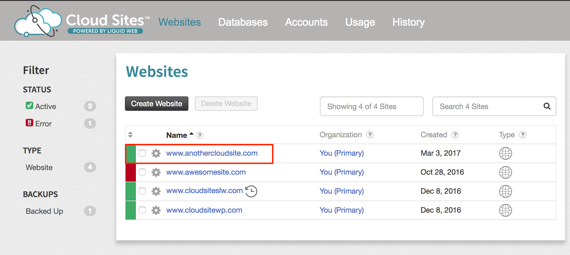
- The new site will appear in your Websites list once the site is created.
Before your site is actually live, you will need to change your DNS to point to your Cloud Sites IP address. See our article Managing Your DNS with Cloud Sites for instructions on how to change your DNS. If you want to upload your content and test it before making the site live, see the instructions in the article Uploading Files Using FTP in Cloud Sites.