Creating a Backup of Your Cloud VPS
Backing up your Cloud VPS is an important part of server maintenance and helps make sure you never lose important data. Liquid Web Cloud VPS Server backups are cost efficient and easy to set up. Backups can be set up when you create your server, or changed at any time to meet your backup needs. You can also choose to use Acronis Backups or our legacy Cloud Backups for your existing servers. You can also create cPanel backups to create a local backup to your local machine by Taking a Manual Backup in cPanel. If you have a Plesk managed server, you can create a local backup by Taking a Manual Backup in Plesk.
Using Acronis Backups
Create a Backup Plan
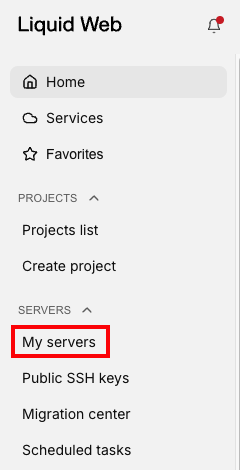
- In your Liquid Web account, click on My Servers, then select the server you want to create the backup for by clicking on the server name. This will open your server details page.

- On the server details page, click the Backups & Image tab.

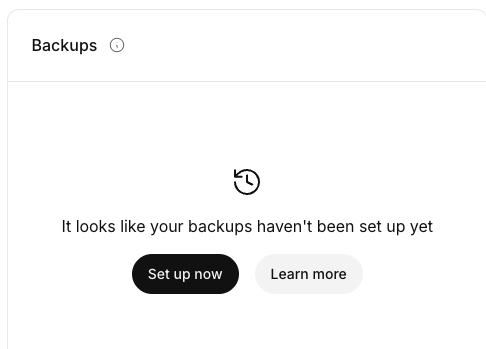
- The Backups and Images page displays your backup settings, most recent backups, and links to modify your backup settings or create images (for more information on VPS Images, see Creating a Cloud VPS Image). Scroll down for a listing of all the backups that are currently saved for the server.
- To add Acronis Backups to your account, click Set up now.

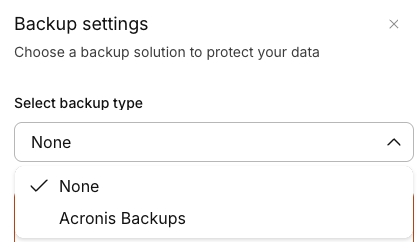
- From the Backups settings menu, select Acronis Backups.

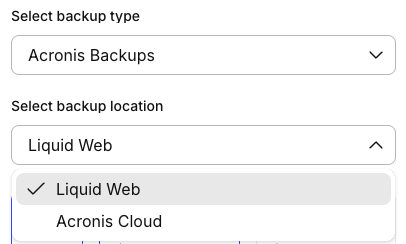
- Select which backup location you’d like to use: either Liquid Web hosted (off-server but in the same data center as your server) or Acronis hosted (both off-server and off-site).

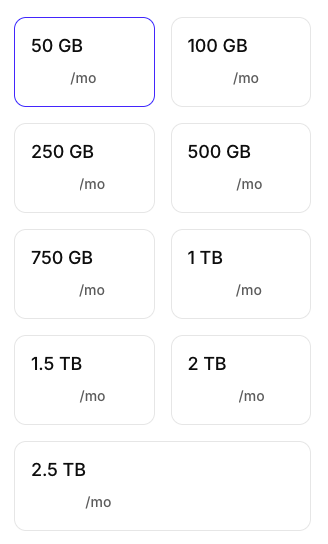
- Select the size of Acronis Backups you’d like to begin with. You can adjust the size of your backup quota up or down as needed in the future.

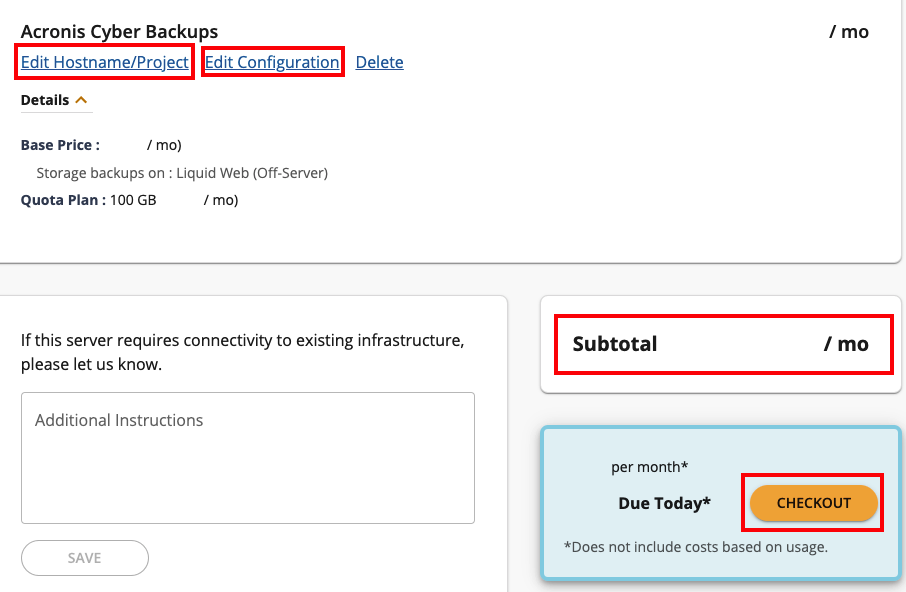
- Click Buy now to finalize your selection. From the cart, you can see the details of the backup configuration. You can also see the subtotal for the Acronis Backups purchase. Click Place your order to complete your order.

Changing Backup Plan Settings
Now that you have Acronis backups for your server, you may find that you need to adjust the size of the backup plan to allow for more storage or perhaps reduce a plan that you are not utilizing fully. You can adjust the size of your Acronis Backup Plan in your my.liquidweb.com account.
- Login to my.liquidweb.com. For more information, see Exploring Your My Liquid Web Account.
- Click My Servers from the navigation bar at the left of the screen.
- Select the server for which you’d like to modify Acronis Backups.
- Click the Backups and Images tab.
- Click the Backup Settings icon.

- You’ll see your current plan selected, along with the other plan options that you have.
- Select any other sized plan, then click Upgrade or Downgrade, as appropriate.
- You should see a notification on the screen that the change has been successfully completed.
Using Cloud Backups
(Liquid Web backups)
Available backup systems are dependent on server configuration. If your Cloud VPS is configured to use Cloud Backups from Liquid Web rather than Acronis Backups, your backups will run once a day automatically.
Adding Cloud Backups to your server
- In your Liquid Web account, click on My Servers, then select the server you want to create the backup for by clicking on the server name. This will open your server details page.
- On the server details page, click the Backups & Image tab.
- The Backups and Images page displays your backup settings, most recent backups, and links to modify your backup settings or create images (for more information on VPS Images, see Creating a Cloud VPS Image). Scroll down for a listing of all the backups that are currently saved for the server.
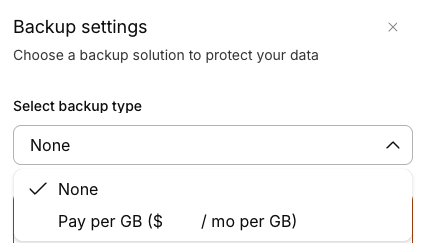
- To add Cloud Backups to your account, click Set up now.
- From the Backups settings menu, select pay per gig.

- Select the number of days of backups you would like to retain (the default option is 7 days).

- Click Update to save your changes.
- That’s all! Cloud backups run on a fixed schedule daily. Once you have backups available to restore, you will find them listed in the Backups block.