Whitelisting IPs in WHM
ConfigServer Security & Firewall (CSF) is the default firewall installed on Liquid Web servers. If you suspect a client or customer’s IP address has been blocked by the firewall, you can resolve the issue easily in WHM and the ConfigServer Firewall. CSF is managed through WebHost Manager (WHM), this tutorial will take you through how to unblock and whitelist IPs.
CSF is found in the Plugins section of the WHM home page. Once you click on the Plugin icon, you can select ConfigServer Security & Firewall. This will open the options within the firewall and allow you to block, unblock and whitelist IP addresses and much more.
You can whitelist an IP address in one of two ways:
Whitelist an IP Address using WHM
There are three main ways to whitelist an IP address in WHM, all using the ConfigServer Security and Firewall plugin. You can whitelist by:
Search for IP
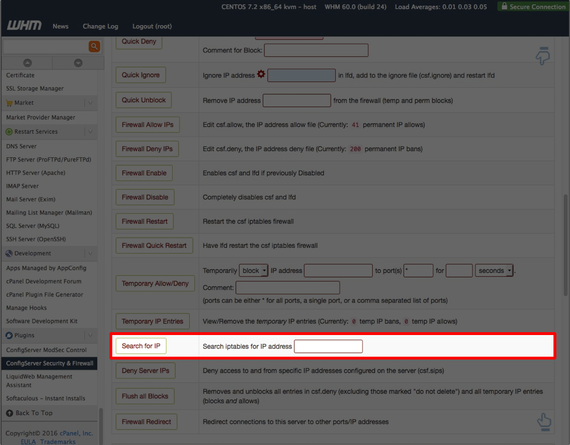
Once you are on the home page of CSF, navigate to the Search for IP section.

- Enter the IP you suspect is being blocked and click Search for IP.
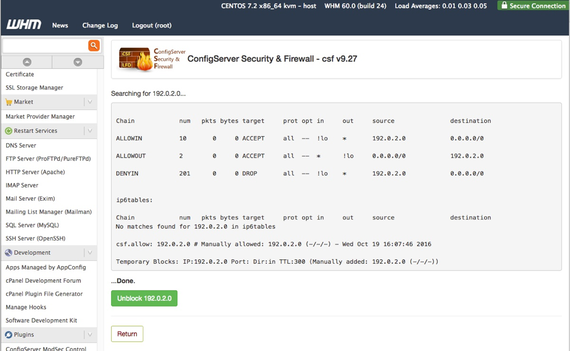
- If the IP is blocked, it will show and the reason why it is blocked will be given.

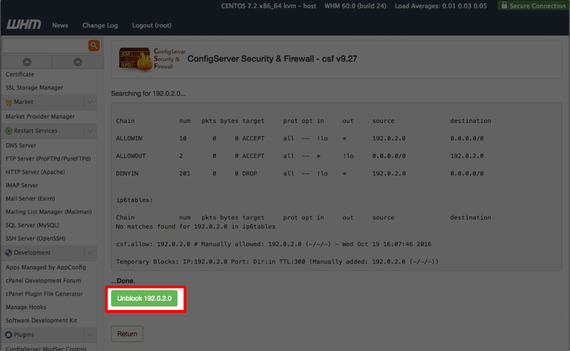
- Click on the green Unblock button to unblock the IP.
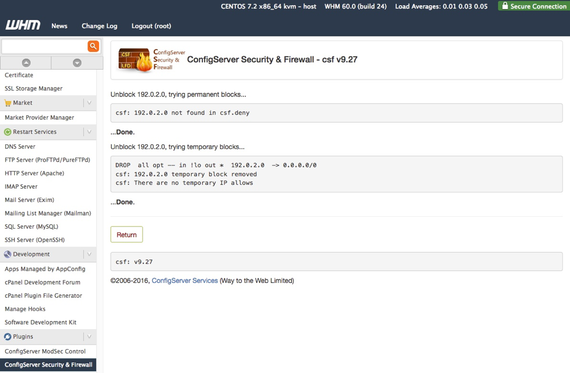
- A confirmation that the IP has been unblocked will show.


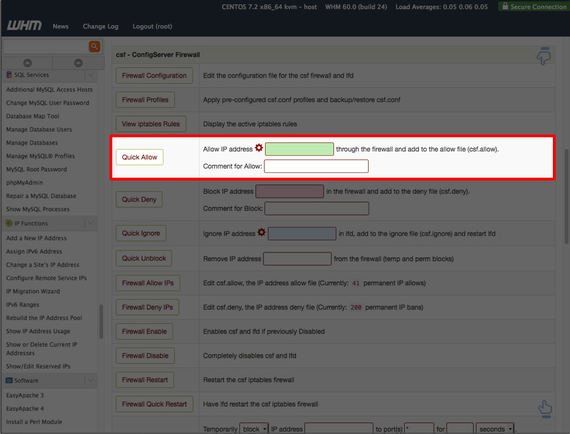
Use Quick Allow (csf.allow)
Navigate to the Quick Allow section on the CSF home page.

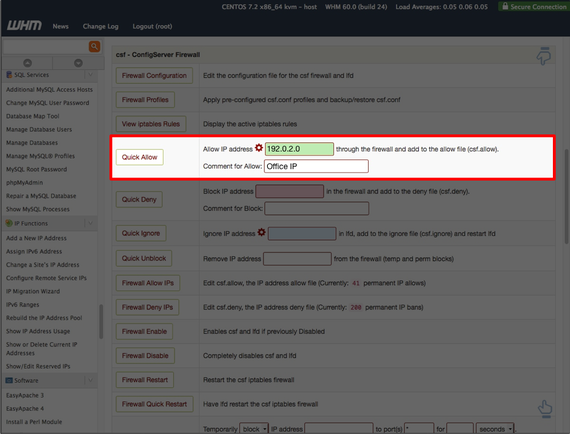
- Enter the IP address you’d like to allow. This will allow the IP address through all ports, but it can still trigger lfd and multiple modsec rule violations. Click on Quick Allow to allow the IP address through the firewall.
- A screen will appear showing the IP address being removed from the csf.deny list. Click Return to be directed back to the CSF home page.
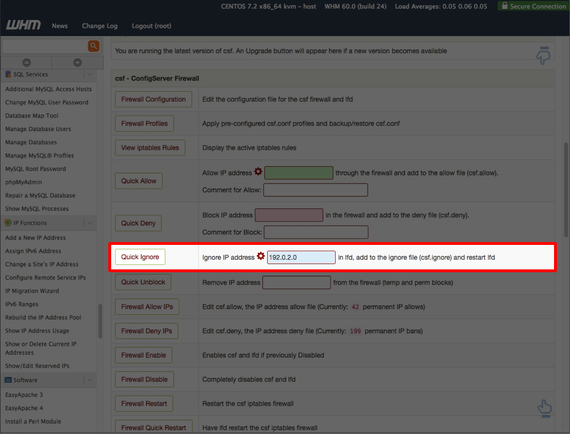
Use Quick Ignore (csf.ignore)
Enter the IP address in the Quick Ignore section of CSF.
Warning:
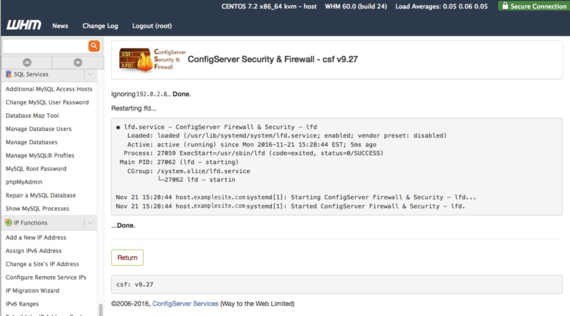
Only use this setting for trusted IP addresses. This allows the IP address to bypass all modsec rules, lfd and access all ports to your server. - Click Quick Ignore to allow the IP address through your firewall. lfd will restart after the IP address is whitelisted.
Whitelist by Command Line for Linux
Once you log into your server via Secure Shell (SSH), you can unblock an IP via CSF.
- First, you will need to know if the IP address is permanently blocked or only temporarily blocked. To do that, run the following command:
csf -g 192.0.2.0
The output should look like this for a permanent block:
Chain		num 	pkts bytes target 	prot opt in 	source 		destination
DENYIN		200		0		0 DROP		;all  --  !lo    *      192.0.2.0	0.0.0.0/0
DENYOUT		200		0 LOGDROPOUT  all  --  *	!lo		0.0.0.0/0		192.0.2.0
ip6tables:
Chain		num		pkts bytes target	prot opt in		out     source		destination
No matches found for 192.0.2.0 in ip6tables
csf.deny: 192.0.2.0 # Manually denied: 192.0.2.0 (-/-/-) - Mon Feb 20 10:25:05 2017
If it is temporarily denied, the output will look like this:
Chain		num			pkts bytes target	prot opt in		out     source		destination
ALLOWIN		1		0		0 ACCEPT	all  --  !lo    *       192.0.2.0		0.0.0.0/0
ALLOWOUT	1		0		0 ACCEPT	all  --  *	!lo     	0.0.0.0/0		192.0.2.0
DENYIN		200		0		0 DROP		all  --  !lo    *       192.0.2.0		0.0.0.0/0
ip6tables:
Chain		num		pkts bytes target	prot opt in		out     source			destination
No matches found for 192.0.2.0 in ip6tables
csf.allow: 192.0.2.0 # Manually allowed: 192.0.2.0 (-/-/-) - Mon Feb 20 10:28:21 2017
Temporary Blocks: IP:192.0.2.0 Port: Dir:in TTL:30 (Manually added: 192.0.2.0 (-/-/-)) - To remove a permanent IP block, use the following command:
csf -dr 192.0.2.0
The output will show that the IP was successfully unblocked:
Removing rule...
DROP  all opt -- in !lo out *  192.0.2.0  -> 0.0.0.0/0
LOGDROPOUT all opt -- in * out !lo 0.0.0.0/0 -> 192.0.2.0 - To remove a temporary IP block, you can wait until the time is up, or run the following:
csf -tr 192.0.2.0
The output will notify you that the temporary block has been removed:
csf: 192.0.2.0 temporary block removed
csf: There are no temporary IP allows
To see how to whitelist your IP using your Liquid Web account, see our article Unblocking Your IP Address.