Enable Let’s Encrypt for AutoSSL on WHM-Based Servers
Follow our tutorial to assign free SSLs on all your domains that will automatically renew! We walk you through the SSL process with easy-to-follow screenshots and instructions.
Introduction
Providing a free, trusted SSL certificate for every website on your server is essential for security and visitor trust. Your WHM server simplifies this process using the AutoSSL feature. By setting Let’s Encrypt as your AutoSSL provider, you can automatically request, install, and renew free, browser-trusted SSLs for all of your cPanel accounts, ensuring every site stays secure without manual work. This guide will show you exactly how to enable and manage Let’s Encrypt in WHM.
Prerequisites
- A managed Liquid Web server with WHM / cPanel version 58.0.17, or higher.
- Port 80 / 443 must be open on the server.
- WHM / root access.
- A domain with DNS that resolves to a public IP address of the WHM server.
Step-by-step Instructions
- Log into WHM.
- Search for “AutoSSL” in the left search bar. Click on Manage AutoSSL in the SSL/TLS section.
- Select the radio button next to Let’s Encrypt. Read the Let’s Encrypt terms and conditions. If you’d like to continue using Let’s Encrypt, check the box next to I agree to these terms of service and click Save.

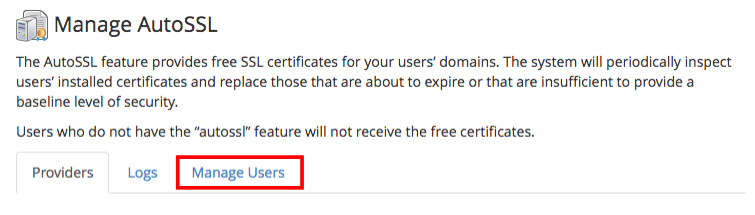
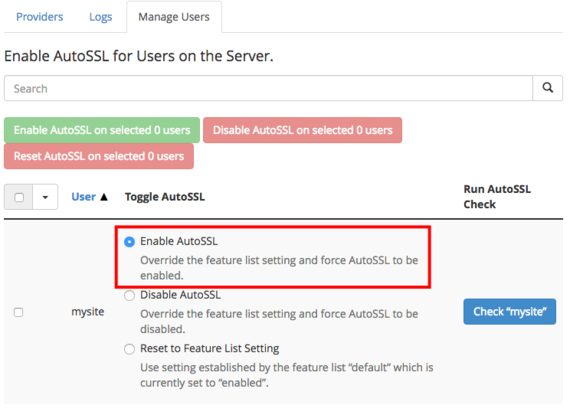
- You’re ready to start using Let’s Encrypt. Click on the Manage Users tab. This is where you’ll manage each domain’s SSL settings.

- For every account you’d like to use with Let’s Encrypt, select the radio button next to Enable AutoSSL. SSLs will be updated and installed automatically.


Verify Let’s Encrypt SSL Usage
Once you’ve set up your Let’s Encrypt SSLs, you can make sure they’re installed in cPanel.
- Log into your cPanel account.
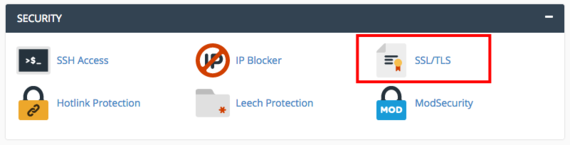
- On the cPanel home page, scroll down to the Security section and click on SSL/TLS.

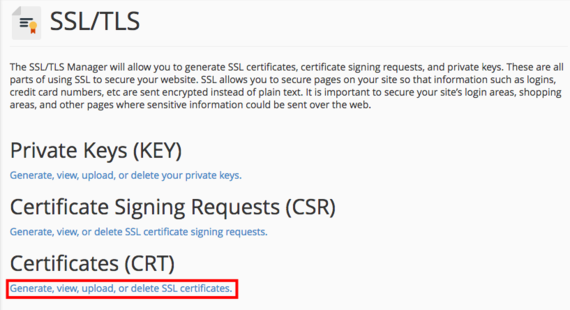
- Under Certificates, click on Generate, view, upload, or delete SSL certificates.

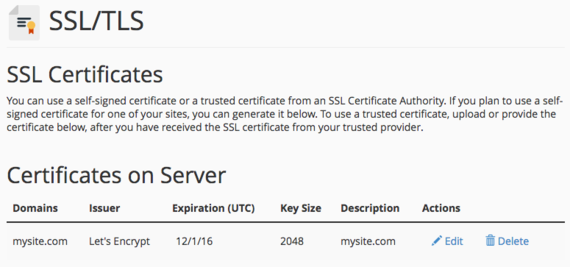
- You’ll be able to see the certificates that are currently active.