Change Your Hostname via WHM
Easily change your server hostname via WHM, Plesk, InterWorx, or SSH—then update it in your Liquid Web account and DNS records.
Changing your hostname is not done often, but is a simple process when done through WHM, Plesk or even in the command line. For most organizations a hostname change is done when the company name changes, for branding changes, or legal issues with the name. While your hostname is not immediately visible to the public, it will appear in email headers, cURL responses, telnet information and in your DNS records. This tutorial will walk you through the steps to change your hostname in WHM, Plesk, and the command line as well as how to update it in your Liquid Web account.
To avoid your site not resolving after changing the hostname, you will need to log into your Liquid Web account to update the hostname and edit your DNS Records, find out how by clicking the links below:
– Update Your Account
– Adding and Editing DNS Records
– Update Your Account
– Adding and Editing DNS Records
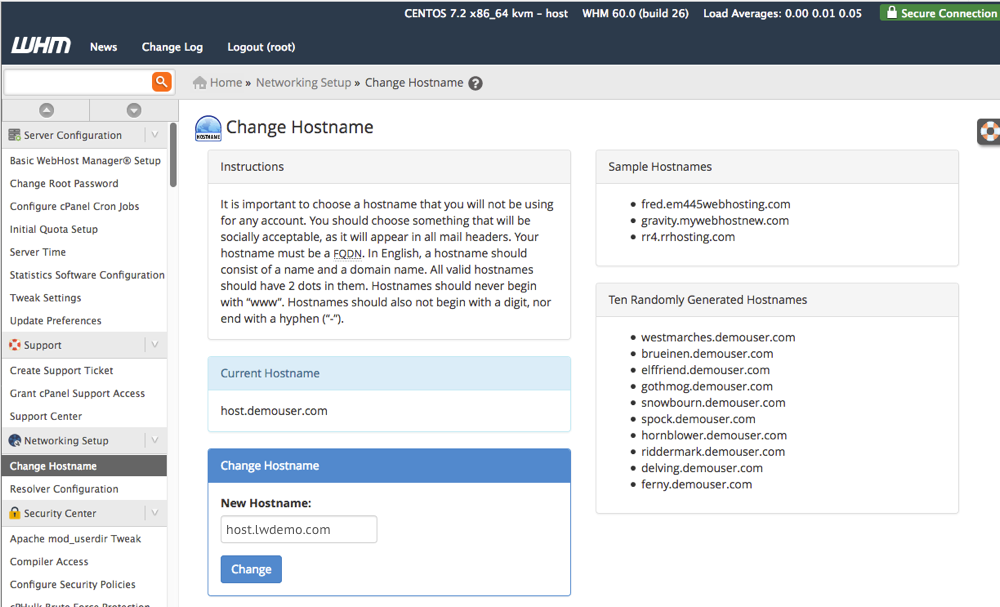
- To change your hostname, log into WHM. Navigate to Networking Setup in the menu on the left-hand side of the page. Click on Change Hostname.

- Type in the new hostname for your server in the Change Hostname section at the bottom of the page.
Hostname Best Practice
Do not use a hostname that will be used as a domain name for a specific site. Make sure that the domain is registered and is socially acceptable as it will be visible in email headers.
- Click Change to complete the change in hostname.
- You will be prompted to add an A Record for the hostname if you have not set one up yet. You can learn how to update DNS records in our article Adding and Editing DNS Records.
Change Hostname in Your Account
Once you’ve changed your hostname in WHM, make sure to navigate to your Liquid Web account to update the hostname and DNS Records. Follow the instructions in the section below, Update Your Liquid Web Account.