Using Plesk Repair Kit Extension
The Plesk control panel is a powerful tool for managing your server and your customers. Whether you use Windows or Linux based servers, Plesk can help organize, maintain, and secure your server while removing much of the busy work of web-hosting. But what do you do when things go wrong? You can try to troubleshoot issues manually, but that often takes a level of expertise and time that you don’t want to commit on a regular basis. Plesk offers powerful command-line utilities, but these come with an additional learning curve and usually require console level access to the server, which may present security risks.
The Plesk Repair Kit may provide the answer for your basic troubleshooting needs. This Plesk extension is available for Plesk Onyx 17.8.11 and up. Once installed, the Repair Kit gives you one-click access to check and repair the most important components on your server, as well as additional troubleshooting tools to help identify problem processes.
Installing the Plesk Repair Kit Extension
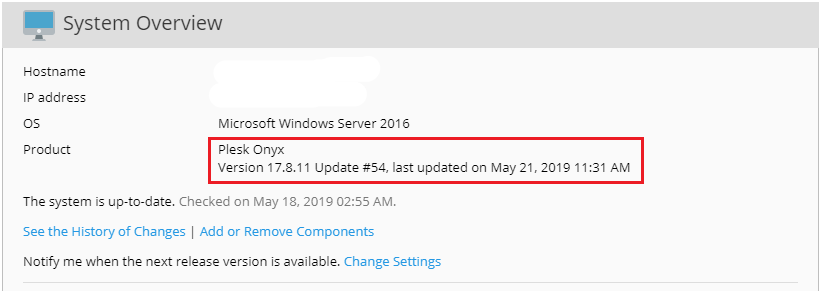
- Verify you are running a compatible version of Plesk (version 17.8.11 and up). You can check the version of Plesk on your server by going to the System Overview (found on the Home screen in Provider view or on the right side-bar in Power User view).
- Click on Extensions (in the left navigation bar) and type the word repair into the search bar. When the Repair Kit extension is displayed, click on Get It Free to install.
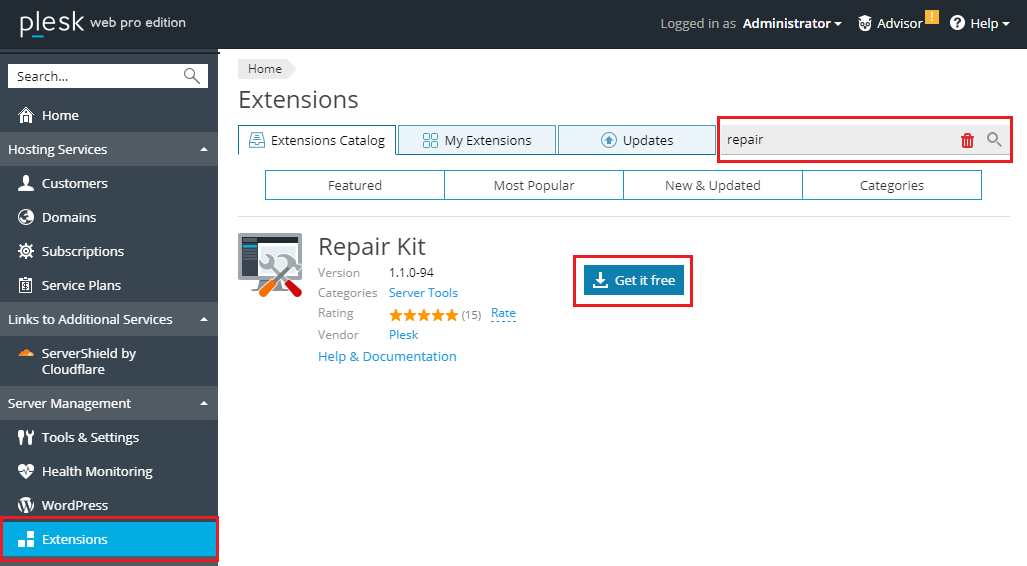
- The installation will complete and you’ll be ready to begin using the Repair Kit!
Using the Repair Kit
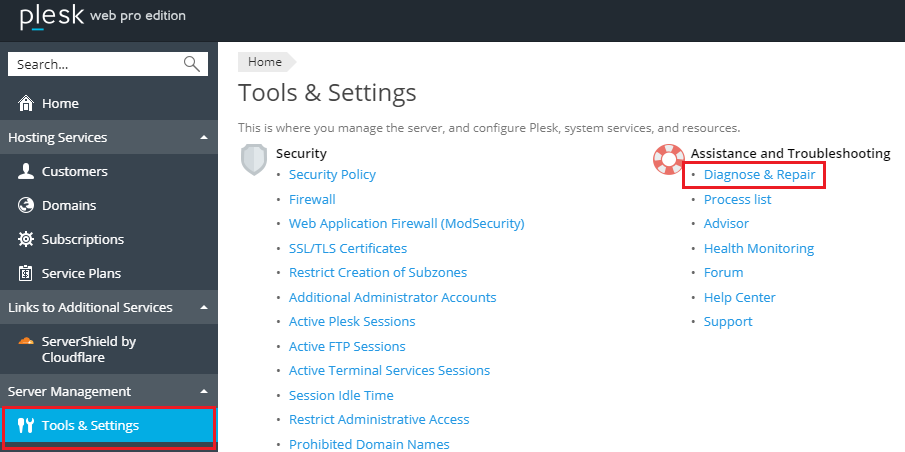
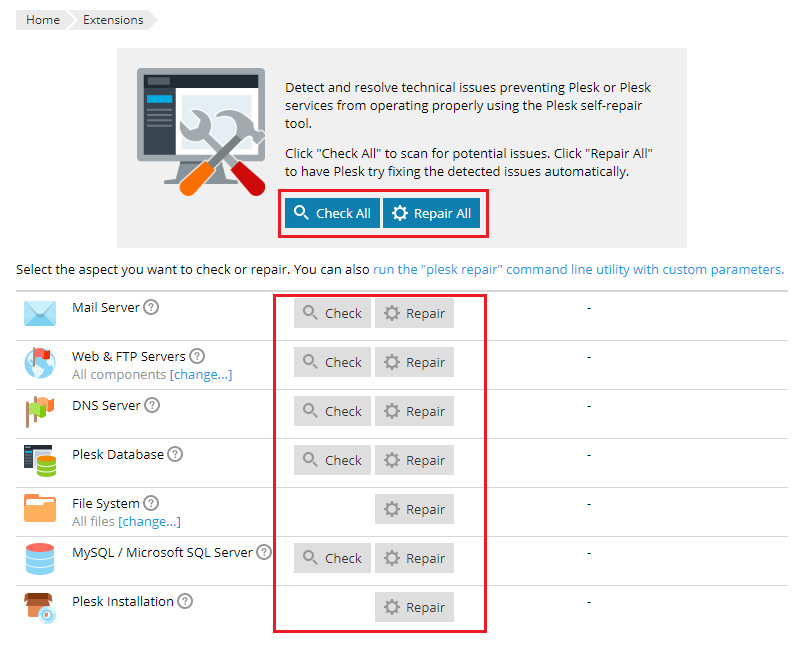
- To open the Repair Kit, click on Tools & Settings -> Diagnose & Repair.
- Find the component that is malfunctioning and click Check to have Plesk automatically check the service for issues. Click Repair to have Plesk attempt to repair any inconsistent settings or permissions that may be causing issues. You can also Check All or Repair All, although these features may take an extended time to complete, depending on the number of domains and files on the server.
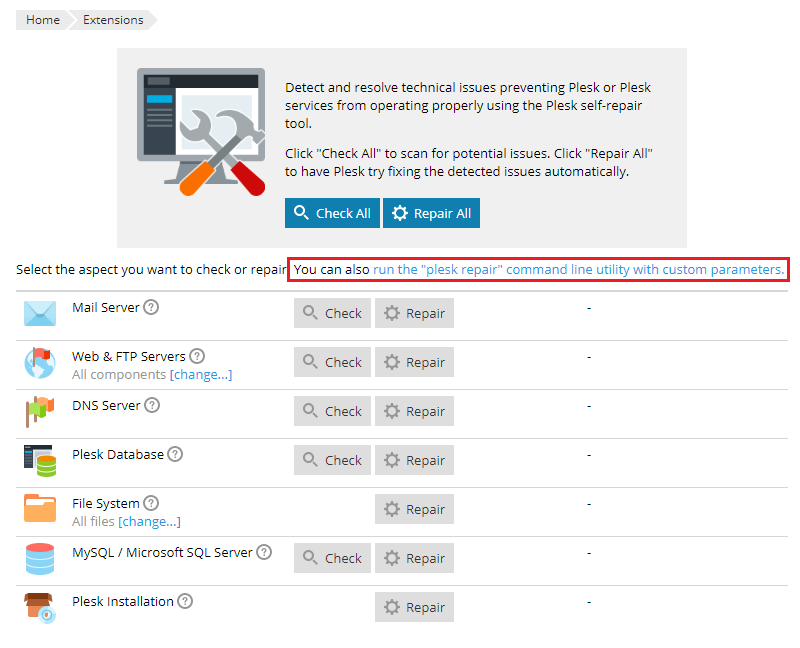
- You can also run custom Plesk CLI commands using the run the “plesk repair” command line utility with custom parameters link. This allows you to execute Plesk CLI commands without having to log in to the server directly. This can be helpful if Plesk documentation recommends a command that isn’t included in the primary components of the Repair Kit. Just enter the command and click Run Utility.

NOTE: |
| Custom CLI commands can have a major impact on your server. Only run commands that you know and understand. Running un-tested or unknown commands can cause serious problems and may not be covered by our Scope of Support. |
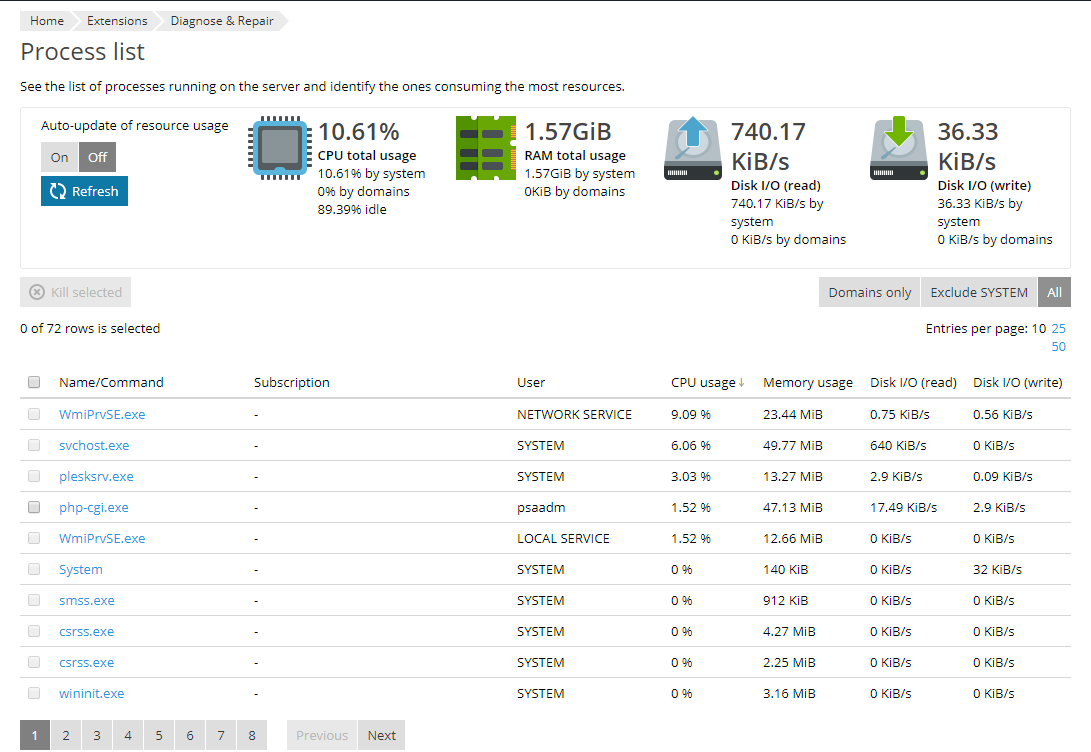
Using the Process List
Installing the Plesk Repair Kit also adds the Process List to your diagnostic toolbox. The process list can display the processes related to all domains, to a single domain, or to the entire system so that you can identify processes that might be causing system issues.
- To view the Process List, click Tools & Settings -> Process List.

- The Process List shows core resource usage and individual breakdowns of processes on the server. The list can be sorted by domain, by process name, by most resource usage (cpu, memory, disk io/ready, or disk io/write). Identifying which processes are using excessive resources can be an important first step in the troubleshooting cycle.