Installing Applications in Plesk
You can develop your website completely by yourself and load everything onto your server manually using FTP. But why not take advantage of applications that are already developed? Plesk makes installing packages like WordPress, Drupal, and Joomla easy — whether using Plesk with a VPS, dedicated server, or cloud-based solution. For example, instead of downloading Joomla from joomla.org and installing it yourself, simply install Joomla using Plesk and you’re ready to start customizing.
- Log into Plesk. If you have never logged into Plesk, read Getting Started with Plesk.
Note:
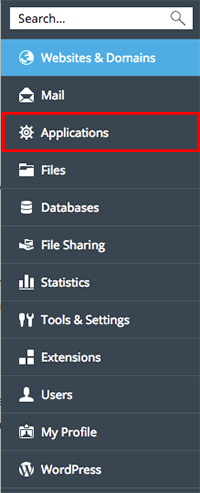
If you are in Power User view, click on Applications in the navigation menu on the left hand side of the site.
 If you are using the Service Provider view:
- In the menu on the left hand side of the page, click on Subscriptions under the Hosting Services section.

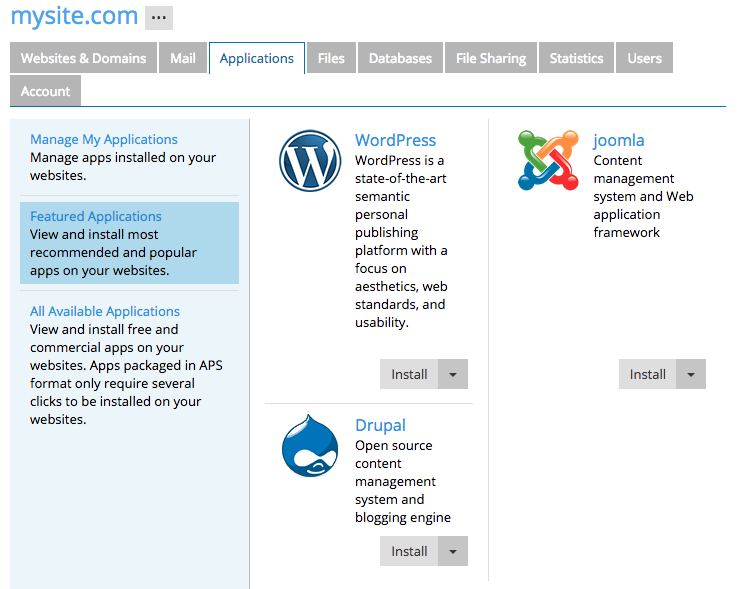
- Click on the domain where you’d like to install your application. Then click on the Applications tab.
- In the menu on the left hand side of the page, click on Subscriptions under the Hosting Services section.
- Choose the application you want to install from the Featured Applications list or search for the application you need in All Available Applications.

- Click Install (for Quick installation) or click the arrow down icon for more installation options. You can install applications in two ways: Quick or Custom.
 If you are using the Service Provider view:
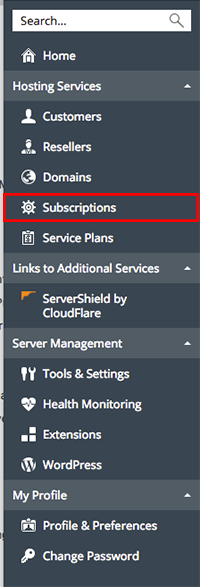
- The Quick installation will use the default settings to install the latest version of the application. This will automatically create an administrator account for the application.
- The Custom installation has more flexibility. You can choose administrator credentials, choose where the application is installed, and change other options, depending on the application.
- Sometimes you’ll also be able to choose to install a different Version of an application.
- Follow the prompts for your particular application to finish the installation.
No matter how you choose to install applications, you can change some settings at any time by clicking on Applications in the left navigation menu and then clicking Manage My Applications. You can also change application settings by logging into the application with your administrator account.