Installing Joomla with Plesk
Manage your website's design and content effortlessly with Joomla. Installing it on your domain is straightforward through Liquid Web's Plesk, with guided setup and administrator account creation.
Joomla is a content management system (CMS) that helps you manage your website’s look and content. If you aren’t familiar with CMSes, check out What Is a Content Management System (CMS)? to decide if Joomla is right for you.
Installing Joomla on your domain is simple at Liquid Web — whether you’re using Plesk with a VPS, managed server, or cloud server. Plesk installs packages so you don’t have to download and install them manually. Plesk also walks you through installing Joomla, choosing some basic settings, and setting up an administrator account.
- Log into Plesk. If you have never logged into Plesk, read Getting Started with Plesk first.
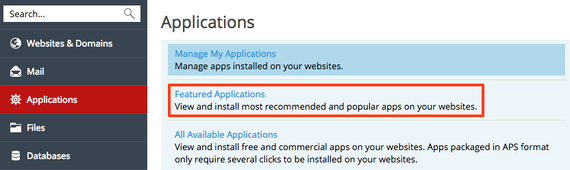
- In Power User view, click on Applications in the left navigation menu. This will open the Plesk applications installer. In Service Provider view, click on Subscriptions in the left navigation menu. Then, click on the domain where you’d like to install Joomla and click on the Applications tab.
- Then click on Featured Applications and find Joomla. (You can also click on All Available Applications and search for “Joomla.”)

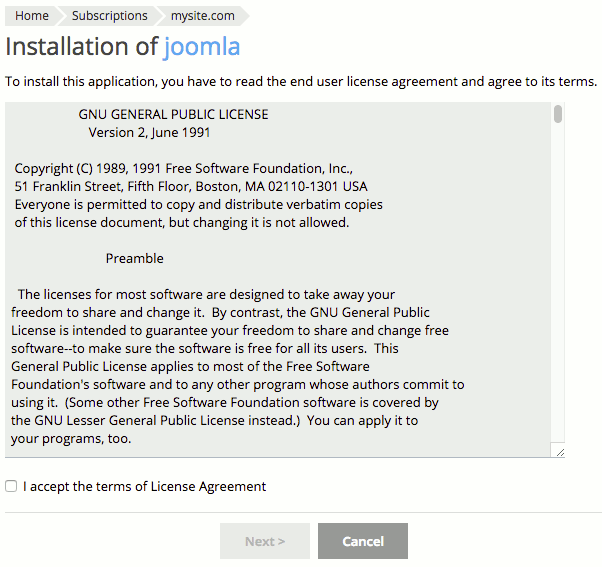
- First, read and accept the Joomla license agreement.

- Now, choose where you’d like to install Joomla. You can install it Joomla on your main domain, on a subdomain, or in a directory (on a certain page of your site).

- Next, check the box to automatically update Joomla in the Update Settings section. This will help protect your site from malicious attacks.


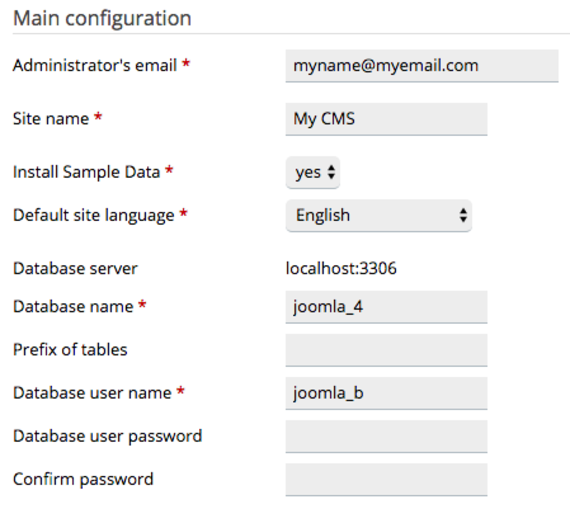
- Now you’ll set up your Main configuration settings.
- Choose the Administrator’s email.
- Choose a Site name. You can change this at any time.
- Choose an Interface language.
- Joomla will automatically create the necessary databases. If you’d like, you can change the database name and user account information.

- Click Install to continue.
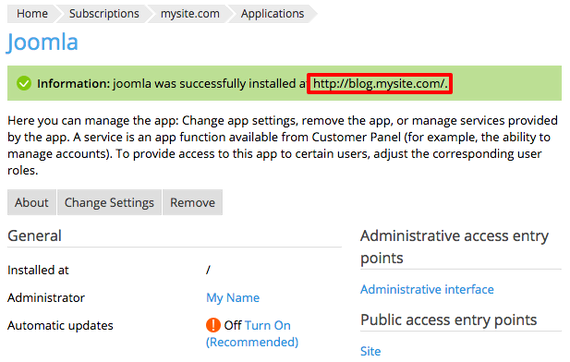
- Once your installation has completed, you’ll see the URL of your Joomla installation. Go to this URL to make sure Joomla is installed how you want it to be installed.

You’ve successfully installed Joomla on your domain. Now you can start exploring how to develop your site and create content!