Managed WordPress & WooCommerce: How to make a WordPress site live
Overview
Suppose you’ve created a new site with Nexcess as part of your hosting plan with us. You have invested the time and effort in designing, building, and testing your new site. If everything meets your expectations, you can take your WordPress site live by following these steps documented in this article for how to make the WordPress site live.
5 detailed steps for how to make a WordPress site live with Nexcess
Here are the details involved for each of the five steps involved with how to make a WordPress site live. Let’s take your site live!
1. Changing the DNS Zone
Please point your live domain to the Nexcess server before changing your domain name from CNAME Target to the live domain. If the live domain uses Nexcess nameservers, you can add and manage the domain’s DNS from the Nexcess Client Portal.
If the live domain uses remote nameservers, you can update the A record of your live domain from your domain registrar. Once you have updated the A record of the live domain, kindly allow the required time for the DNS propagation and check the domain. You can track the DNS propagation of the domain using online DNS checker tools.
Follow the steps below to add/edit the domain in the DNS Zone.
1a. Log in to my.nexcess.net.
1b. Click the DNS option in the left-side menu.
1c. Click the plus (+) icon on the right side of the page to add a DNS Zone.
1d. Enter the live domain in the Domain field and click the Add button.
1e. Once you have added the live domain, click the domain name and add/manage the required DNS records per your requirements.
1f. To add a new DNS record for the live domain, click the plus (+) icon corresponding to the DNS record type you wish to add.
1g. Enter the DNS details and then click the Add button.
As a result, you will see a message like this on the left side of the page:

1h. To edit the existing DNS record for the live domain, click the three dots on the right side of the corresponding DNS record, then click the Edit entry in the menu.
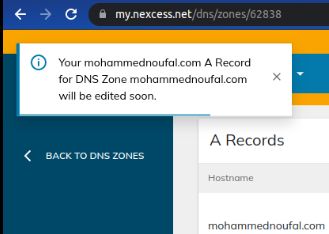
1i. Update the DNS details and click the Save button.
Next, you will see a message like this on the left side of the page:
2. Change your domain name
Once the DNS propagation is completed correctly and the live domain is pointed to the Nexcess server, you can change your domain name from CNAME Target to the live domain by modifying the Master Domain.
To change your domain name, you can follow the steps mentioned below:
2a. Navigate to the area for managing your plans in the Nexcess Client Portal.
2b. Click the required site under the plan it belongs to.
2c. Then, go to the Domains tab in the Nexcess Client Portal.
2d. Click the Modify Master Domain button.
2e. Enter the domain you want to change to live and click the Change Domain button to reflect the changes.
You will see a message like this on the left side of the page:

3. Enable the Let’s Encrypt SSL certificate
Once you change your domain name from CNAME Target to the live domain, you can also enable the Let’s Encrypt SSL certificate for the live domain from my.nexcess.net.
Please note that the Let’s Encrypt SSL certificate will not be enabled by default after the modifying of the Master Domain step has been run. Rather, you will need to enable the Let’s Encrypt SSL toggle in your Nexcess Client Portal.
To install and enable the Let’s Encrypt SSL certificate, follow the steps below:
3a. Go to the area for managing your plans within the Nexcess Client Portal.
3b. Click the required site under the plan.
3c. Select the SSL option on the left side menu.
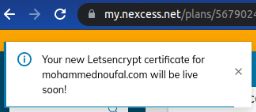
3d. Enable the toggle button for the site and the Auto Let’s Encrypt Certificate, then click the Issue Certificate button.
To follow, you will see a message like this on the left side of the page:
4. Resave your permalinks on the site from the WordPress Admin Panel
Once everything is done, you must log in to your WordPress Admin panel and resave your permalinks on the site to reflect the changes.
To resave your permalinks, you can follow the steps mentioned below:
4a. Log in to your WordPress Admin Panel.
4b. Go to Settings on the left side of the panel, then click Permalinks.
4c. Click the Save Changes button to reflect the changes.
5. Flush the various types of cache, including object caching, full page caching done by Nexcess or a plugin, and CDN caching
If you have enabled object caching or any full page caching plugin for your site, you must flush the cache when the site is live. To learn more about how to clear caching on your WordPress site, you can review the documentation in the Nexcess Knowledge Base.
To flush the object cache, you can follow the following steps:
5a. Log in to your WordPress Admin Panel.
5b. Click the Nexcess logo in the admin bar along the top of the screen, then click the Flush Object Cache option.
You will see a message like this at the top of the page:

Conclusion
Successfully making a WordPress site live on Nexcess involves more than just a DNS change. By following these five steps—updating DNS records, modifying the Master Domain, enabling Let’s Encrypt SSL, resaving permalinks, and flushing the cache—you ensure a seamless transition for your visitors. This process guarantees that your live site is secure, accessible, and fully optimized for performance immediately upon launch.