Managing DNS records in Interworx
Manage DNS in InterWorx by viewing, editing, or adding records via NodeWorx under DNS Zones using icons and forms.
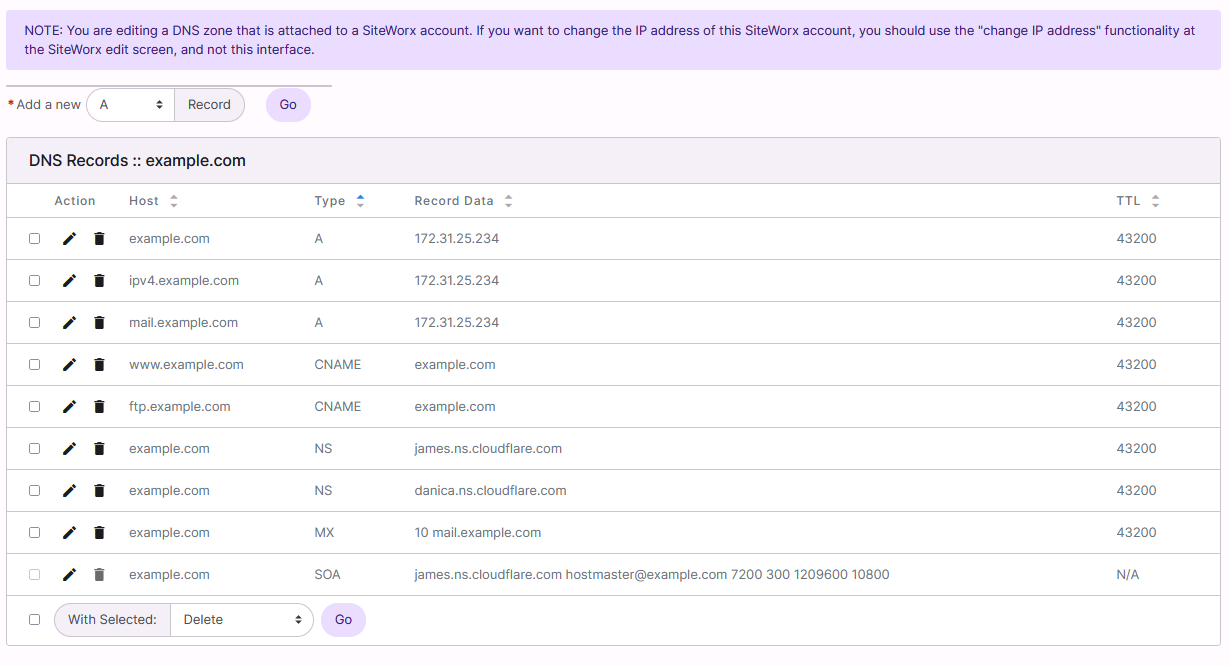
To View the DNS Records for a Domain
- Log into NodeWorx from the browser (https://ip.ad.dr.ess:2443/nodeworx)
- In NodeWorx, navigate to System Services > DNS Server > Zones
- Click the Magnifying Glass next to the domain. This opens the specific DNS records page for that domain

Managing DNS records in Interworx involves a systematic approach to viewing, editing, and adding records. These operations require logging into NodeWorx and navigating through the DNS Server settings. Each action follows specific steps, including selecting the relevant domain and utilizing icons for viewing and editing records. Adding new records also involves choosing the record type and filling out specific forms.
To Edit a DNS Records for a Domain
- Log into NodeWorx from the browser (https://ip.ad.dr.ess:2443/nodeworx)
- In NodeWorx, navigate to System Services > DNS Server > Zones
- Click the Magnifying Glass next to the domain. This opens the specific DNS records page for that domain
- Click the Pencil next to the record to edit. This opens the Edit DNS Record Form
- Update the desired information
- Click Save

To Add a DNS Record for a Domain
- Log into NodeWorx from the browser (https://ip.ad.dr.ess:2443/nodeworx)
- In NodeWorx, navigate to System Services > DNS Server > Zones
- Click the Magnifying Glass next to the domain. This opens the specific DNS records page for that domain
- From the Add a New dropdown, select the type of record
- Click Go. This opens the Add DNS Record form. This form is a different for each type of record, as they all require different configuration information. Details can be found here
- Update the required information
- Click Save
