How to manage cron jobs in SiteWorx
Prerequisites
- Knowledge of the full server filesystem path to the file that you want to change should be ready to run; for example, /home/domain/domainname.com/html/file.ext.
- A non-Cloud account. If you are a Nexcess Cloud client, instead see How to schedule cron jobs in Nexcess Cloud.
Add a new Cron Job
- Log in to your SiteWorx account. If you do not know your password, click Forgot your password on the login page.
- From the main menu, select Hosting Features > Cron Jobs.
- The System CRON Management page, in the Cron Editor section, click Simple Interface.
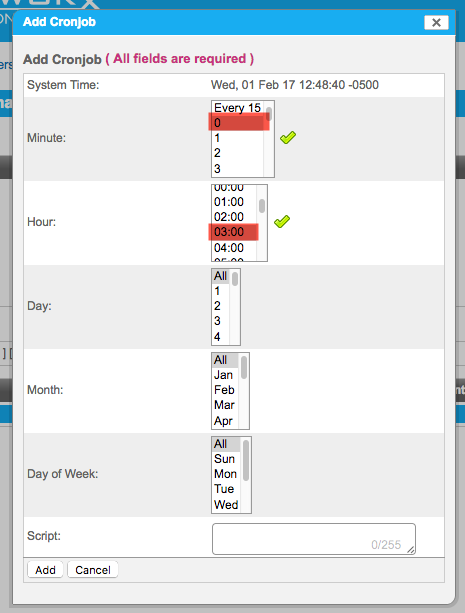
- In the Add Cronjob panel, designate your preferred time for the cron job to run. For this example, set the Minute to 0, and the Hour to 03:00. Note the times in the hour list are reflective of a 24-hour clock.

- In the Script field, designate both the path and the script. For the example, enter the following, but replace angle brackets (<>) and everything between them with your domain name.
php /home/user//html/shell/indexer.php --reindexall
- Click Add.
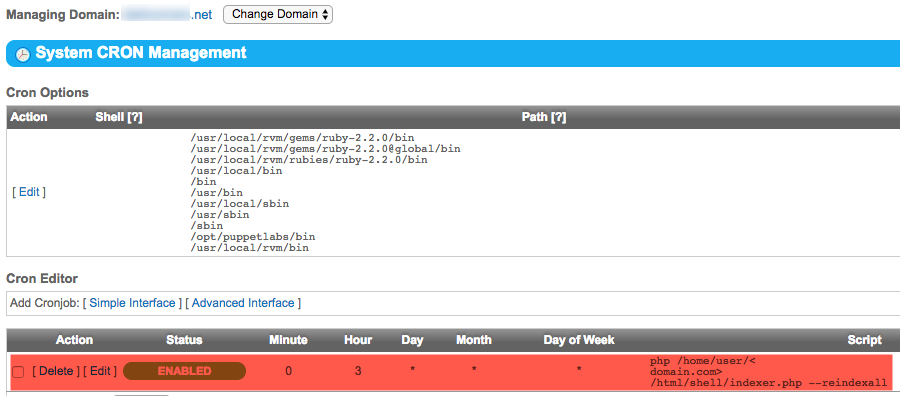
- After clicking Add, the page redirects to the System CRON Management page, where your new cron job should now appear.

Editing a Cron Job
- Log in to your SiteWorx account.
- If you do not know your password, click Forgot your password on the login page.
- On the main menu, click Hosting Features > Cron Jobs. The System CRON Management page displays a list of all existing cron jobs under the Cron Editor section of the page.
- Under the Action column for the job that you want to edit, click Edit.
- In the Edit Cronjob window, make the necessary changes and then click Edit to save.
Deleting a cron job
- Log in to your SiteWorx account.
- If you do not know your password, click Forgot your password on the login page.
- On the main menu, click Hosting Features > Cron Jobs. The System CRON Management page displays a list of all existing cron jobs.
- Next to the job that you want to delete, click Delete.
- When prompted, click Delete to confirm deletion of the cron job.
Simple interface
The following describes the options available in the “Simple Interface.”
Set the Minute interval. You may use a specific minute of every hour, an interval, or select All for every minute.
Set the Hour interval using the same choices. You may use a specific hour, an interval, or select All for every hour.
Set the Day interval. You may use a specific day or select All for every day.
Set the Month interval. You may use a specific month or All for every month.
Set the Day of Week interval. You may use either a specific day of the week or All for every day of the week.
Enter the Script to be run.
Click Add.
Advanced interface
The following describes the options available in the “Advanced Interface.”
Set the Minute interval. You may use a specific minute of every hour, an interval, or a range.
Set the Hour interval. Using a 24-hour clock, you may use a specific hour, an interval, or a range.
Set the Day interval. You may use a specific day, an interval, or a range.
Set the Month interval. You may use a specific month, an interval, or a range.
Set the Day of Week interval. You may use a specific day of the week, an interval, or a range. Note 0 and 7 both represent Sunday.
Enter the Script to be run.
Click Add.
Cron option reference guide
MAILTO: any output produced by a cron job will be sent to this address if one is present.
Shell: all scripts will be executed within this shell. The default shell is /bin/sh.
PATH: this option sets the directories to be used in the search path for the cron job.