

Configuring SiteWorx Spam Filtering
InterWorx uses SpamAssassin to help keep levels of email spam reasonable. From the Spam Filtering page in SiteWorx, users may manage the SpamAssassin service, determine how spam messages are handled for the account, and add custom rules.
NOTE: |
| This documentation refers specifically to SiteWorx-level SpamAssassin settings. Information on NodeWorx SpamAssassin settings can be found in our article, Configuring NodeWorx Spam Filtering. |
Manage SpamAssassin Status
- Log into SiteWorx from the browser (https://ip.ad.dr.ess:2443/siteworx)
- In SiteWorx, navigate to Administration > Mail Options > Spam Settings, either from the side menu or SiteWorx home.
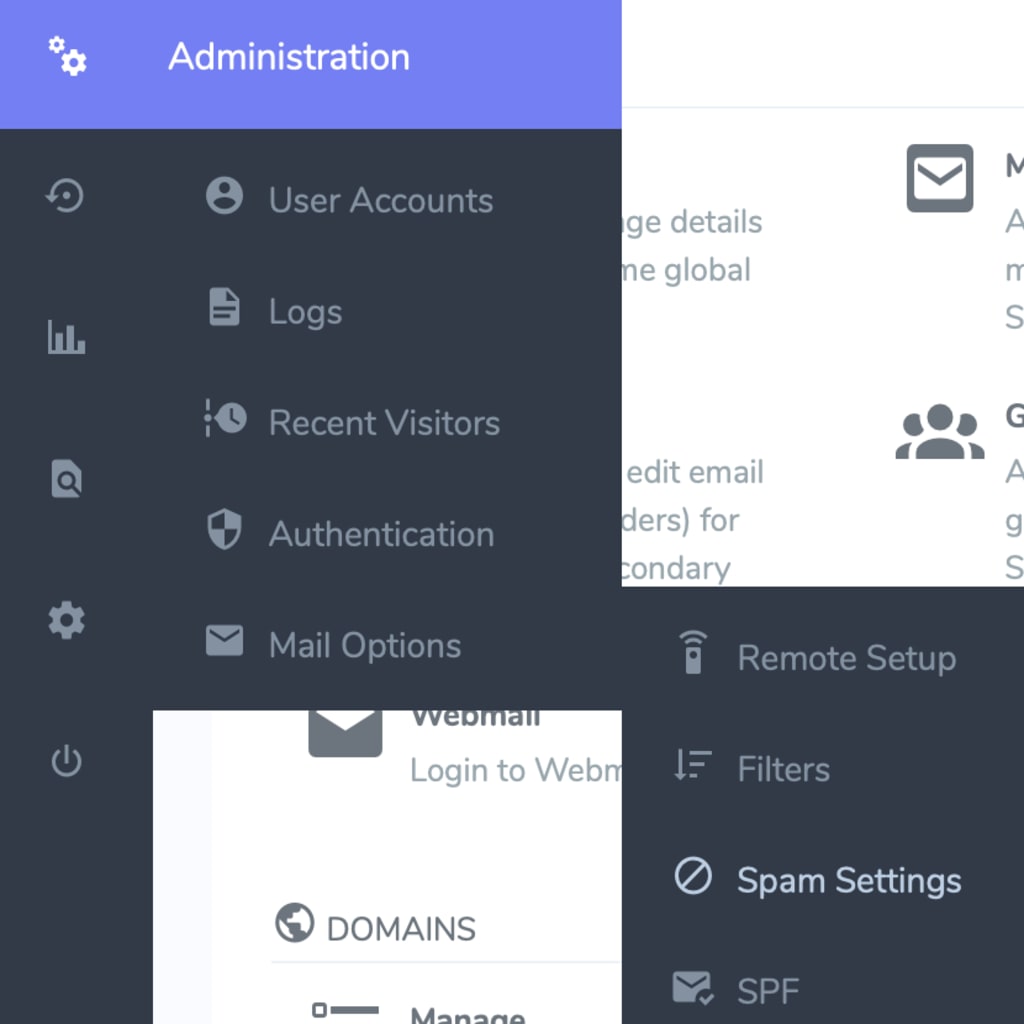
- Under SpamAssassin Configuration, Select either On or Off from the SpamAssassin Status dropdown.

Edit SpamAssassin Options
NOTE: |
| It is only possible to edit SpamAssassin configuration options when SpamAssassin is enabled. |
- Log into SiteWorx from the browser (https://ip.ad.dr.ess:2443/siteworx)
- In SiteWorx, navigate to Administration > Mail Options > Spam Settings, either from the side menu or SiteWorx home
- Under SpamAssassin Configuration, update the desired settings:
- Spam Delivery: Defines what happens to spam, once it has been tagged by SpamAssassin The options are:
- Deliver the spam to an IMAP mailbox named Spam, or, if that box does not exist, the message is delivered to the Inbox
- Delete spam scored above a certain threshold. All messages that are below that threshold marked as spam are delivered to an IMAP mailbox named Spam
- Spam Score Threshold: Messages that are scored above this value will be tagged and identified as spam by SpamAssassin. Messages with scores below this value will not be tagged as spam
- Rewrite Message Subject: Determines whether SpamAssassin will alter the subject line of messages it identifies as spam. This can make messages tagged as spam more readily visible when viewing a list of messages, and can be used to filter messages based on the subject line in some e-mail clients
- Message Attachment Policy: Determines how SpamAssassin handles the messages it tags as spam

- Click Submit.
Manage Custom Spam Settings
SpamAssassin allows for custom rules to more specifically target and manage potential spam messages that enter the server. More detailed information can be found in SpamAssassin’s User Preferences documentation.
Adding a Custom Spam Setting
- Log into SiteWorx from the browser (https://ip.ad.dr.ess:2443/siteworx).
- In SiteWorx, navigate to Administration > Mail Options > Spam Settings, either from the side menu or SiteWorx home.
- Under Advanced SpamAssassin Custom Options, click +. This opens the Add Spam Preference Form.
- Under Add Spam Preference, update the desired fields:
- Type: Determines if the custom rule applies to the whole domain, or just a specific email address
- Add Preference For: The domain or email address the rule should apply to
- Preference: The type of custom SpamAssassin rule
- Value: The value of the rule

- Click Add.
Edit Custom Spam Setting
- Log into SiteWorx from the browser (https://ip.ad.dr.ess:2443/siteworx).
- In SiteWorx, navigate to Administration > Mail Options > Spam Settings, either from the side menu or SiteWorx home.
- Under Advanced SpamAssassin Custom Options, click the Pencil next to the rule. This opens the Edit Spam Preference form.
- Update the desired fields:

- Click Save.
Delete a Custom Spam Setting
- Log into SiteWorx from the browser (https://ip.ad.dr.ess:2443/siteworx).
- In SiteWorx, navigate to Administration > Mail Options > Spam Settings, either from the side menu or SiteWorx home.
- Under Advanced SpamAssassin Custom Options, click the Trashcan next to the rule. This opens the Delete Confirmation form.

- Click Delete.